Tracking Contact Balances: An Overview
Watch Video
If your group charges dues or sends out statements, it’s important to understand how to track contact balances in MoneyMinder.
In this quick overview, we’ll walk through the key steps. For detailed, step-by-step instructions, click here.
Before you begin, make sure your contacts are entered in MoneyMinder. If you already have a contact list, we can import it for you. Just follow the contact import guidelines for instructions on how to format and submit your contact list.
Add Activity Accounts
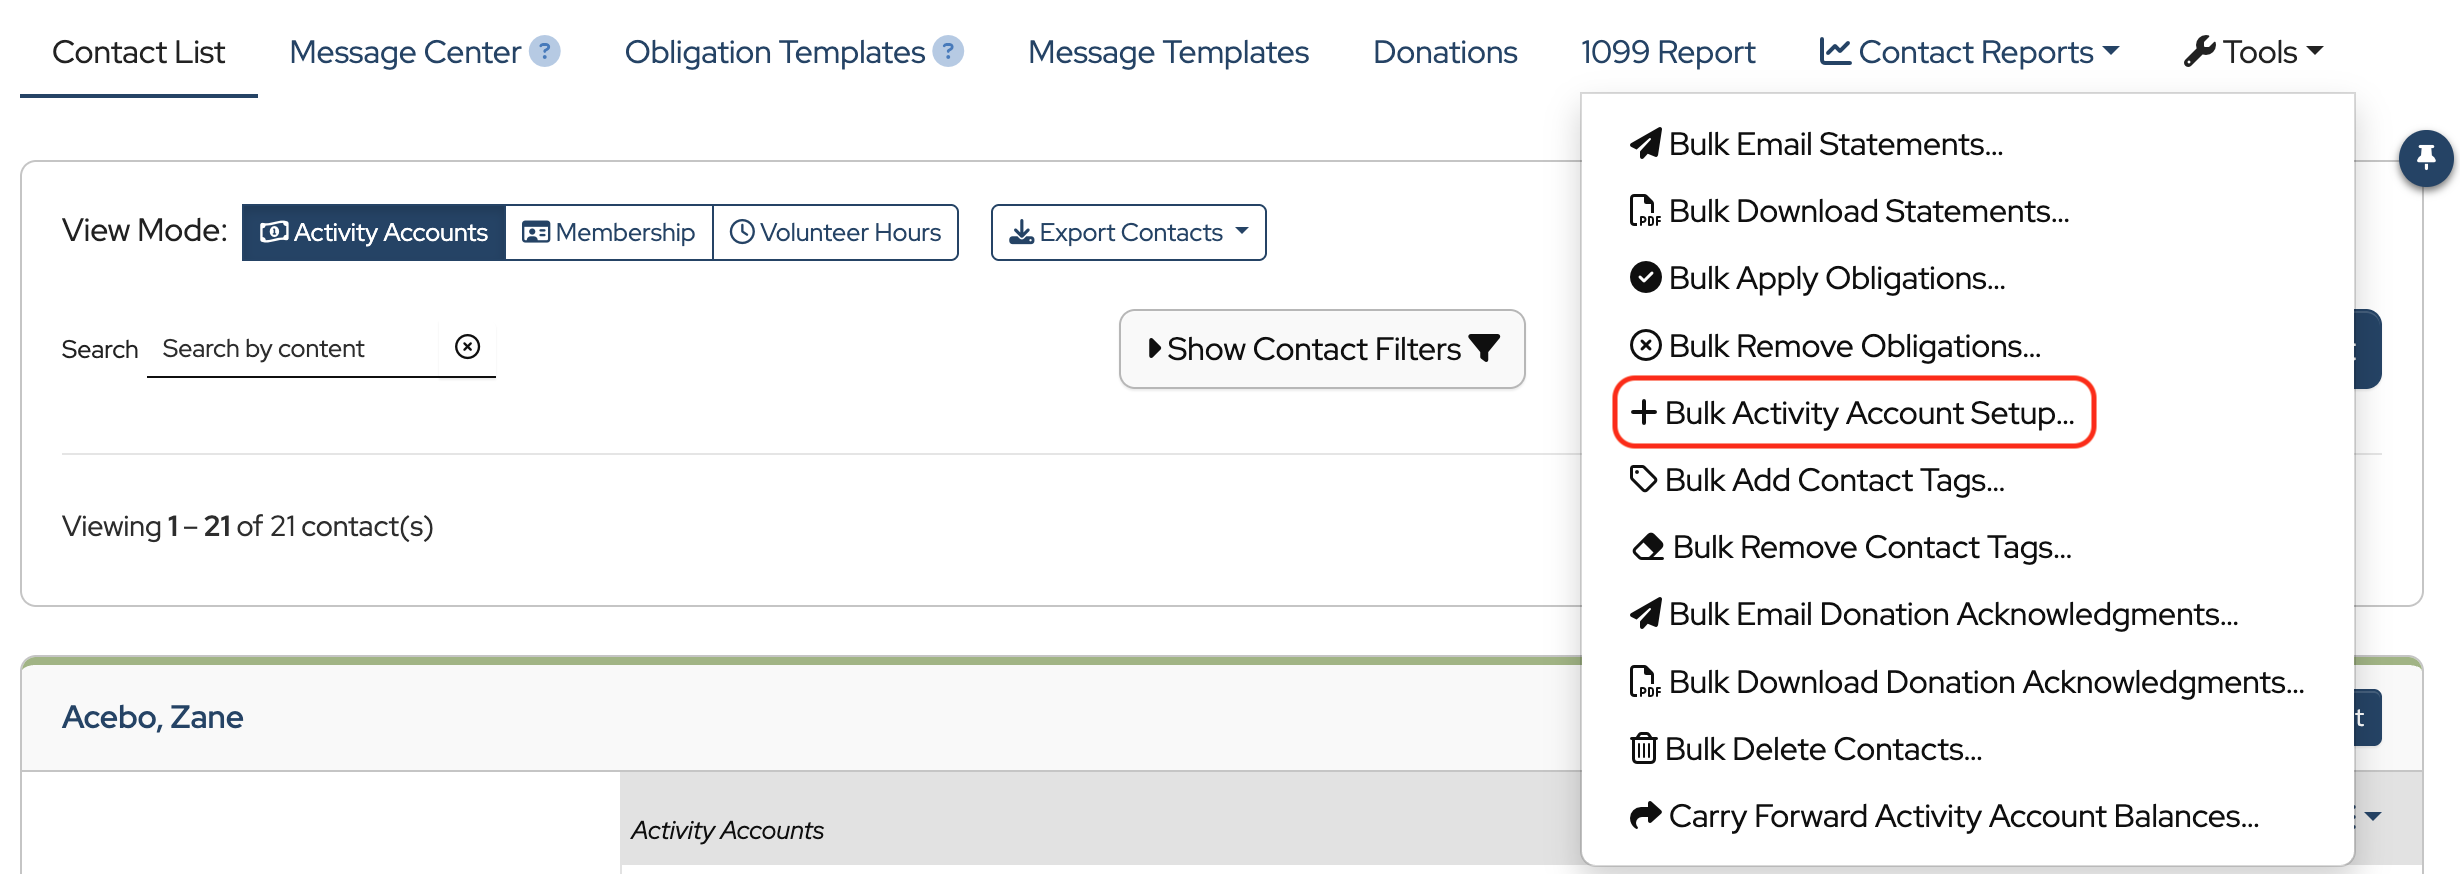
Once your contacts have been entered in MoneyMinder, the next step is adding activity accounts. Activity accounts allow you to track charges, payments, and account history for each contact.
You can add activity accounts individually.

Or in bulk to multiple contacts at once.
Create Obligation Templates
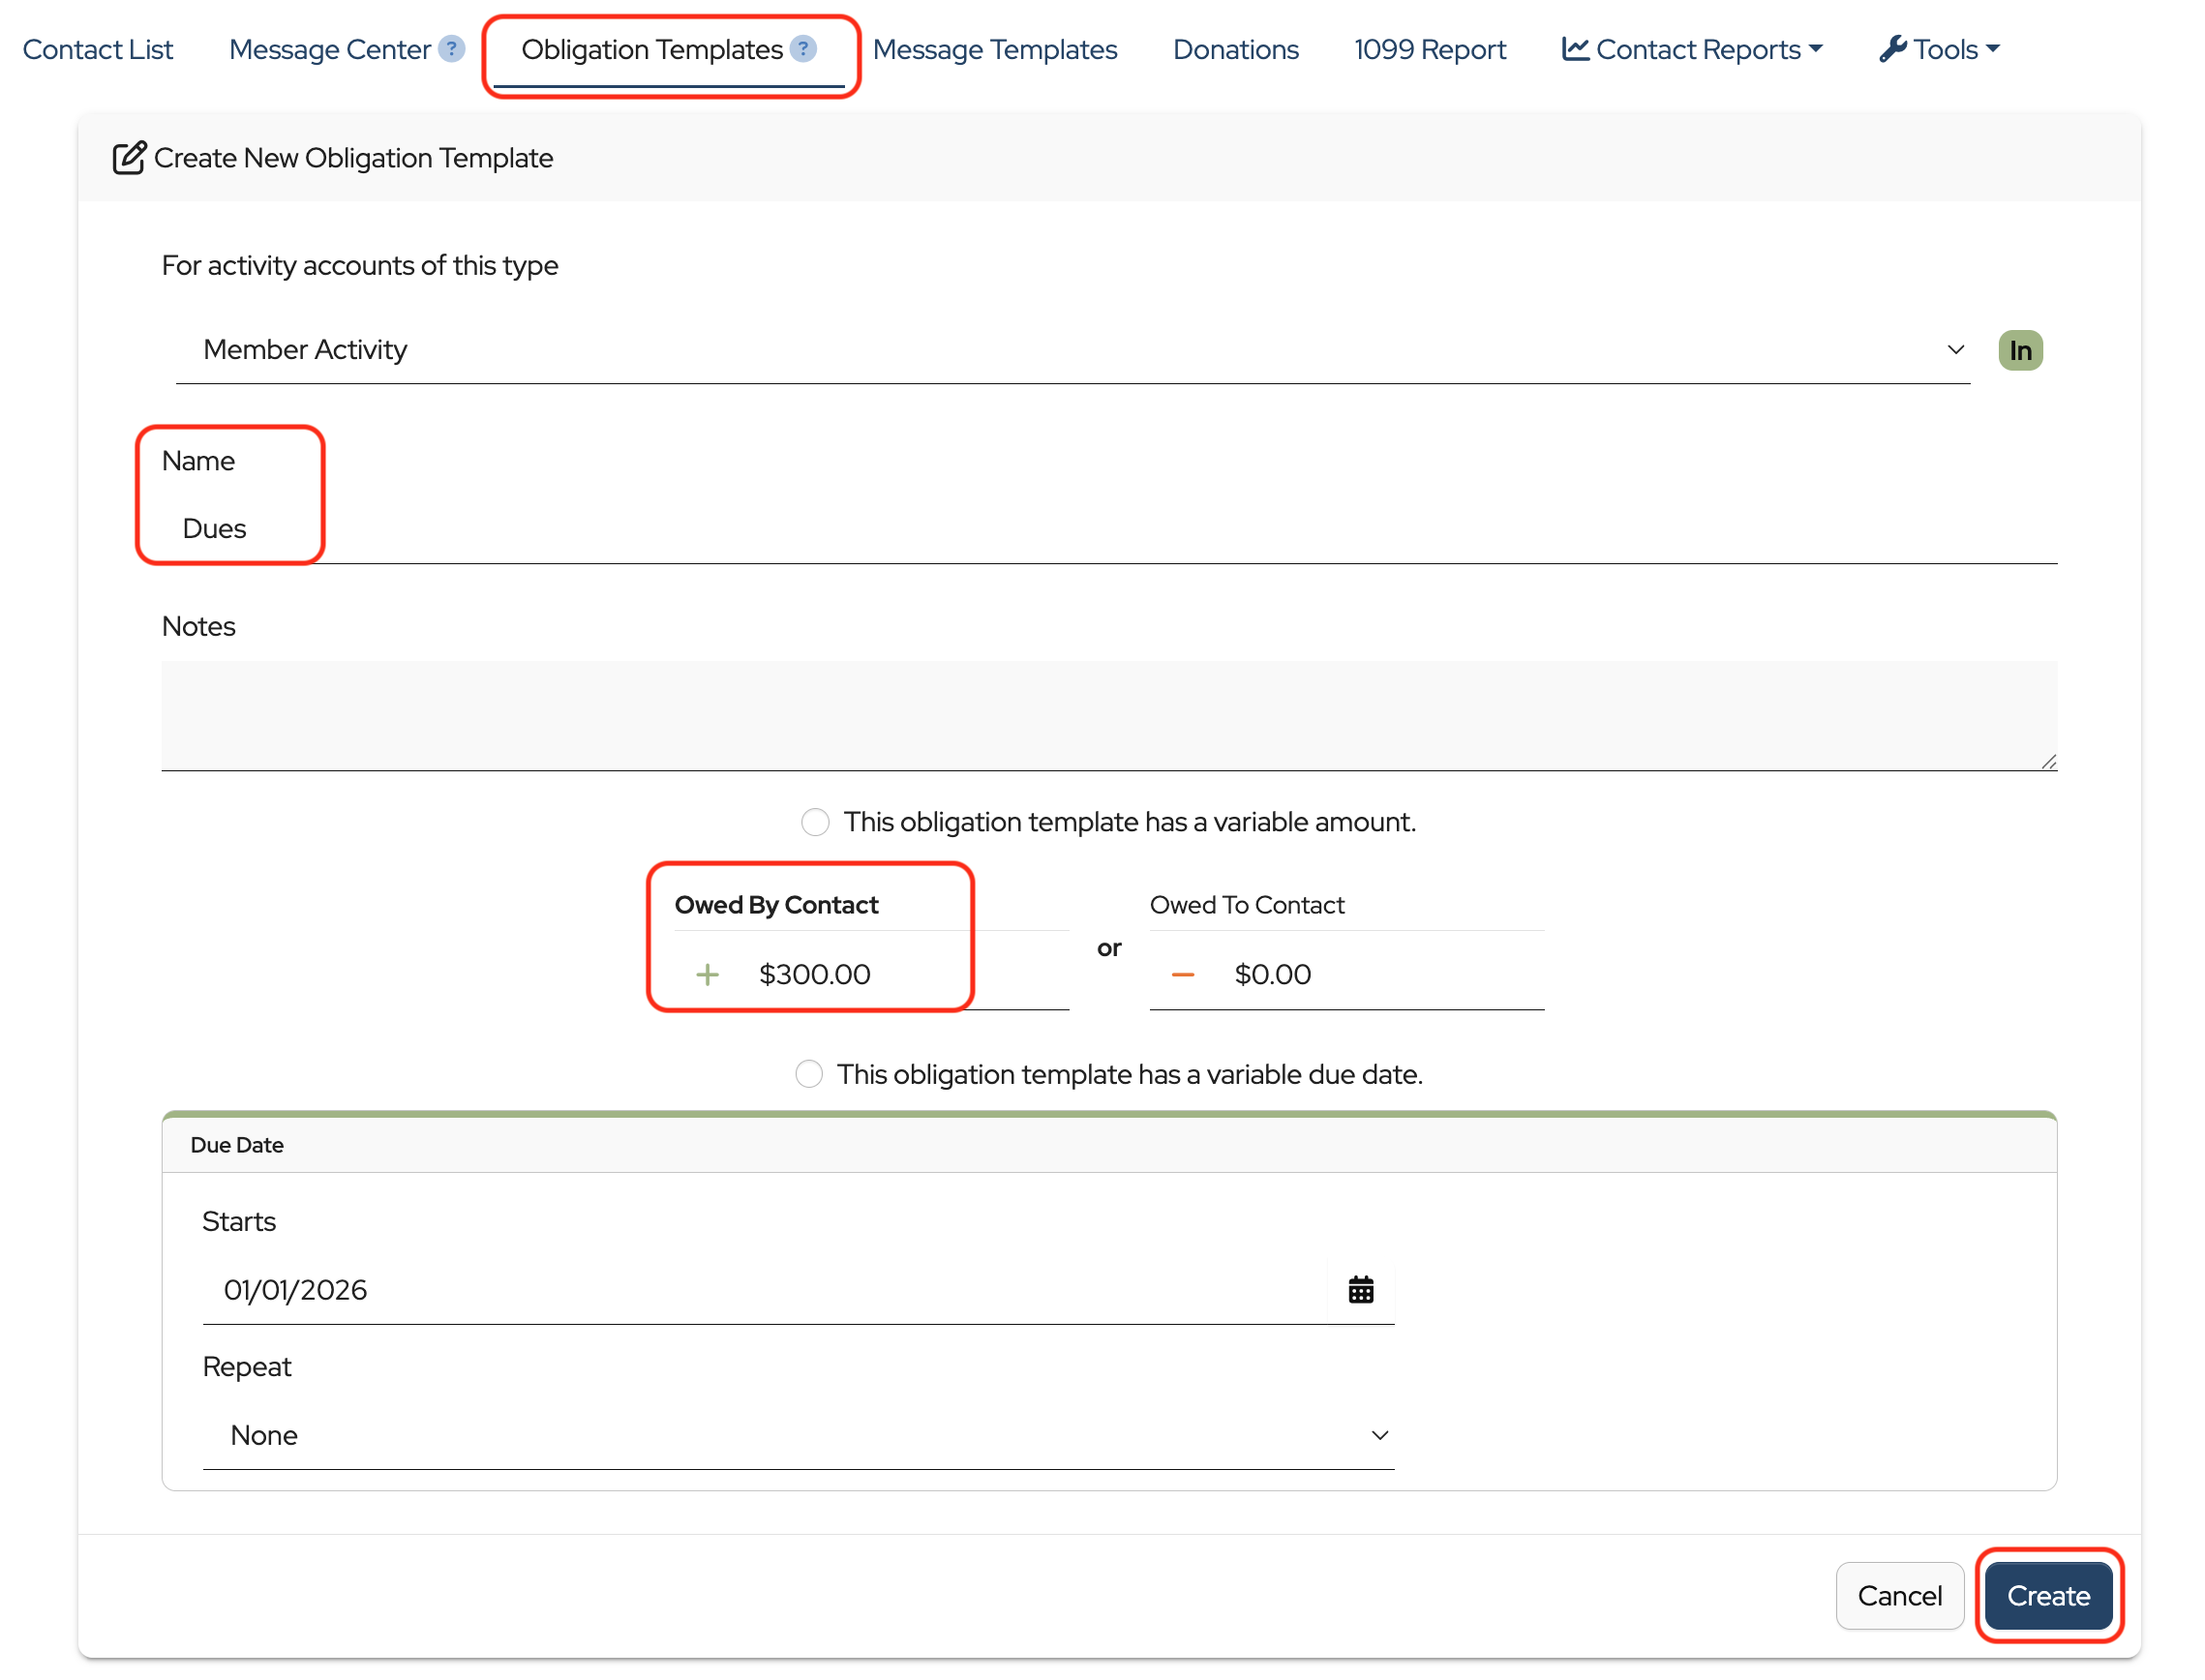
Next, you’ll create an obligation template. Obligation templates are used to apply specific charges to contacts.
For example, if you’re collecting dues, you can create a Dues obligation template and enter the amount owed.
Apply Obligation Templates
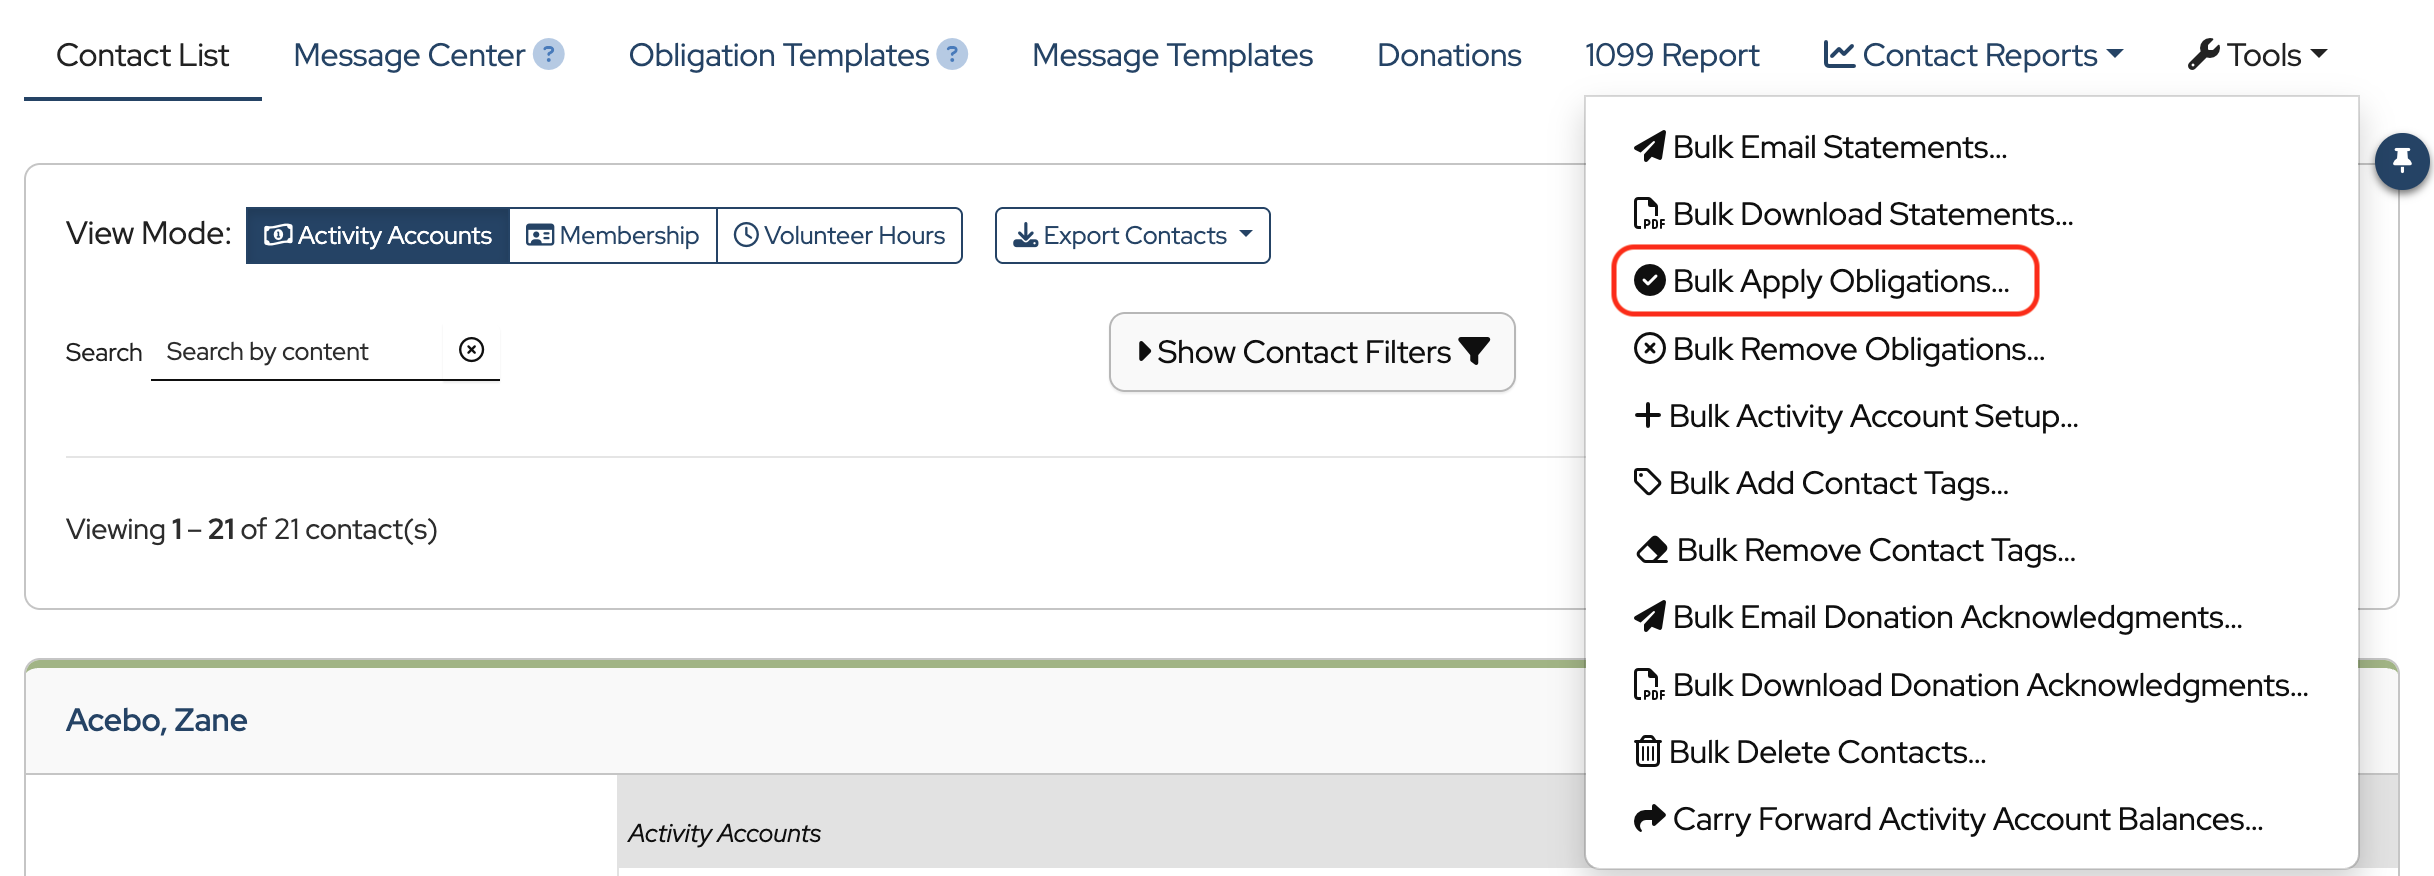
Once the template is created, apply it to your contacts to add the charge to their accounts.
Just like Activity Accounts, obligation templates can be applied individually or in bulk.
Send Statements
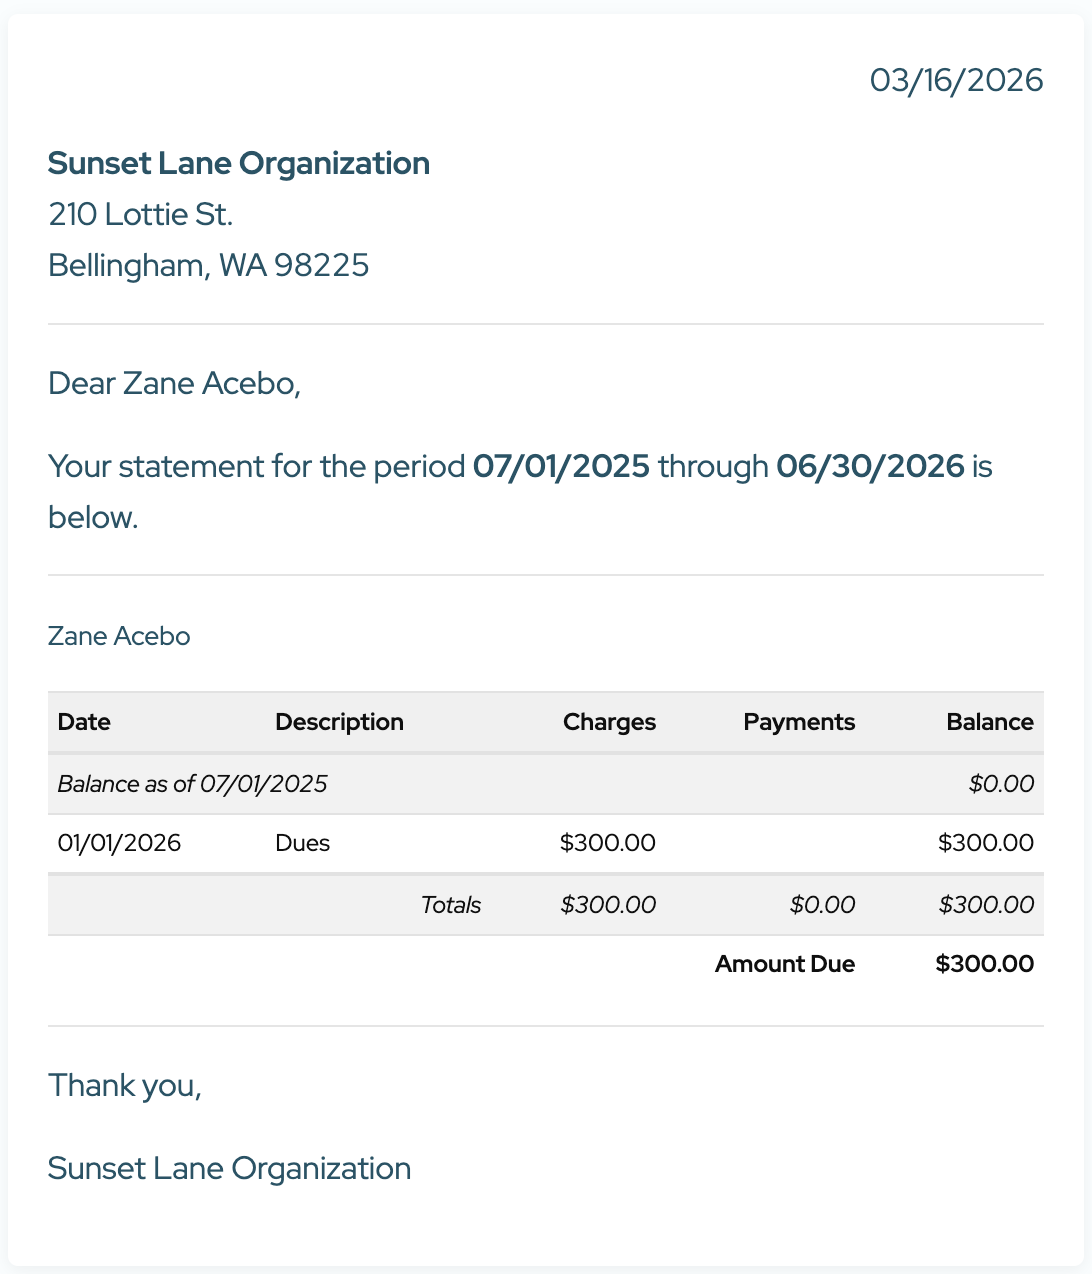
After charges are applied, you’re ready to send statements.
MoneyMinder includes a default statement template, or you can create your own and include your logo and a link for online payments. Statements can be emailed or downloaded, and sent individually or to a group.
Record Payments
When a payment is received, record it as a deposit in the Banking section and apply it to the appropriate contact account.
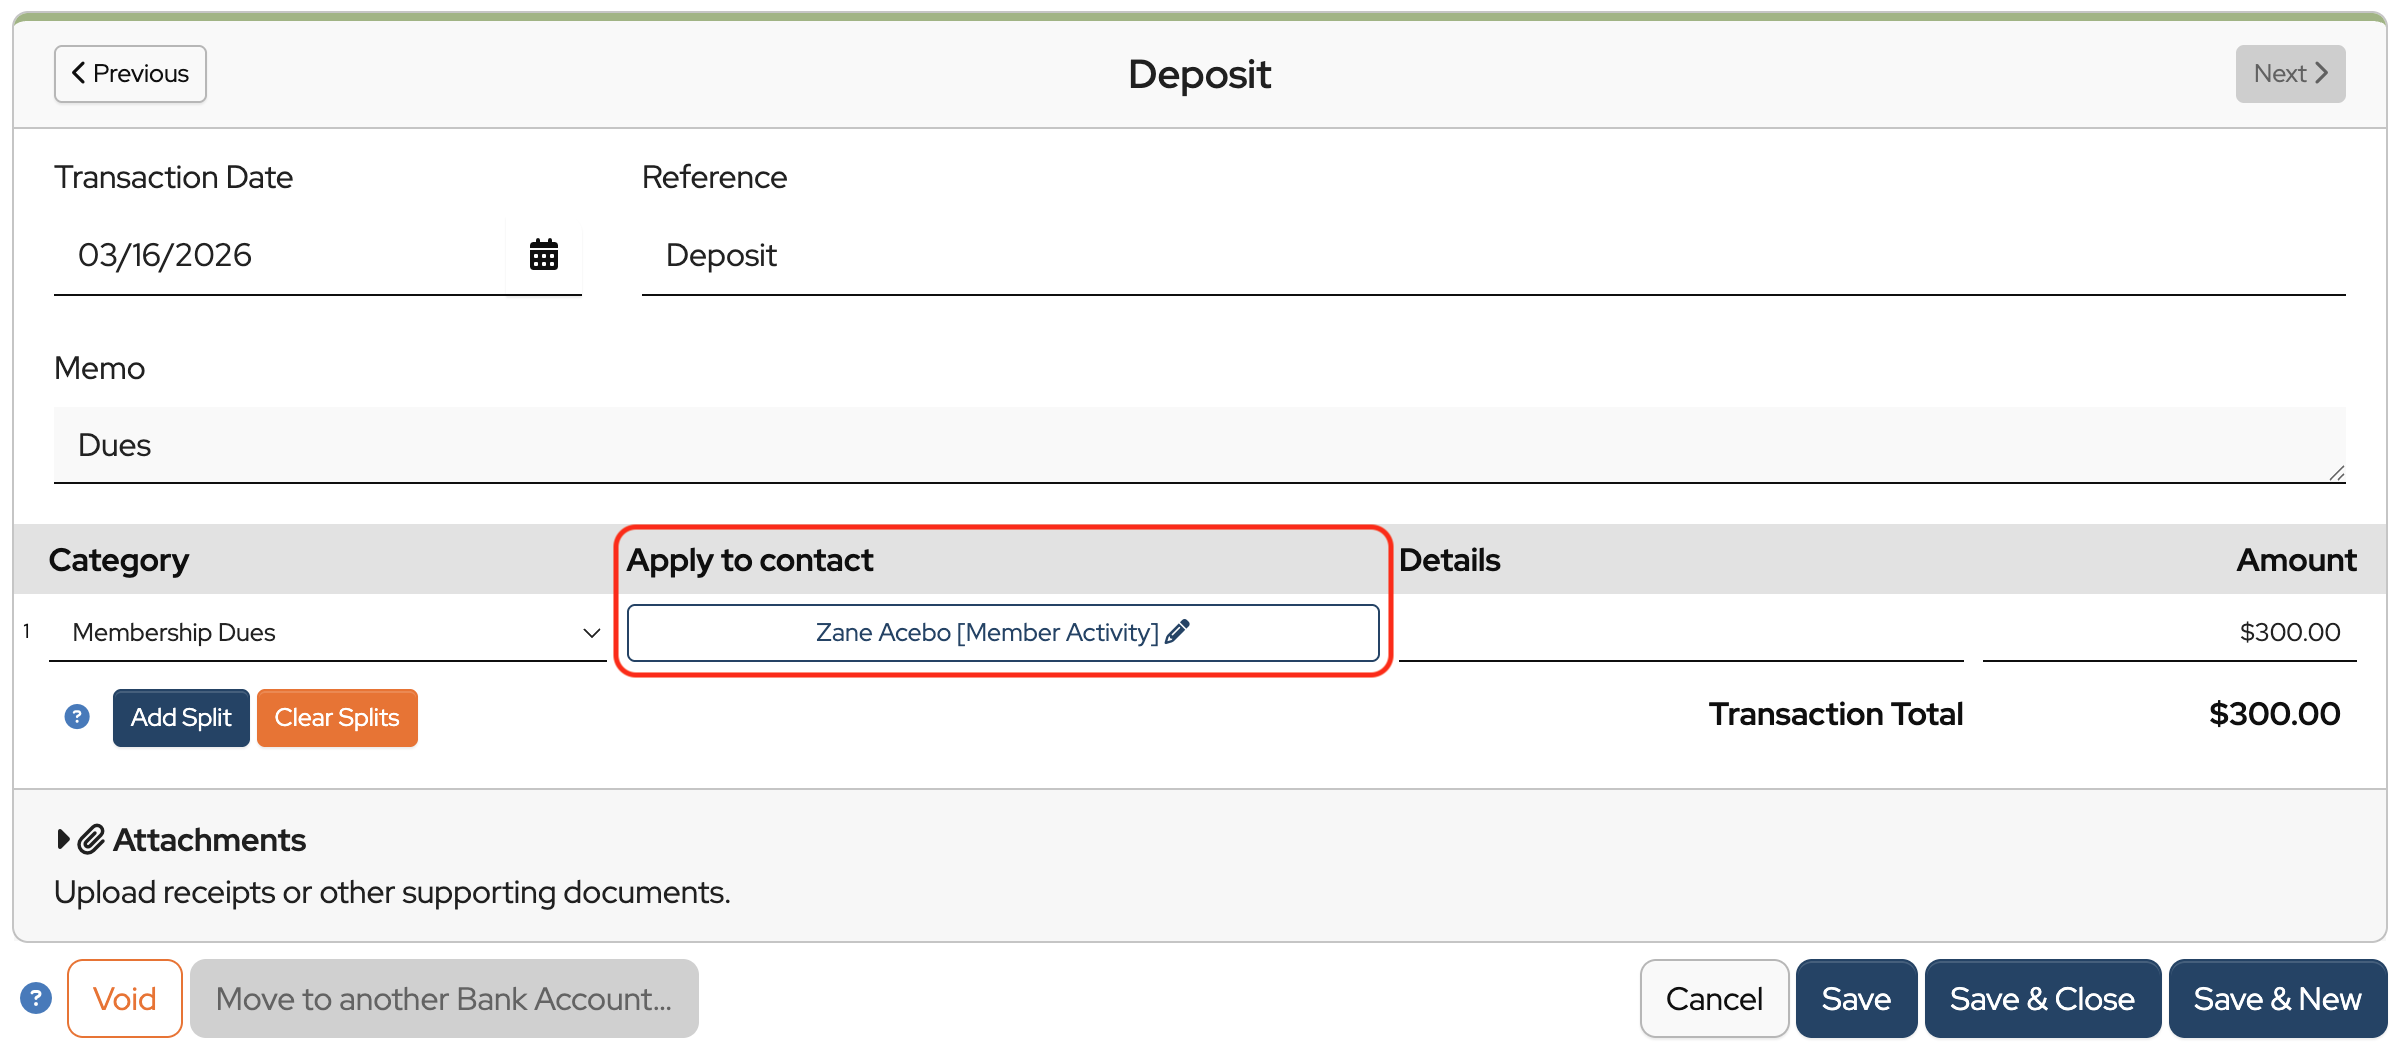
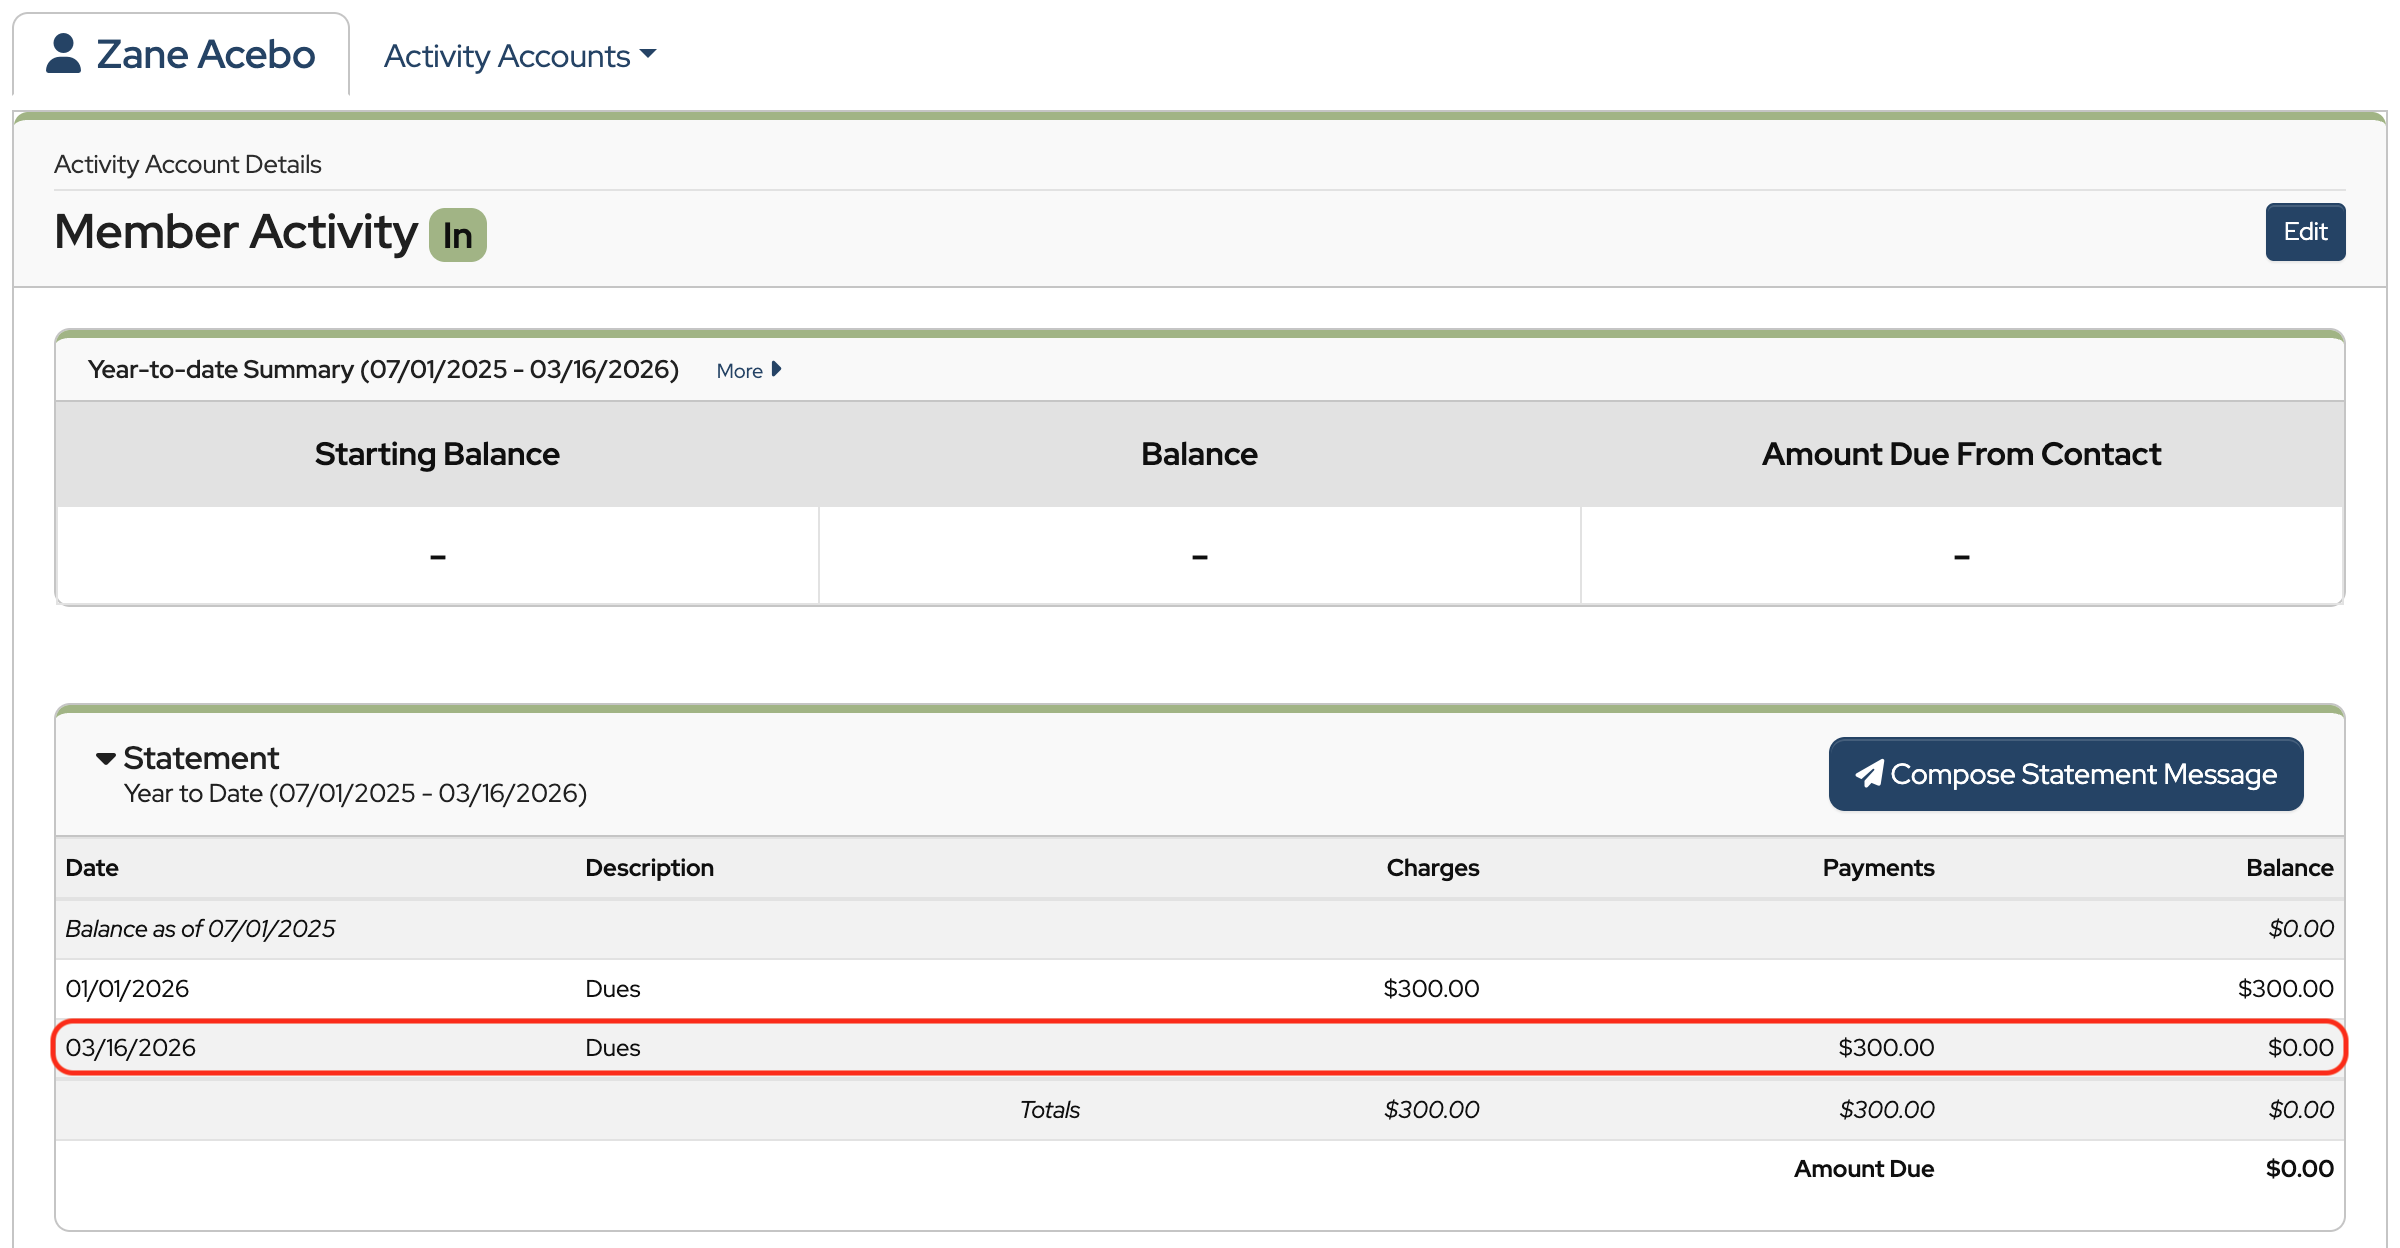
Once the payment is applied, it will appear in the contact’s activity account and update their balance.
Let’s review the process:
- First, add activity accounts to your contacts.
- Next, create and apply obligation templates for any charges you need to track.
- Then, generate and send statements as needed.
- And finally, record and apply payments as they are received.
How do you change the “Paid through” status once the Member Activities have been paid in accordance with the obligations. Need a way to know who has met their obligations. When I run the report to show who has paid, I don’t see any data.
Hi Elayne,
Changing the Paid through” date is done manually in the Membership section of Contacts. You will need to change the View Mode to Membership and then click the Edit button in the contact you want to update. Scroll down to the Membership section, and you can enter the new Paid On and Paid Through dates.
Also, just so you know, we are close to launching a new feature where payments can be applied to specific obligations, and you will be able to run a report that shows who has paid the obligation. It sounds like that new feature may be a help for your group.
Hello,
That would be a huge benefit to my team.
Thank you for the update.
When someone does not pay their invoice (obligation), how do I mark that for the following year. For example, students have production fees but if they do not pay their dues, how should I mark that for the following fiscal year??
Hi Christina,
If a student still has a balance on their account at the end of the year, that balance will be carried forward into the next year. It will show as a beginning balance in the new financial year.
Since it’s an obligation from the previous year, you won’t be able to apply the payment directly to that obligation. You can apply the payment to the student’s Activity Account so that their overall balance is correct.