How to use Contact tools
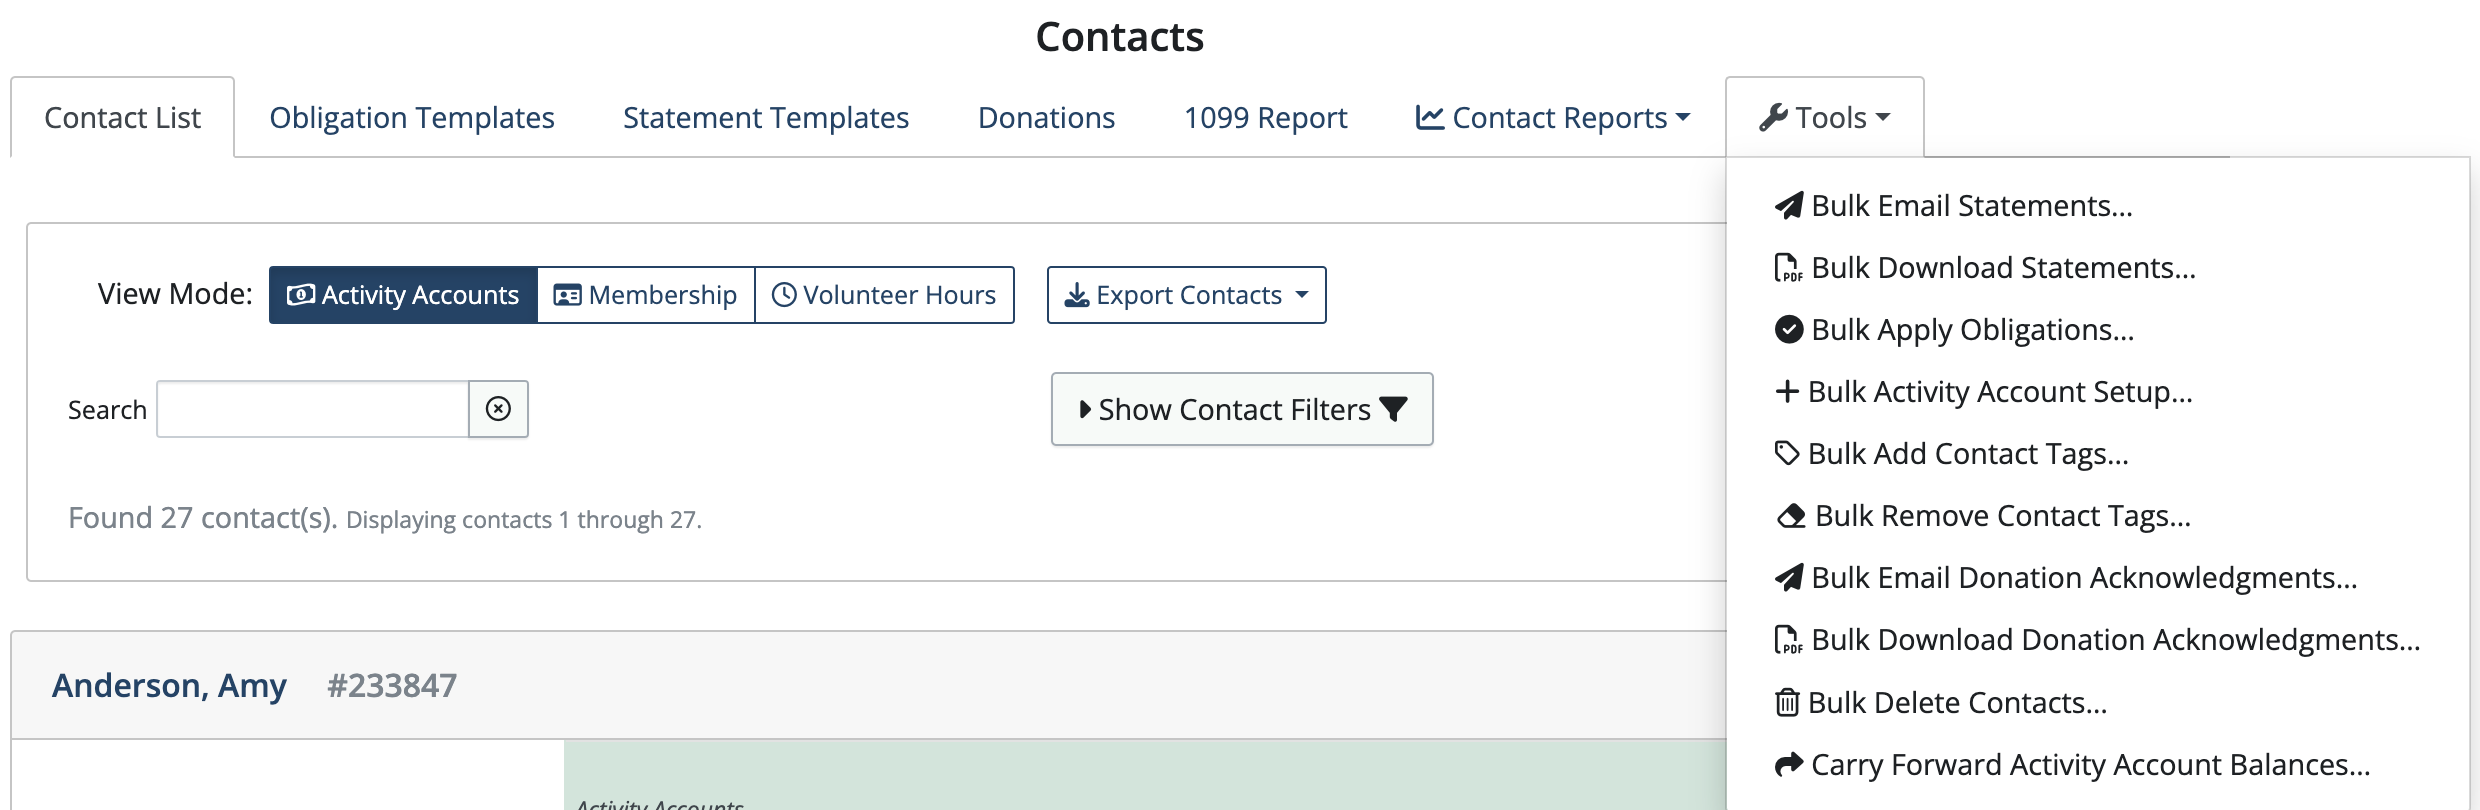
There are a number of Tools available to make using Contacts easier and allow for handling Contact actions in bulk.
Bulk Add Contact Tags
A useful tool when applying obligations or creating statements is the ability to “filter” Contacts using Tags.
Contact Tags can be added to multiple contacts at once using the Bulk Add Contact Tags… tool.
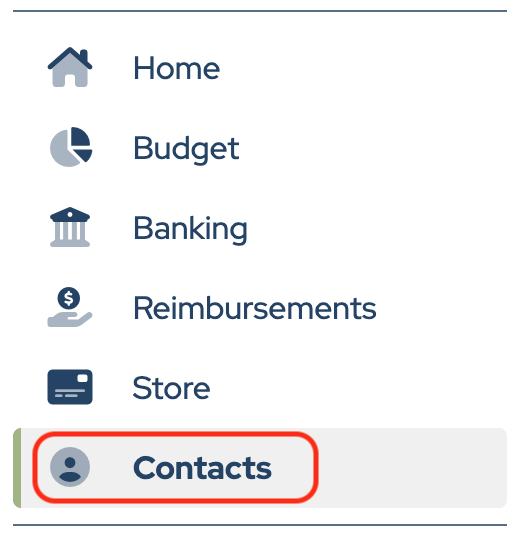
Click Contacts in the sidebar.
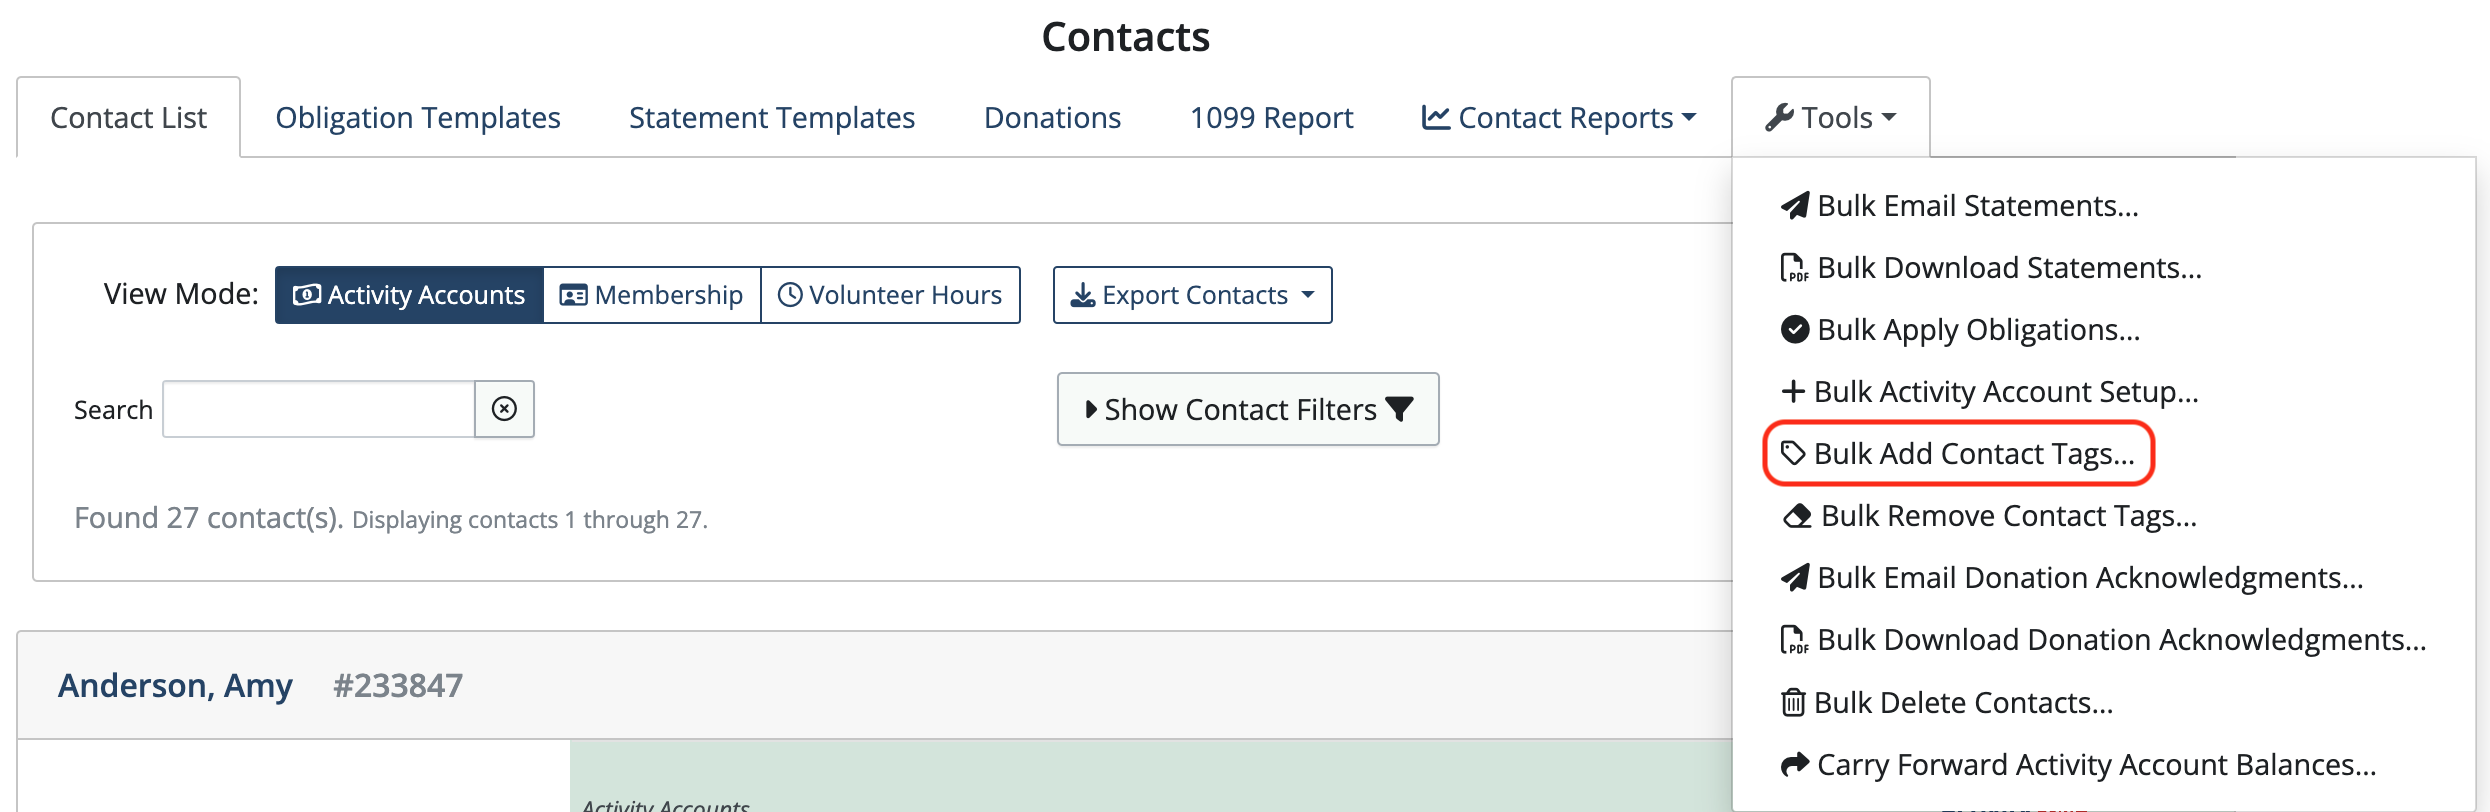
Click the Tools drop-down and choose Bulk Add Contact Tags…
Click Select all (deselect any contacts you don’t want to include or hold shift to select a range)
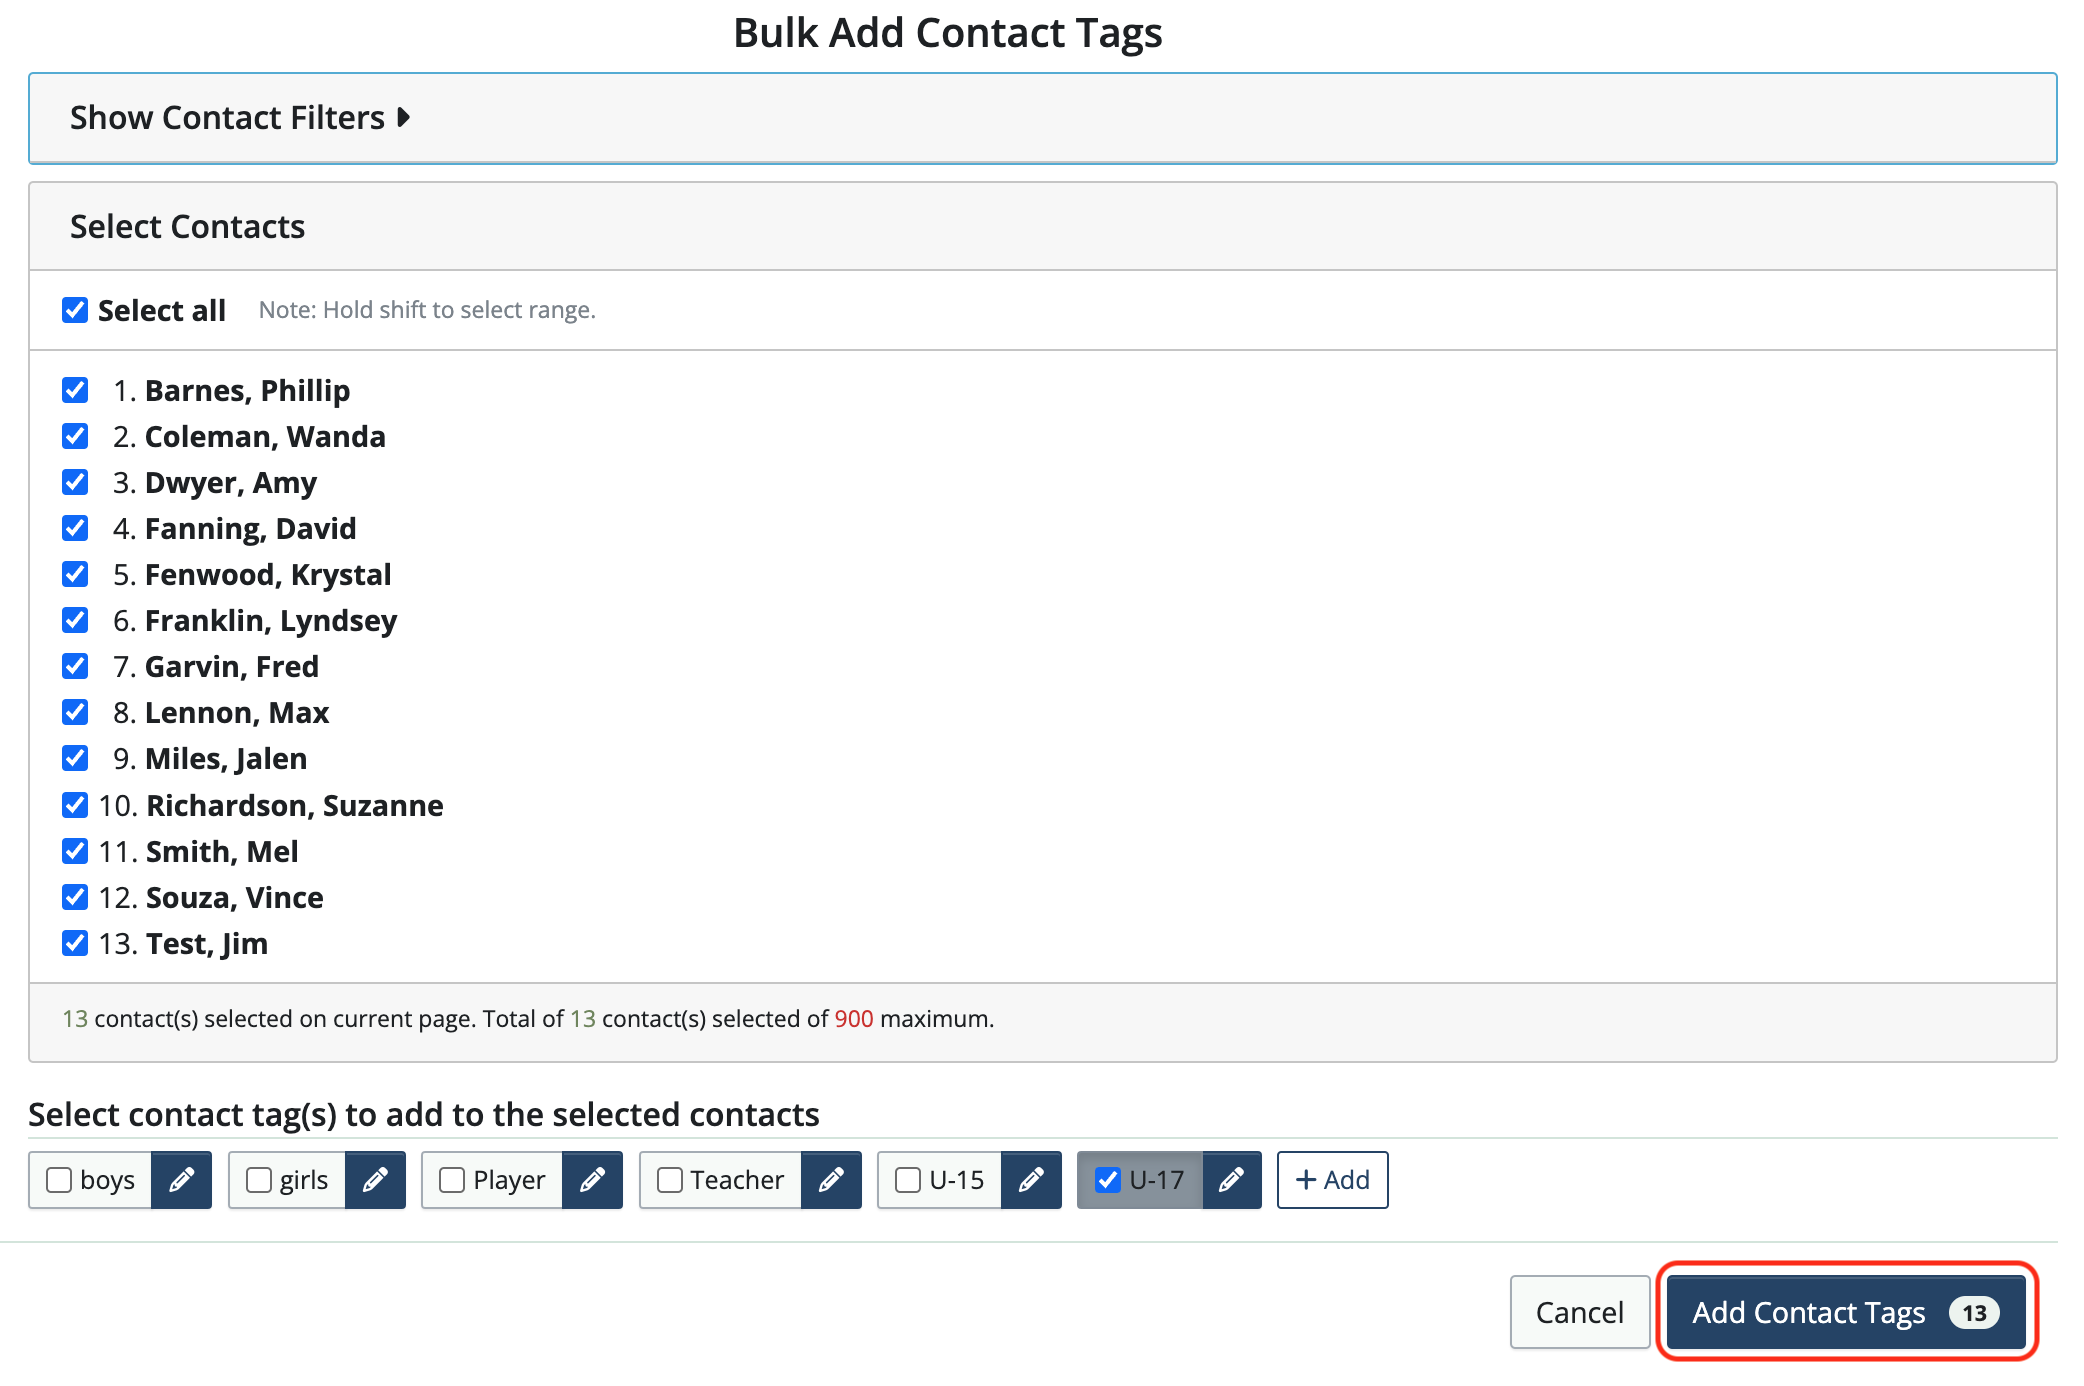
Select the contact tag(s) to be added or click +Add to create a new tag.
Click the Add Contact Tags button. (The number that appears in the Add Contact Tags button refers to the number of contacts that tags are being added to.)
NOTE: Tags can be added to a maximum of 900 contacts at a time. Repeat the process to add tags to any remaining contacts.
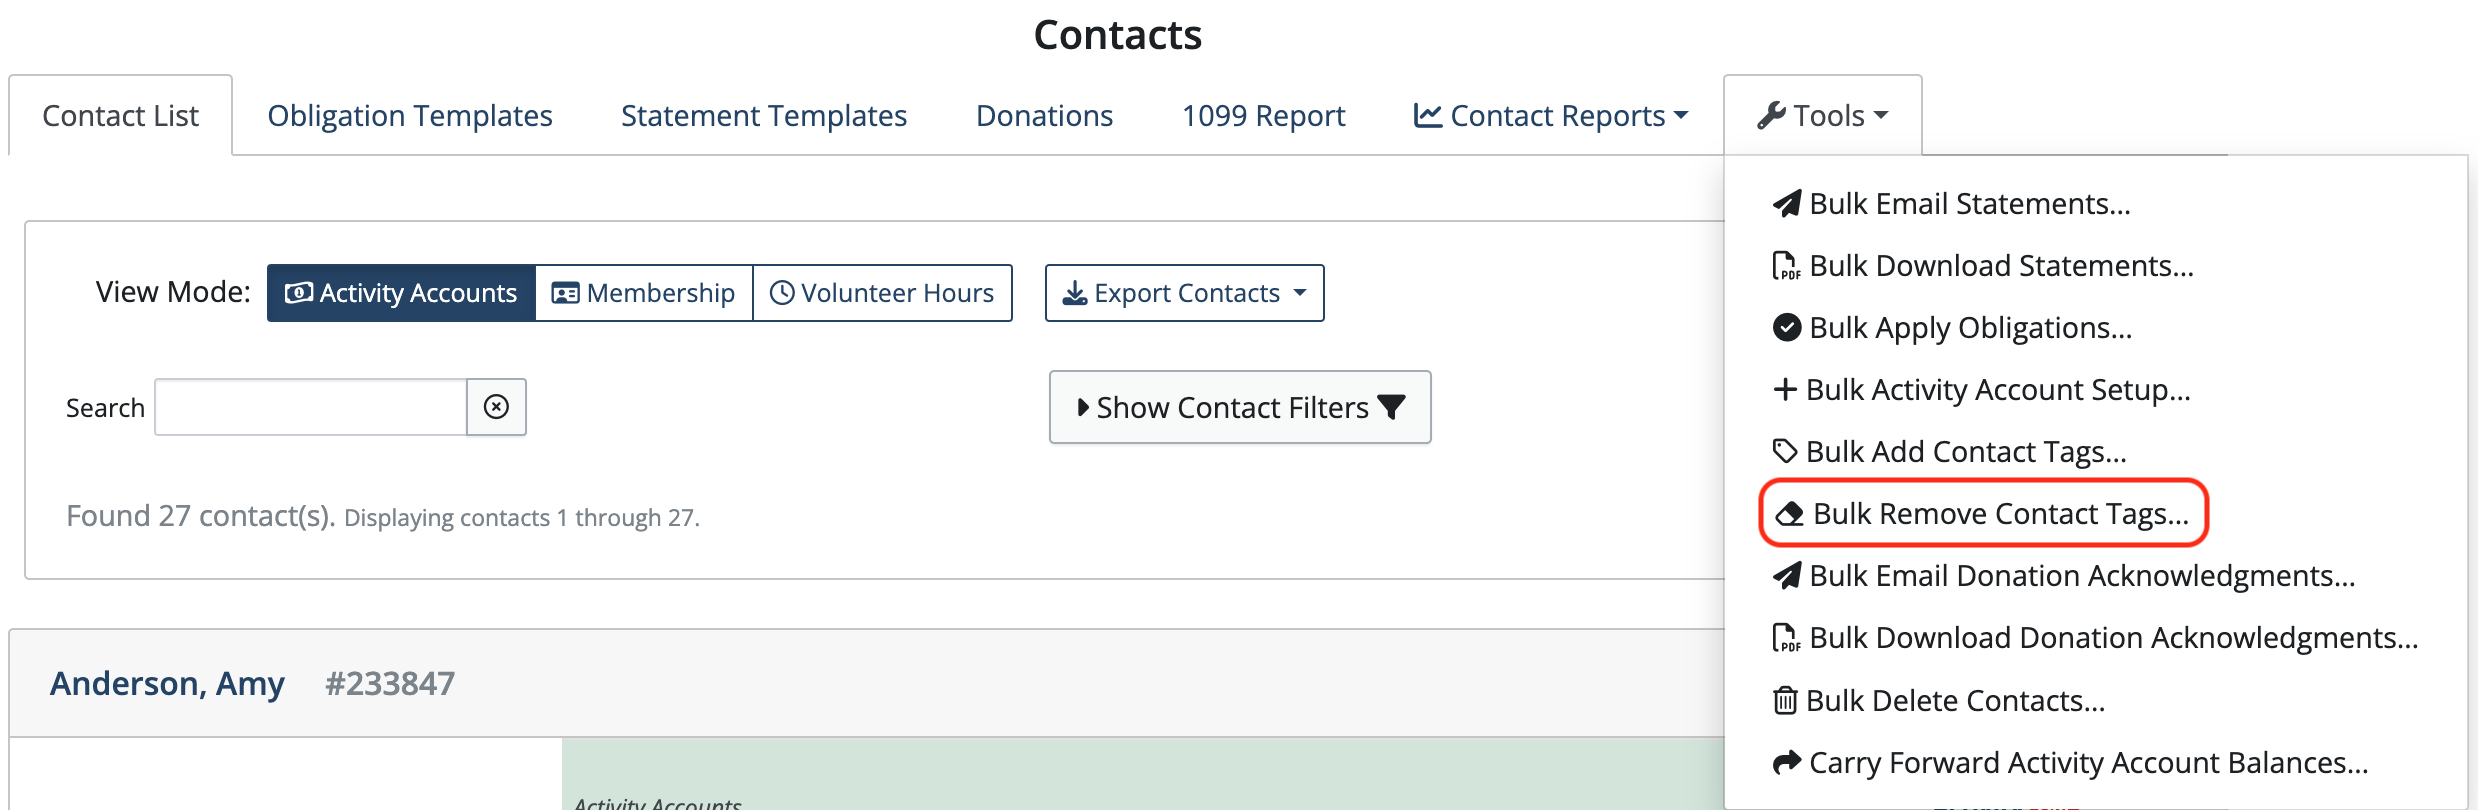
Bulk Remove Contact Tags
Contact Tags can also be removed from multiple contacts at once using the Bulk Remove Contact Tags… tool.
Click Contacts in the sidebar.
Click the Tools drop-down and choose Bulk Remove Contact Tags…
Click Select all.
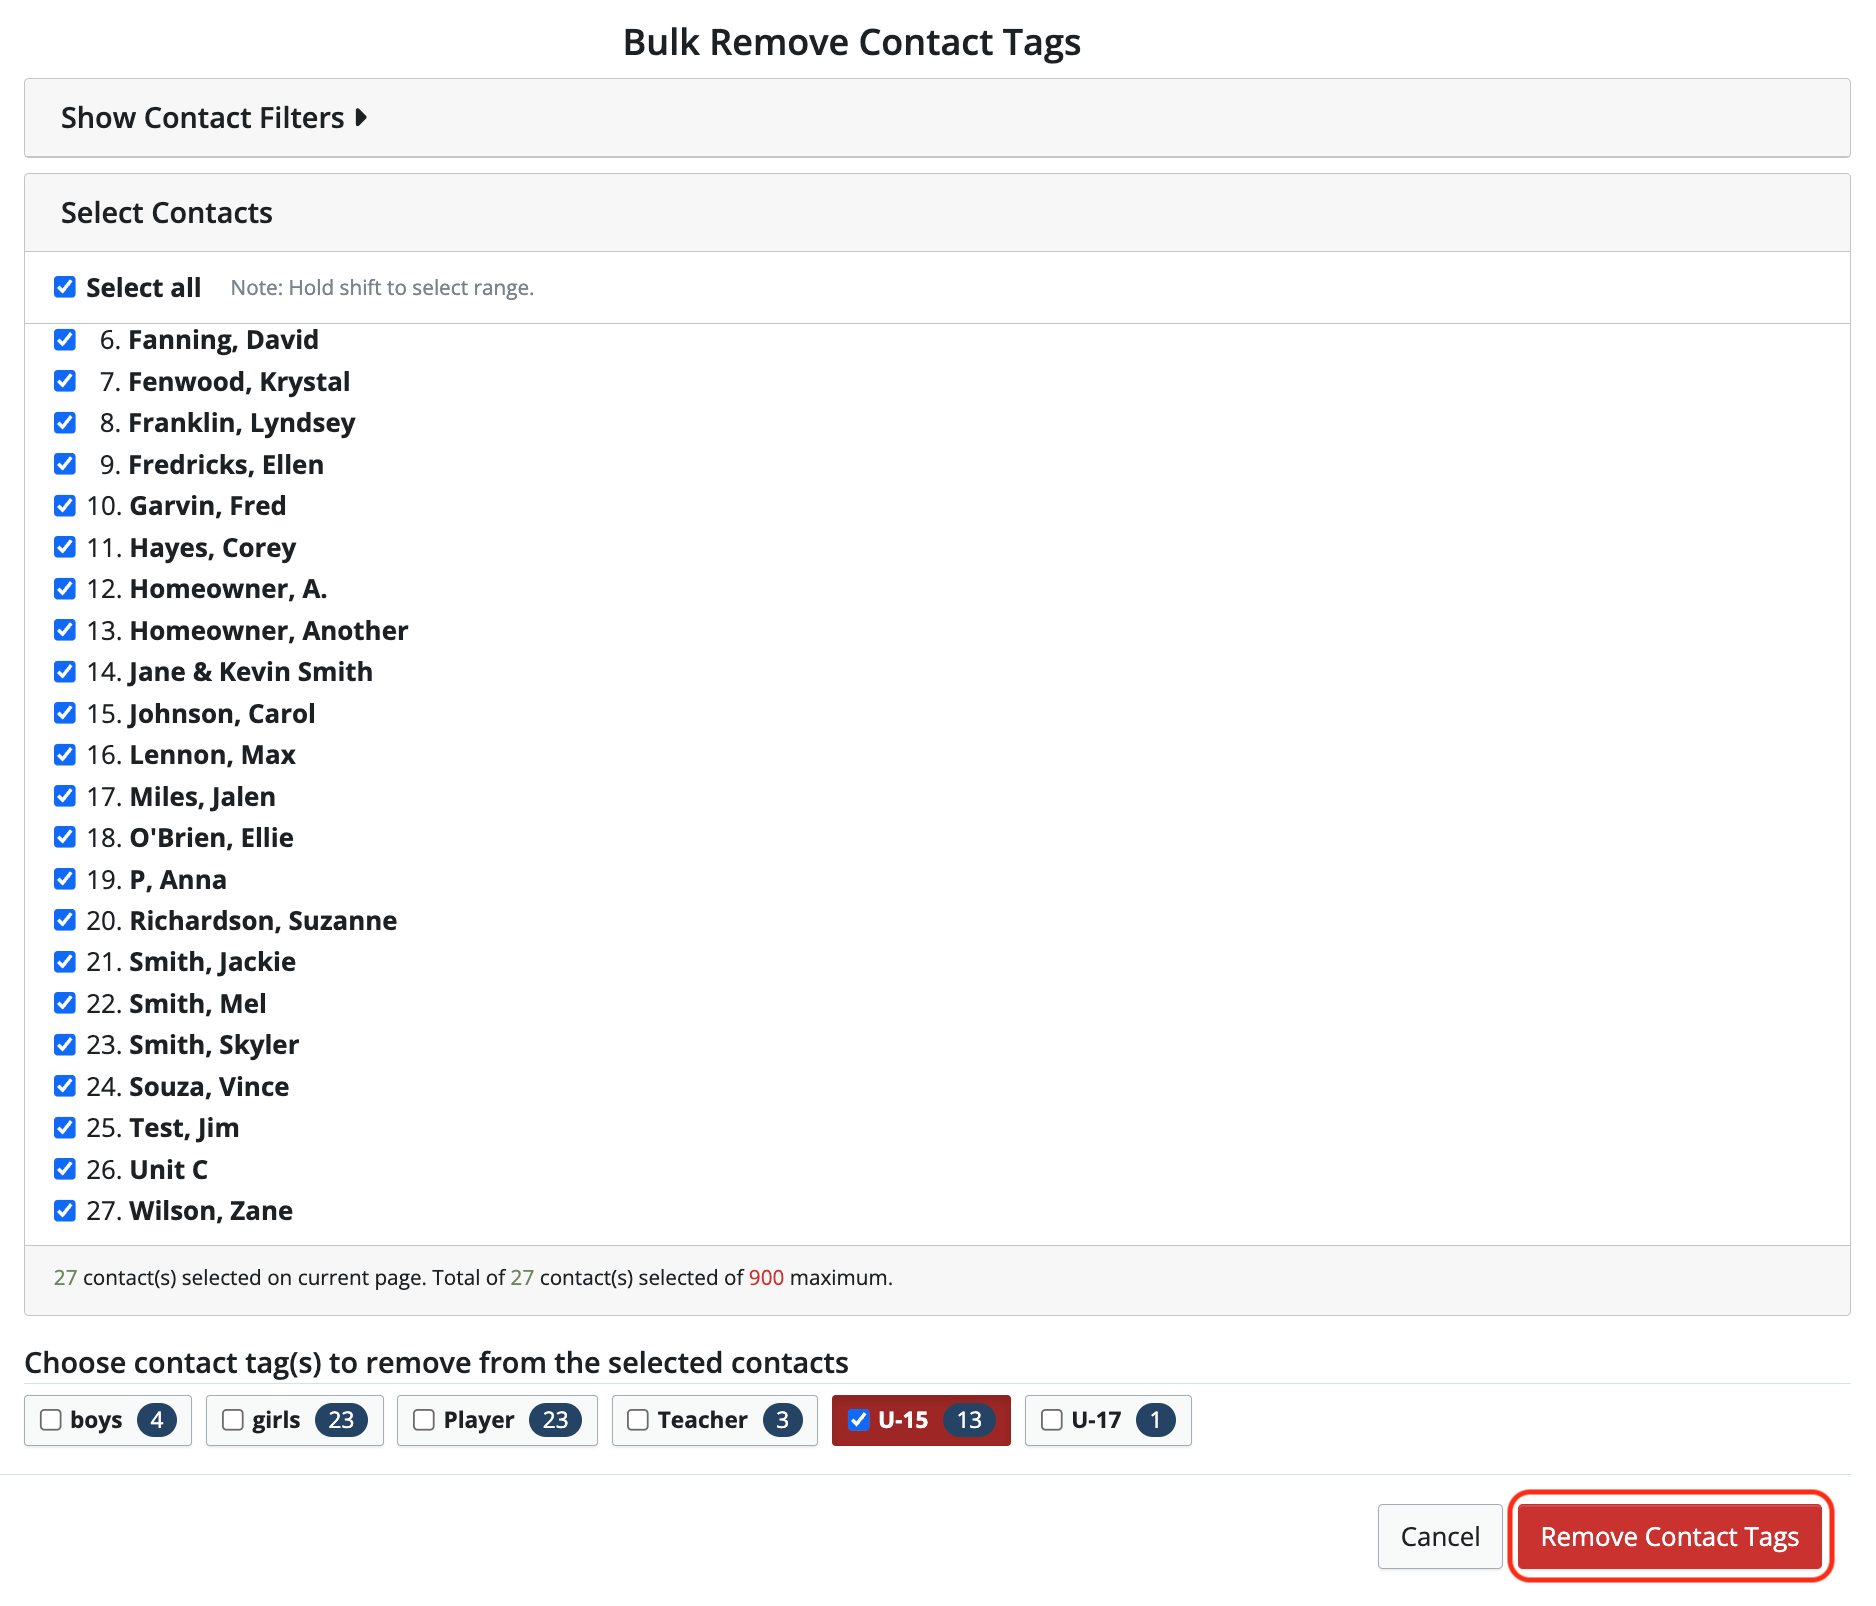
Choose contact tag(s) to remove. (The number in the box is the number of contacts with that tag and the number of tags that will be removed.)
Click the Remove Contact Tags button.
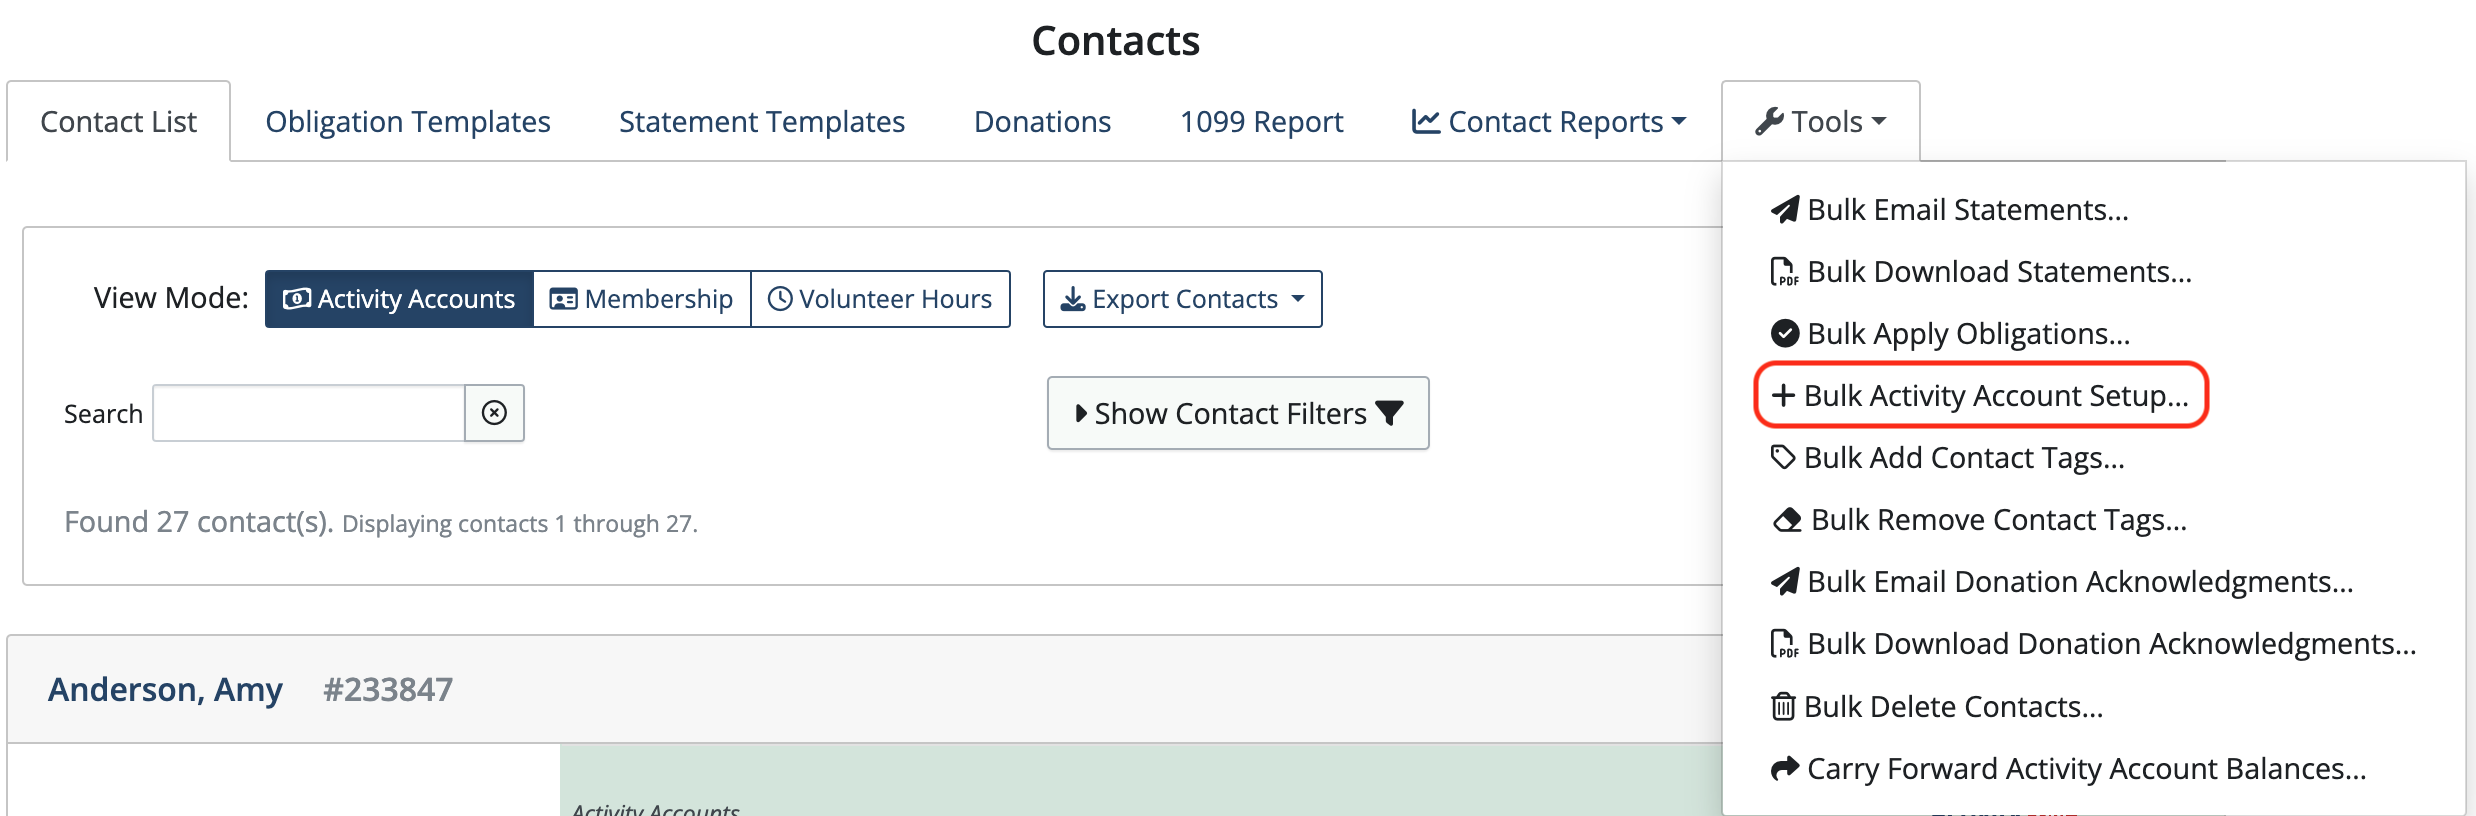
Bulk Activity Account Setup
You can track how much you’ve paid people and/or how much they’ve paid you using Activity Accounts.
Activity Accounts can be added to multiple contacts at once using the Bulk Activity Account Setup…
Click Contacts in the sidebar.
Click the Tools dropdown and choose Bulk Activity Account Setup…
Click Select All (deselect any contacts you don’t want to include or hold shift to select a range)
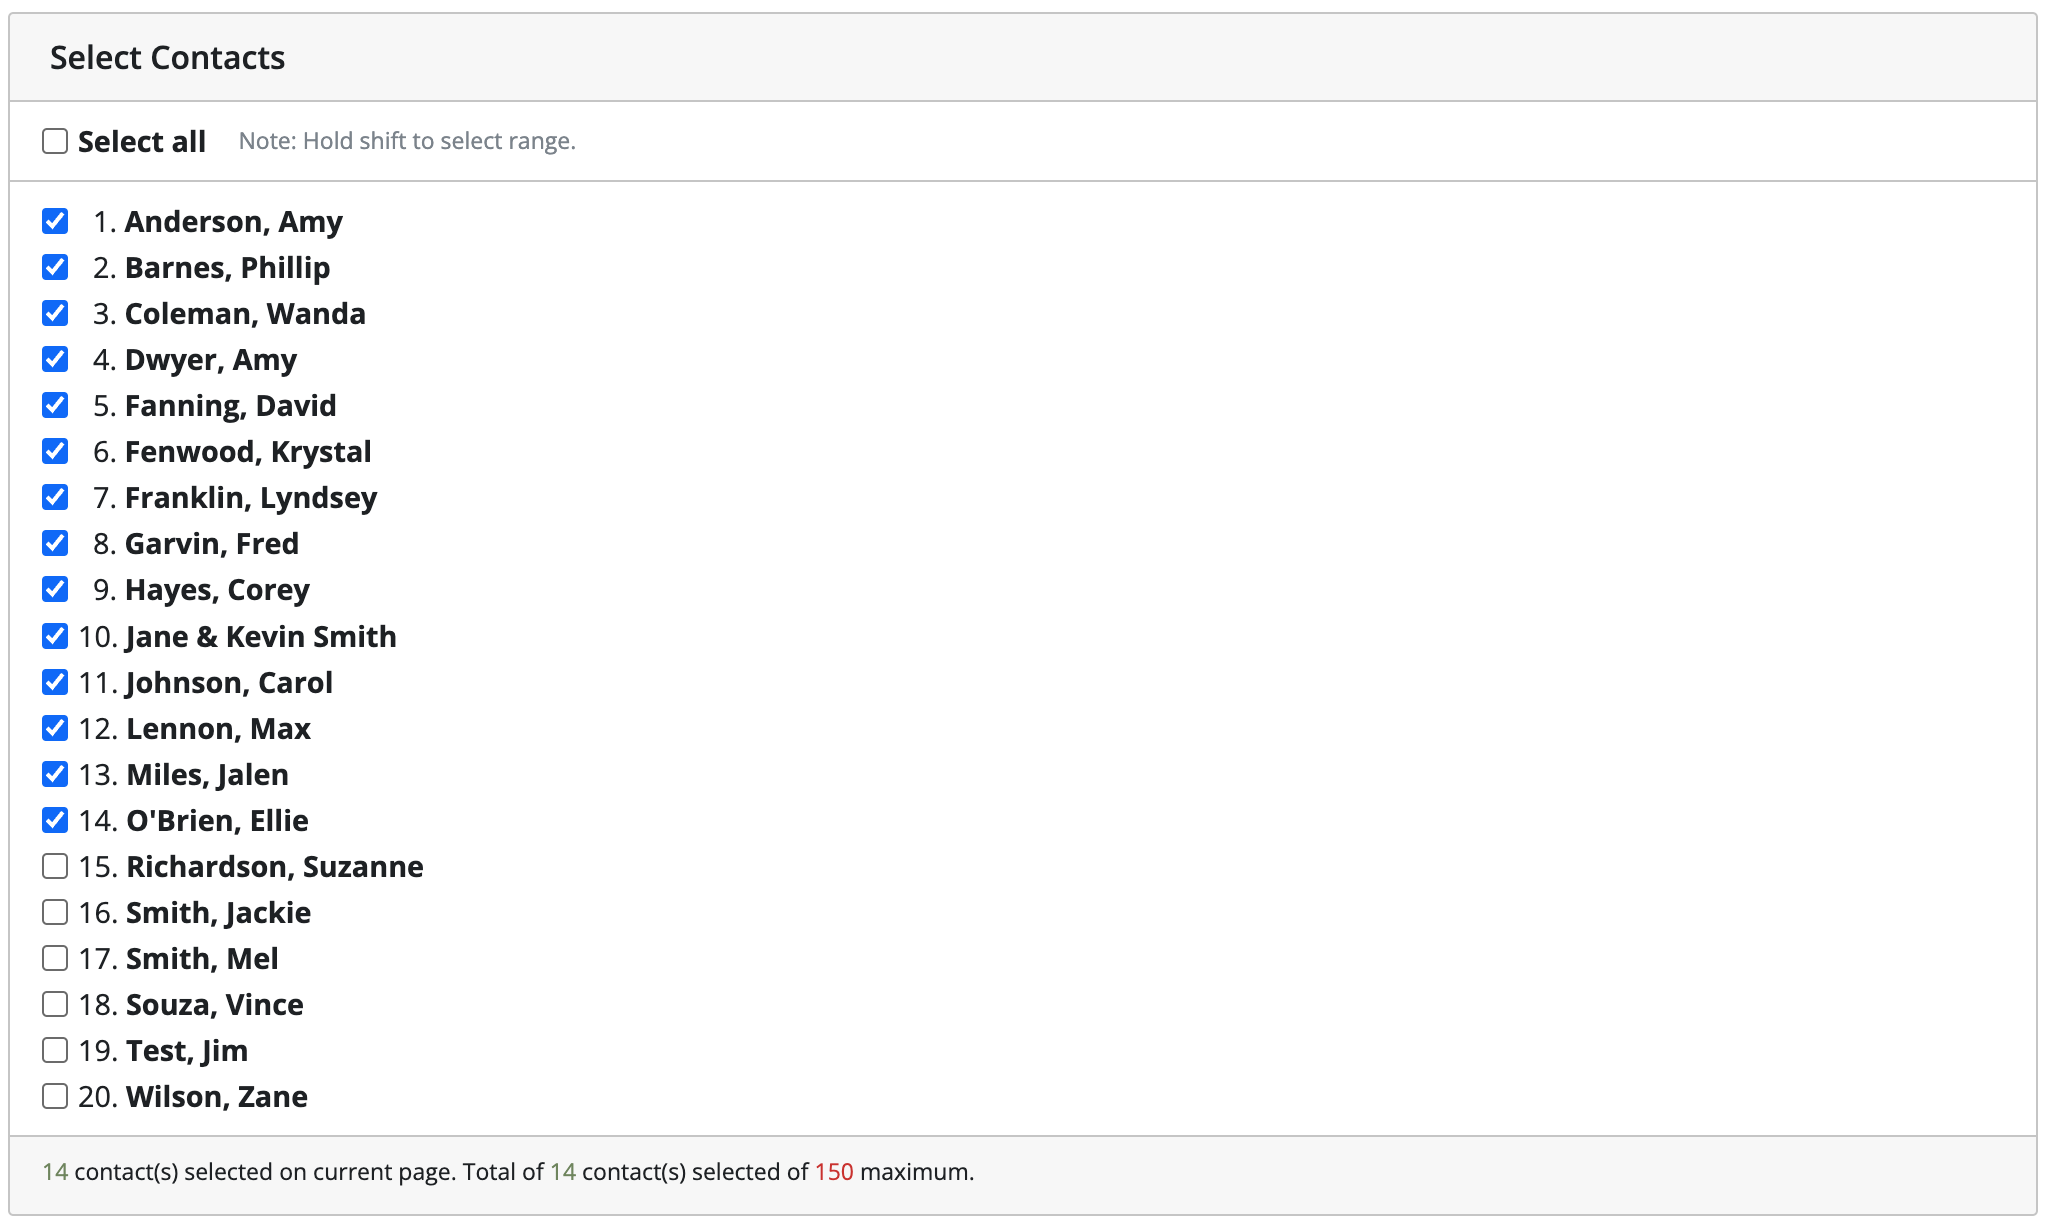
Select the Activity Account(s) you wish to add by clicking the box(es).

Click Create Activity Accounts (The number that appears in the Create Activity Accounts button refers to the number of contacts that Activity Accounts are being created for.)
NOTE: Activity Accounts can be added to a maximum of 150 contacts at a time. Repeat the process to add Activity Accounts to the remaining contacts.
Bulk Apply Obligations
After you have set up an Obligation Template, it can be applied to multiple contacts at once using the Bulk Apply Obligations… tool.
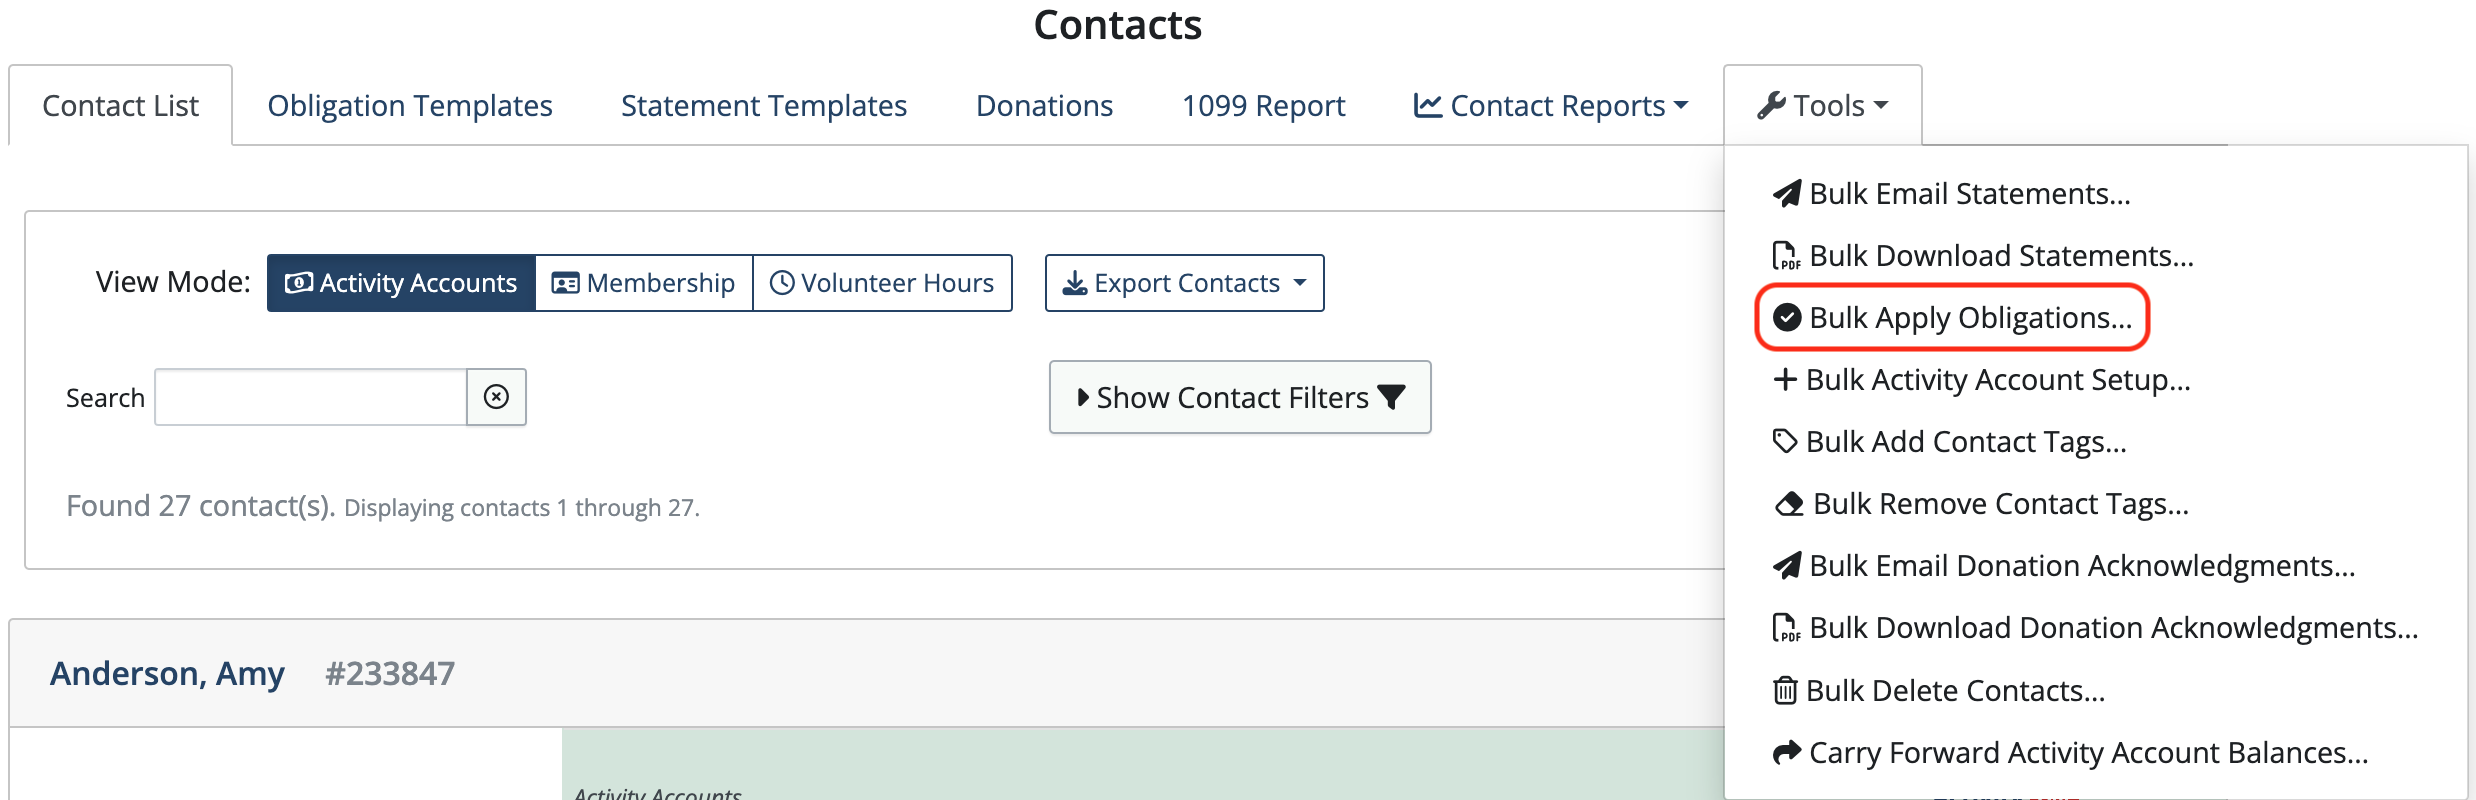
Click Contacts in the sidebar.
Click the Tools dropdown and choose Bulk Apply Obligations…
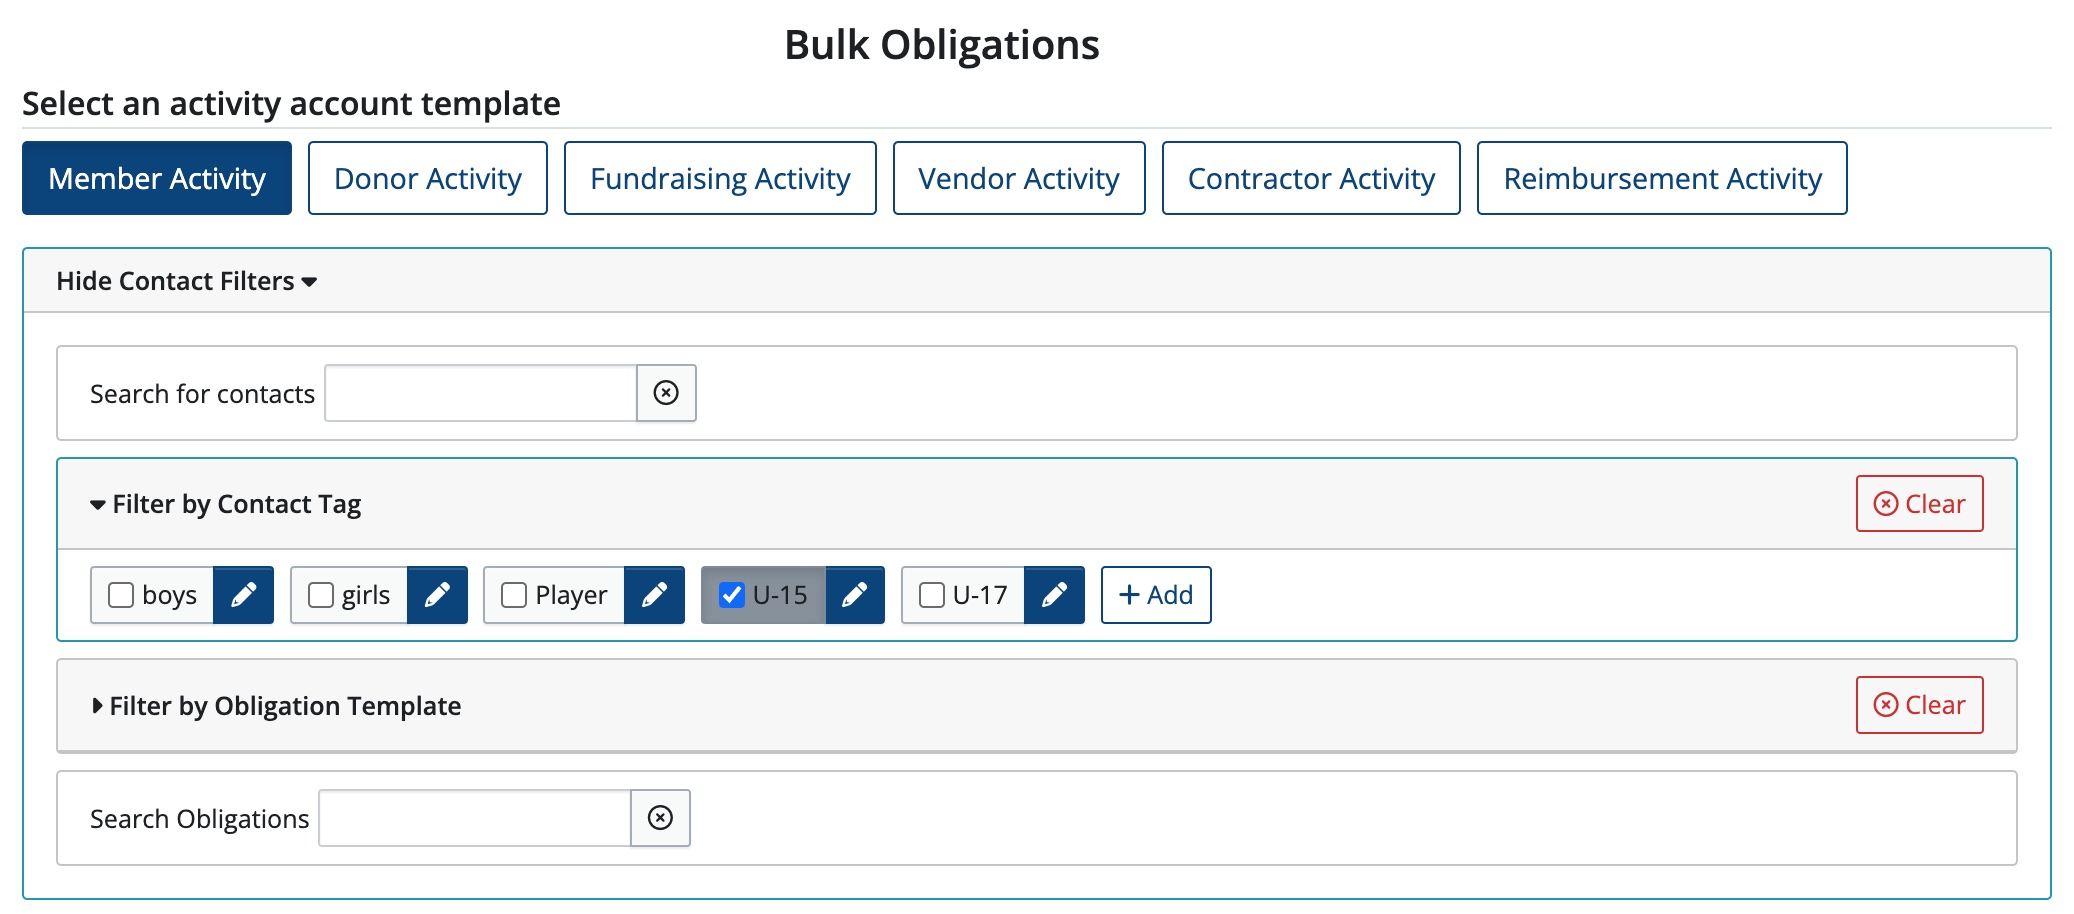
Select an activity account template.
If tags have been added to your contacts, you can filter by tag to add Obligation Templates to different groups of contacts. Click Show Contact Filters. Under Filter by Contact Tag, click the box next to the tag(s) for the group to apply Obligation Templates to.
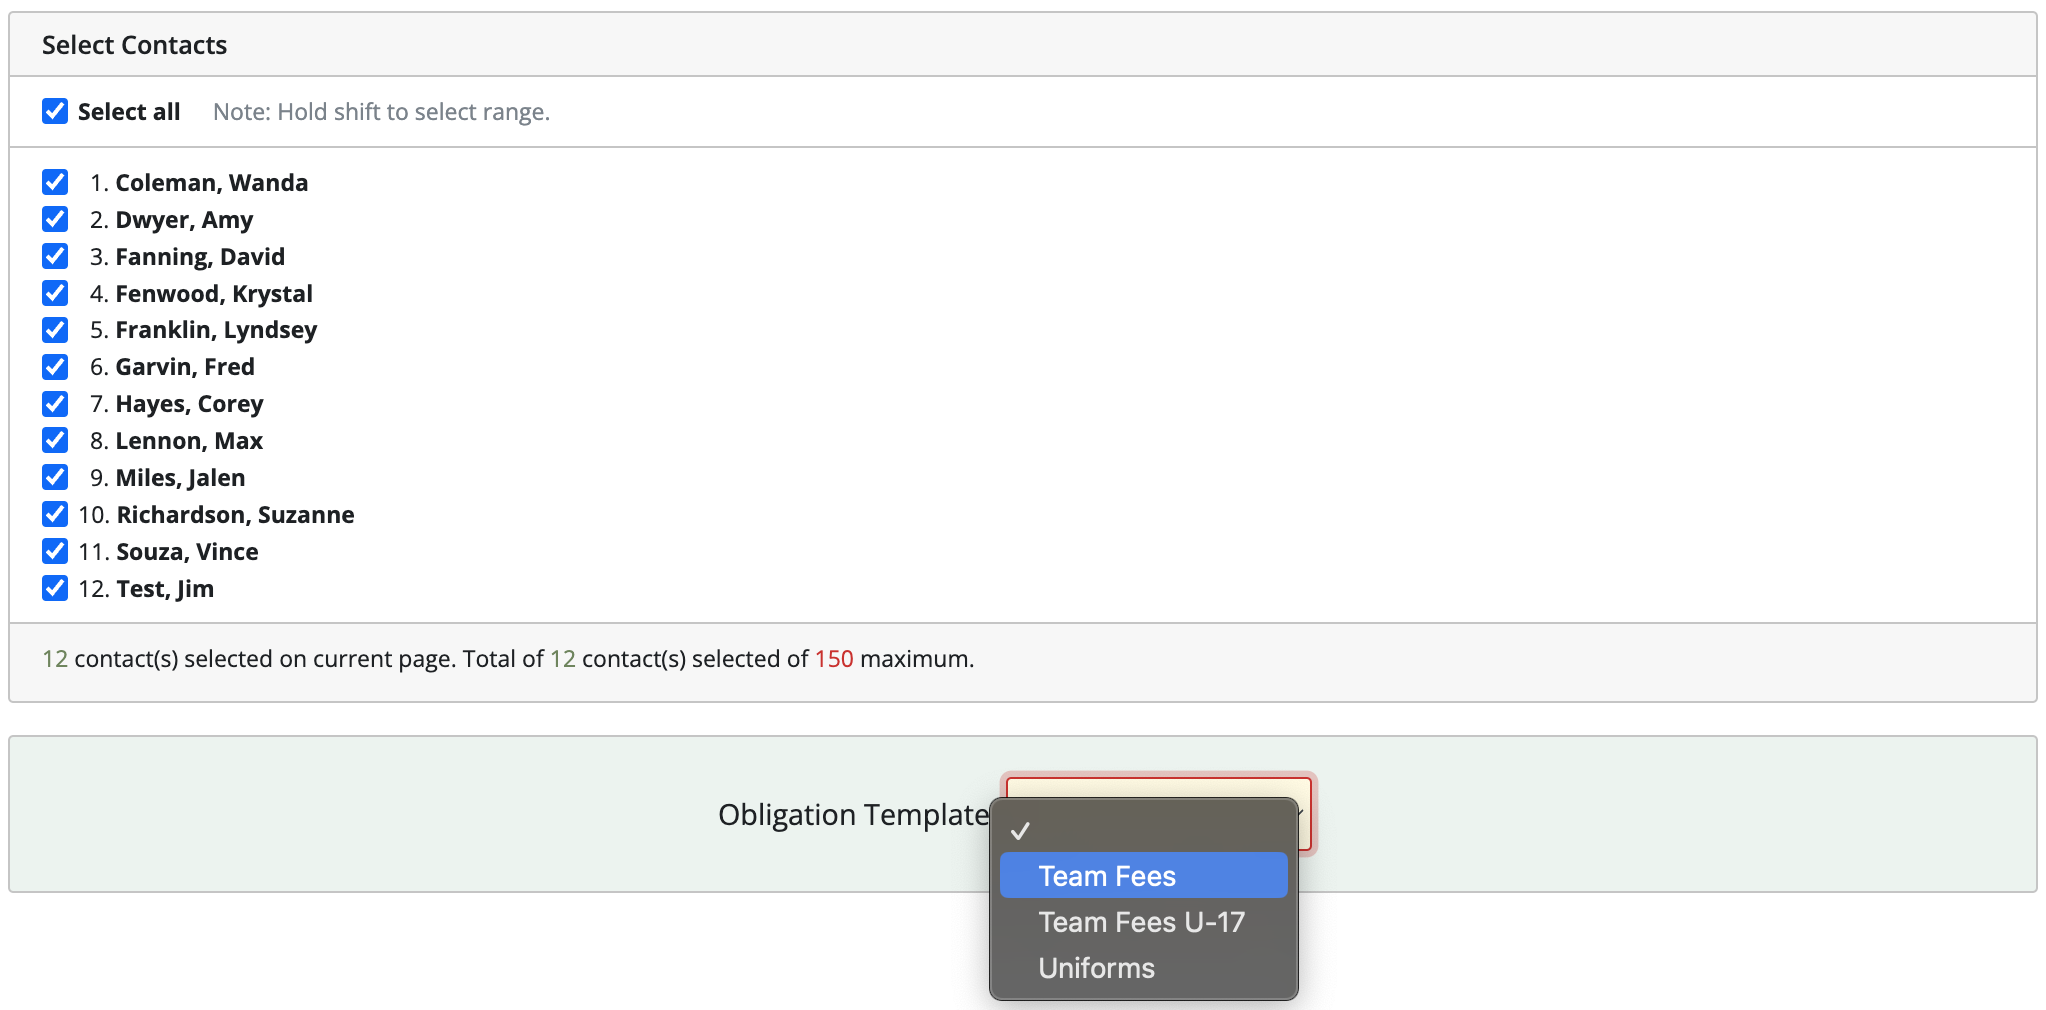
Click Select all (deselect any contacts you don’t want to include or hold shift to select a range)
From the dropdown menu next to Obligation Template, choose the template.
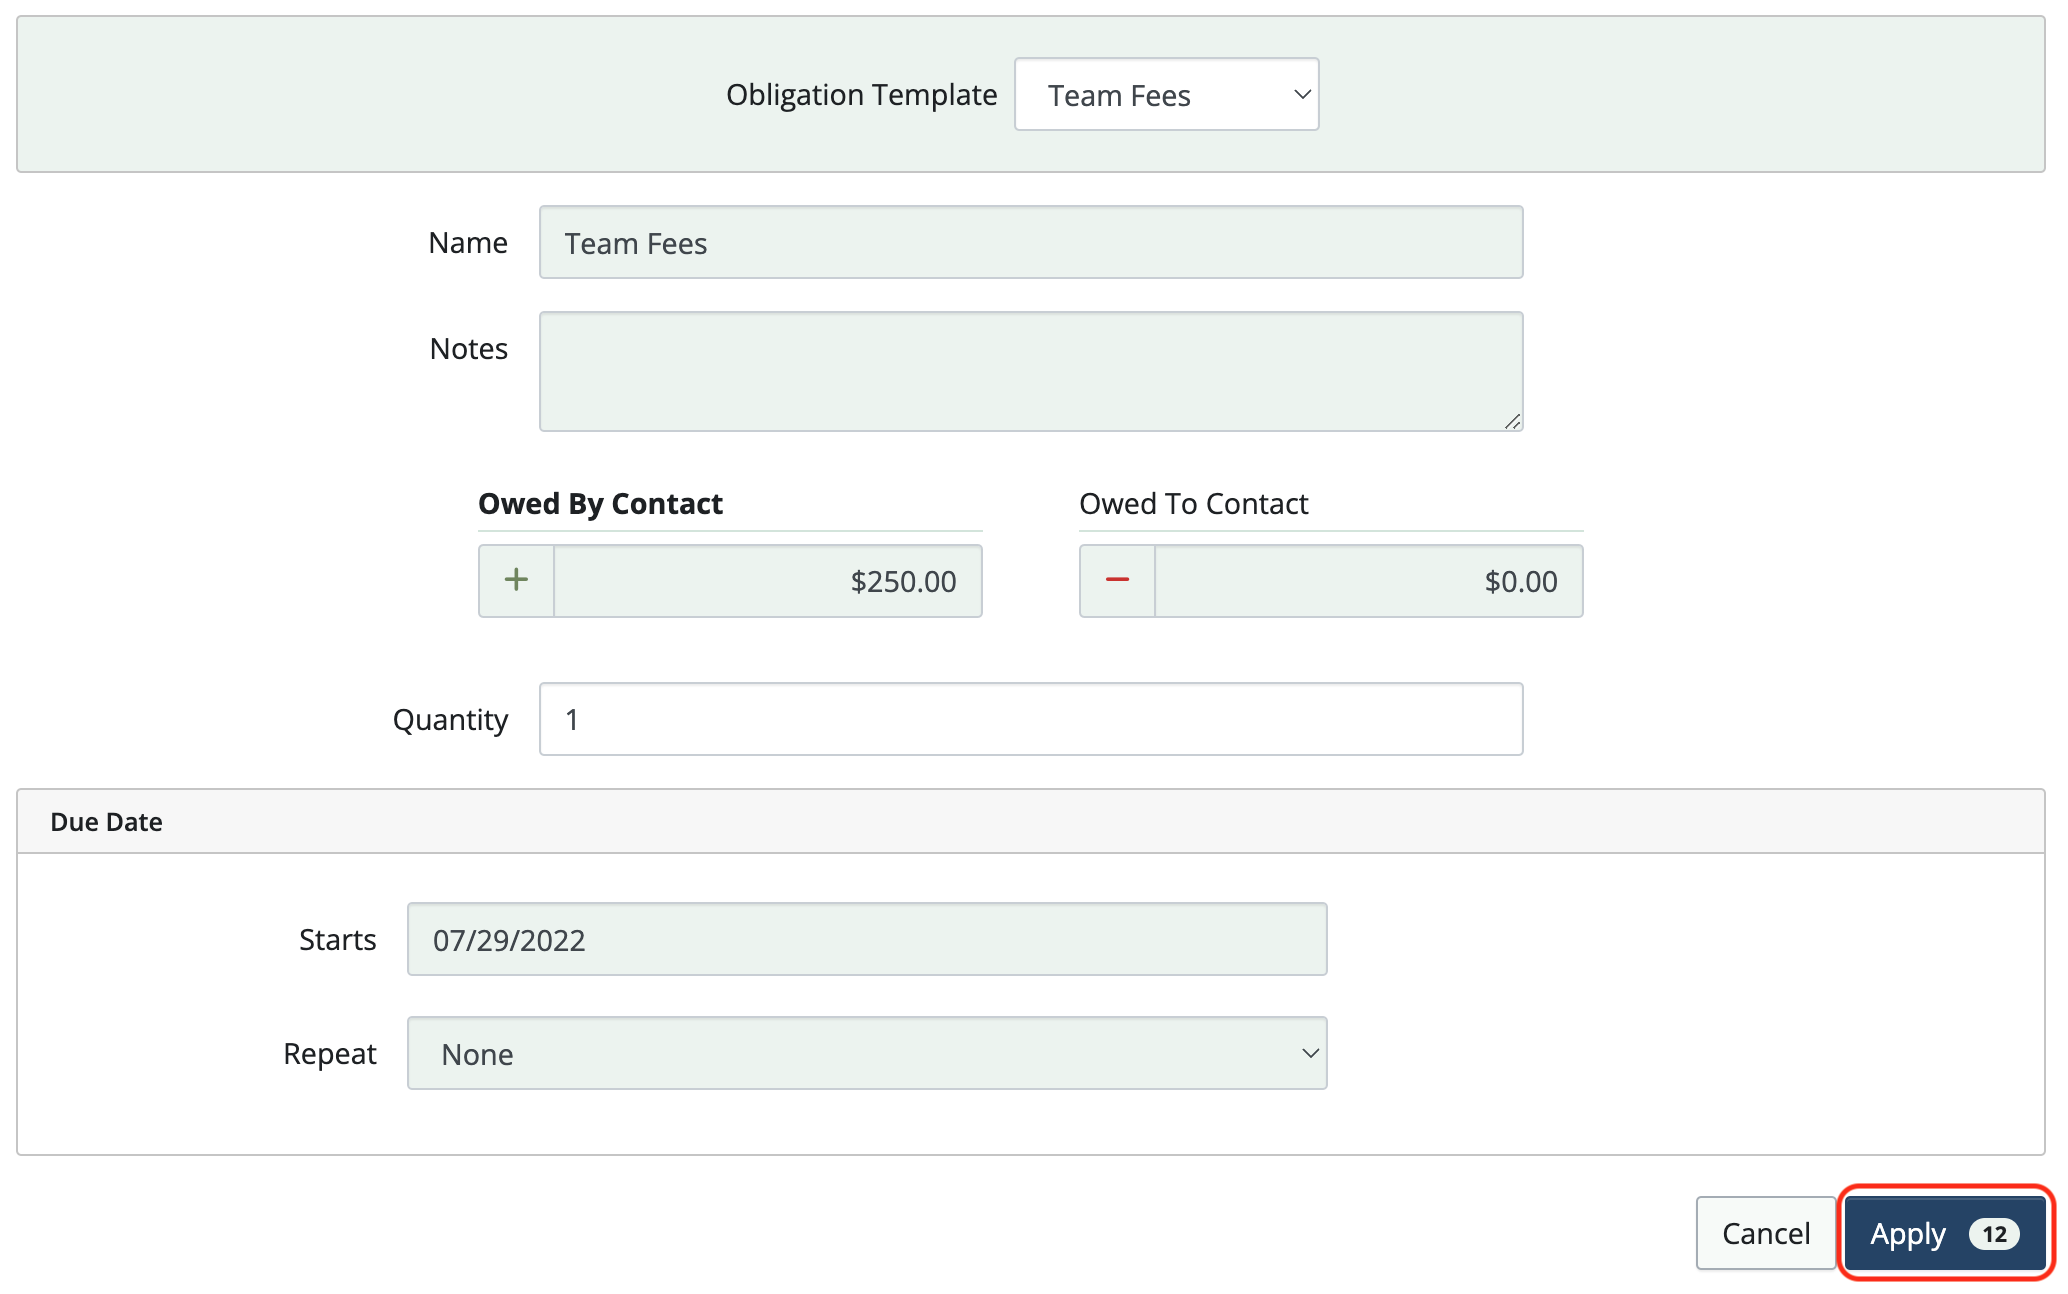
When the details of the Obligation Template appear, click Apply. (The number that appears in the Apply button refers to the number of contacts the obligation will be applied to.)
NOTE: Obligations can be added to a maximum of 150 contacts at a time. Repeat the process to add Obligations to the remaining contacts.
Bulk Email & Bulk Download Statements
If the Contact information includes an email address, statements can be emailed to multiple contacts at once using Bulk Email Statements. Bulk Download Statements can be used to download statements for multiple contacts.
Click Contacts in the sidebar.
Choose Bulk Email Statements… or Bulk Download Statements from the Tools drop-down menu.

Select the Activity Account, the Date Range, and check the box to Show only contacts with non-zero Amount Due.
Once again, if needed, you can filter your Contacts by contact tags.
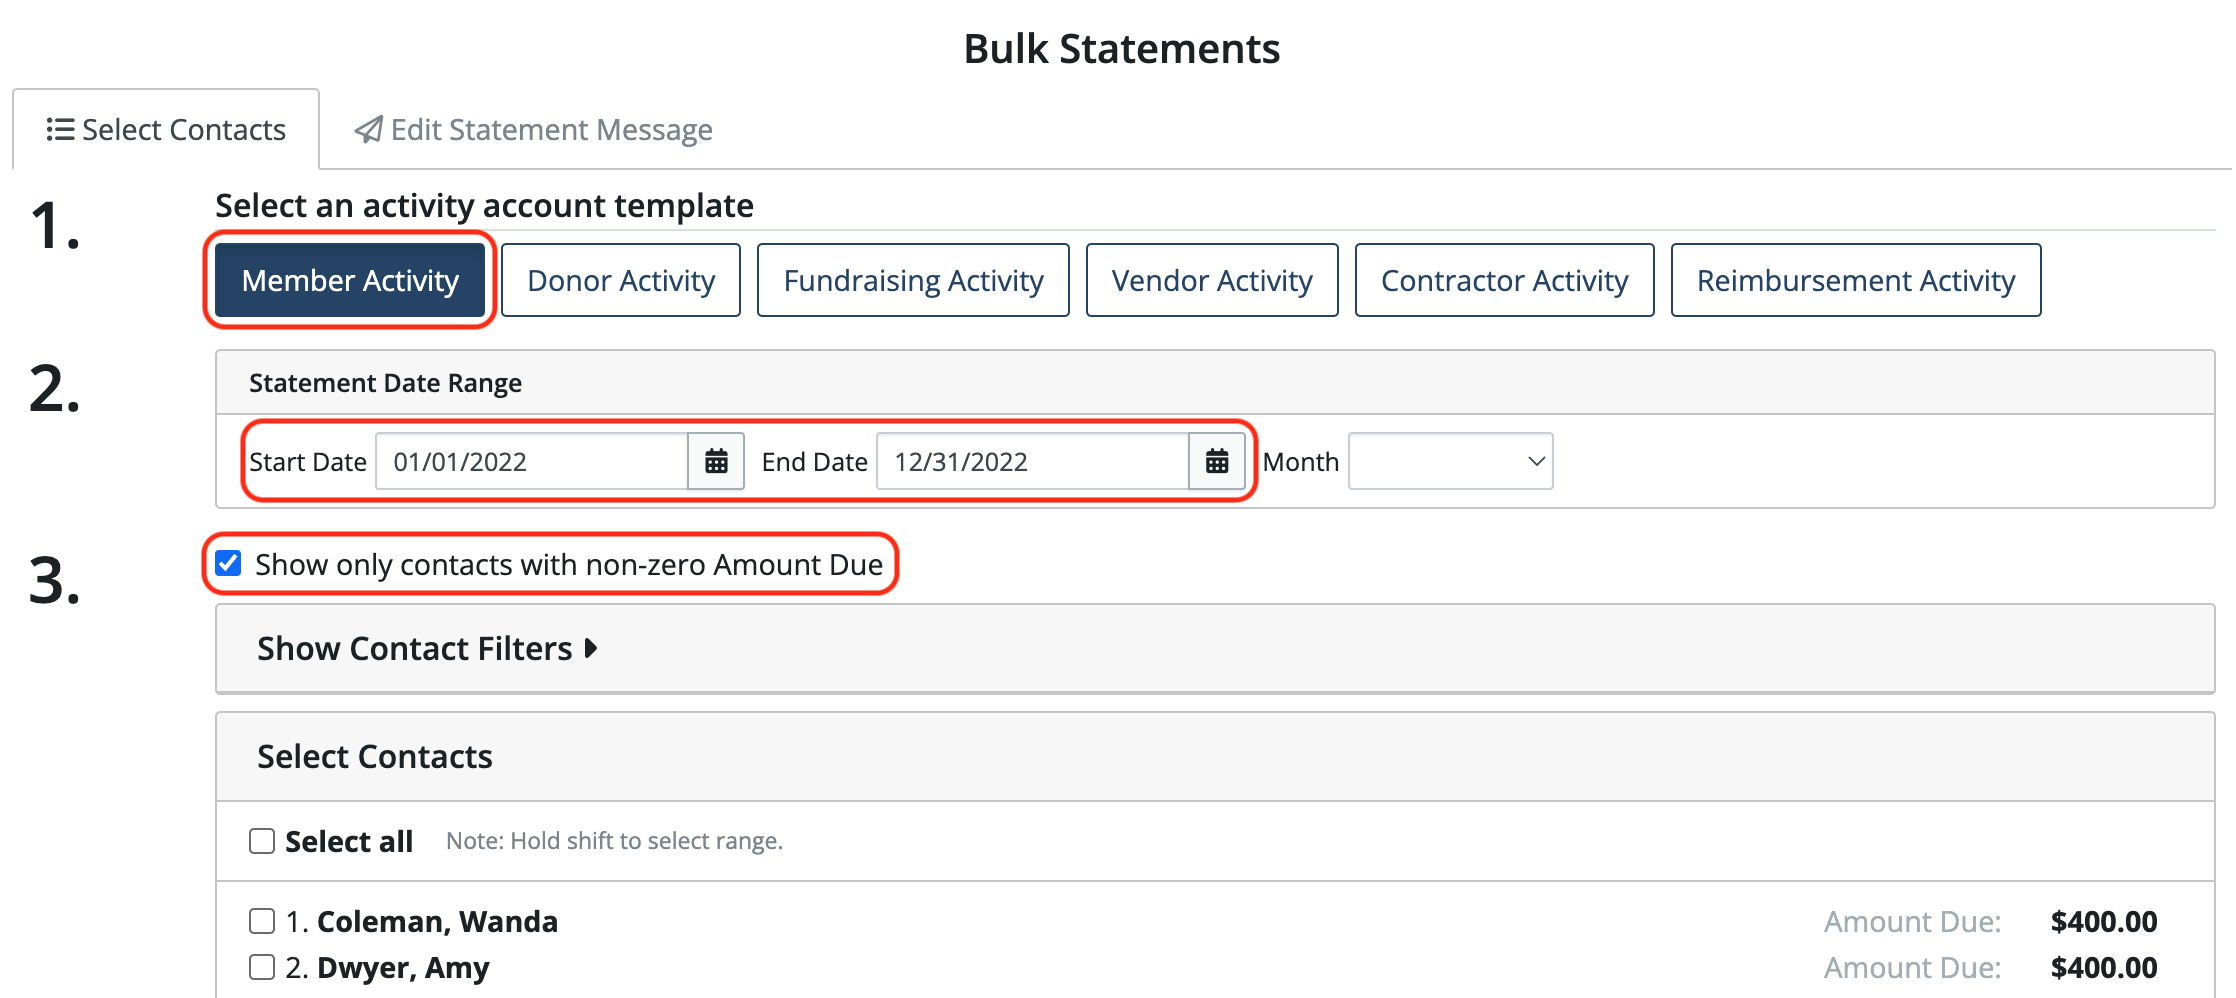
Click Select All (deselect any contacts you don’t want to include or hold shift to select a range)
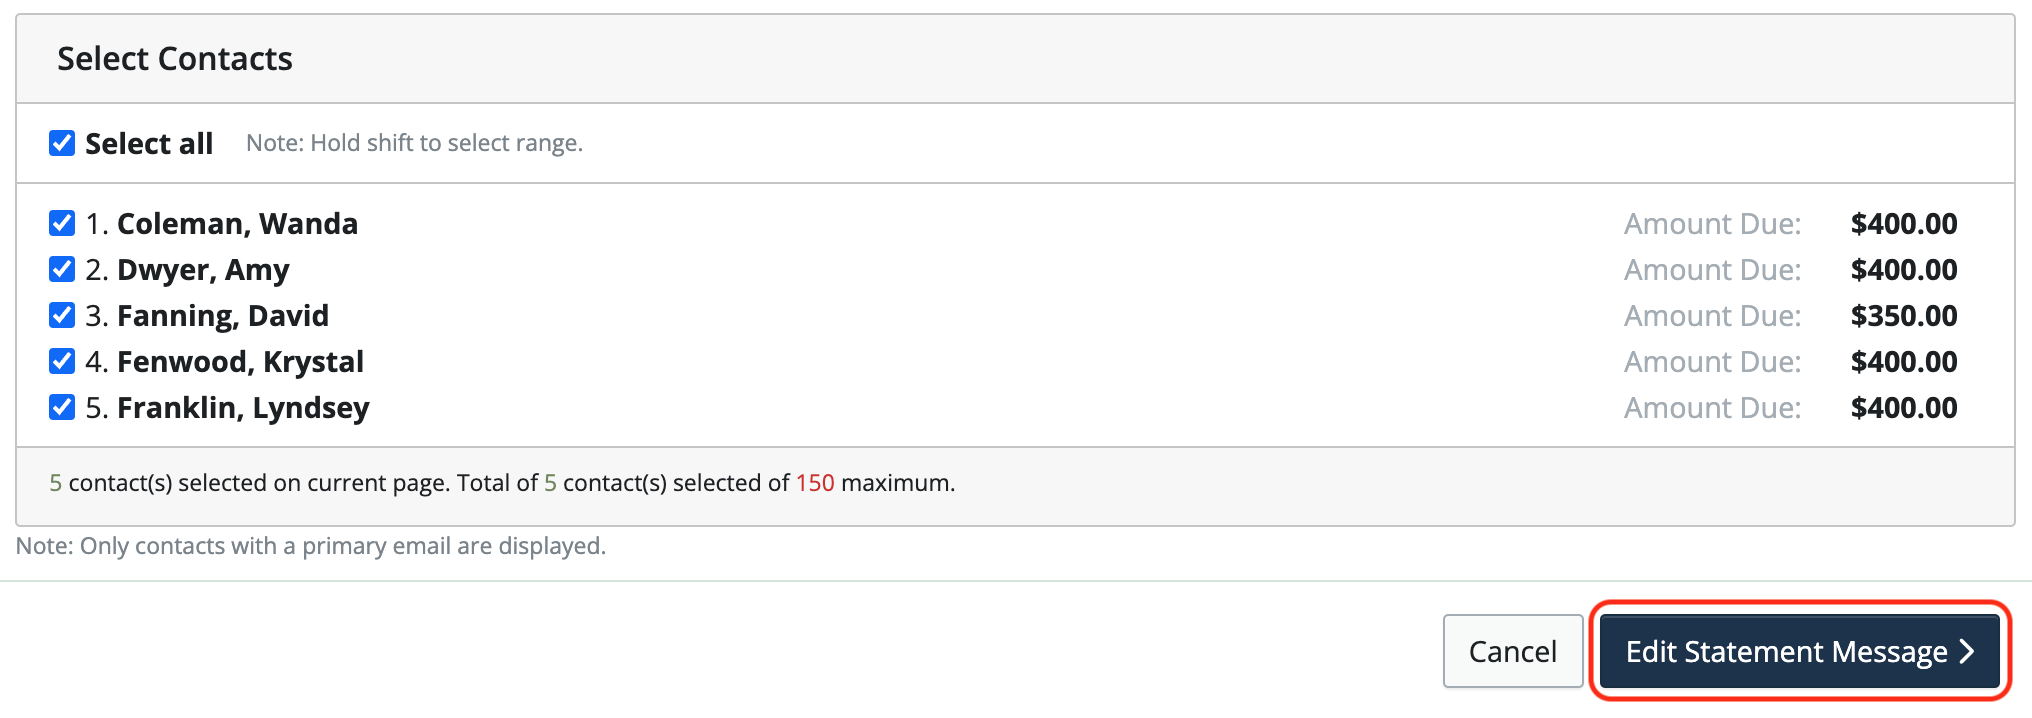
Click Edit Statement Message to choose a template and prepare the message that will be on the statements.
Once the statement message has been created, click Save & Send or Save & Download PDF.
(The number that appears in the Save & Send button refers to the number of contacts that are being emailed statements.)
NOTE: Statements can be emailed to or downloaded for a maximum of 150 contacts at a time. Repeat the process to email statements to or download for the remaining contacts.
Note: When emailing statements in bulk, contacts with multiple email addresses listed will be emailed to the contact’s default email.
Note: Emails will come from the email used to log in to your MoneyMinder account. You will have the option of receiving a copy of each email to that address. Undeliverable emails will appear in your MoneyMinder Inbox.
Bulk Delete Contacts
Multiple Contacts can be deleted once using the Bulk Delete Contacts… tool.
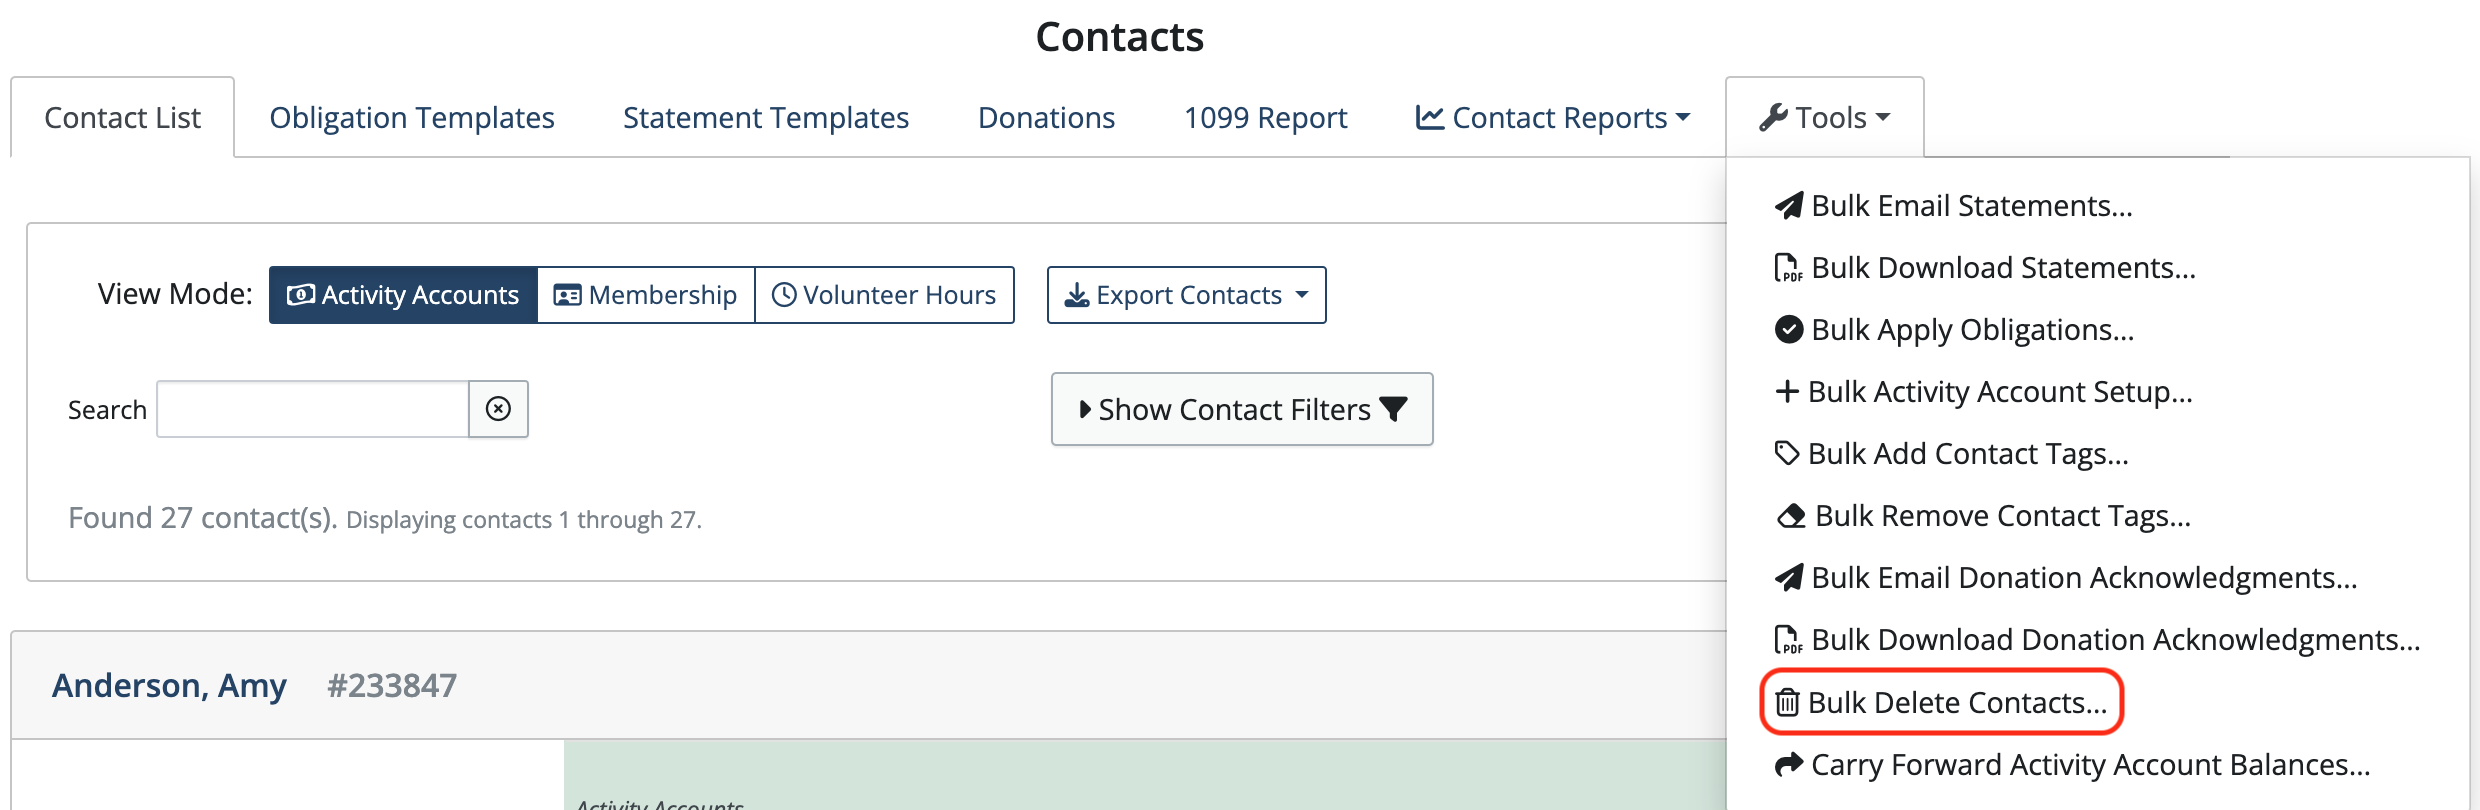
Click Contacts in the sidebar.
Click the Tools dropdown and choose Bulk Delete Contacts…
If tags have been added to your contacts, you can filter by tag to delete different groups of contacts. Click Show Contact Filters. Under Filter by Contact Tag, click the box next to the tag(s) for the group you want to delete.
Click Select all (deselect any contacts you don’t want to include or hold shift to select a range)
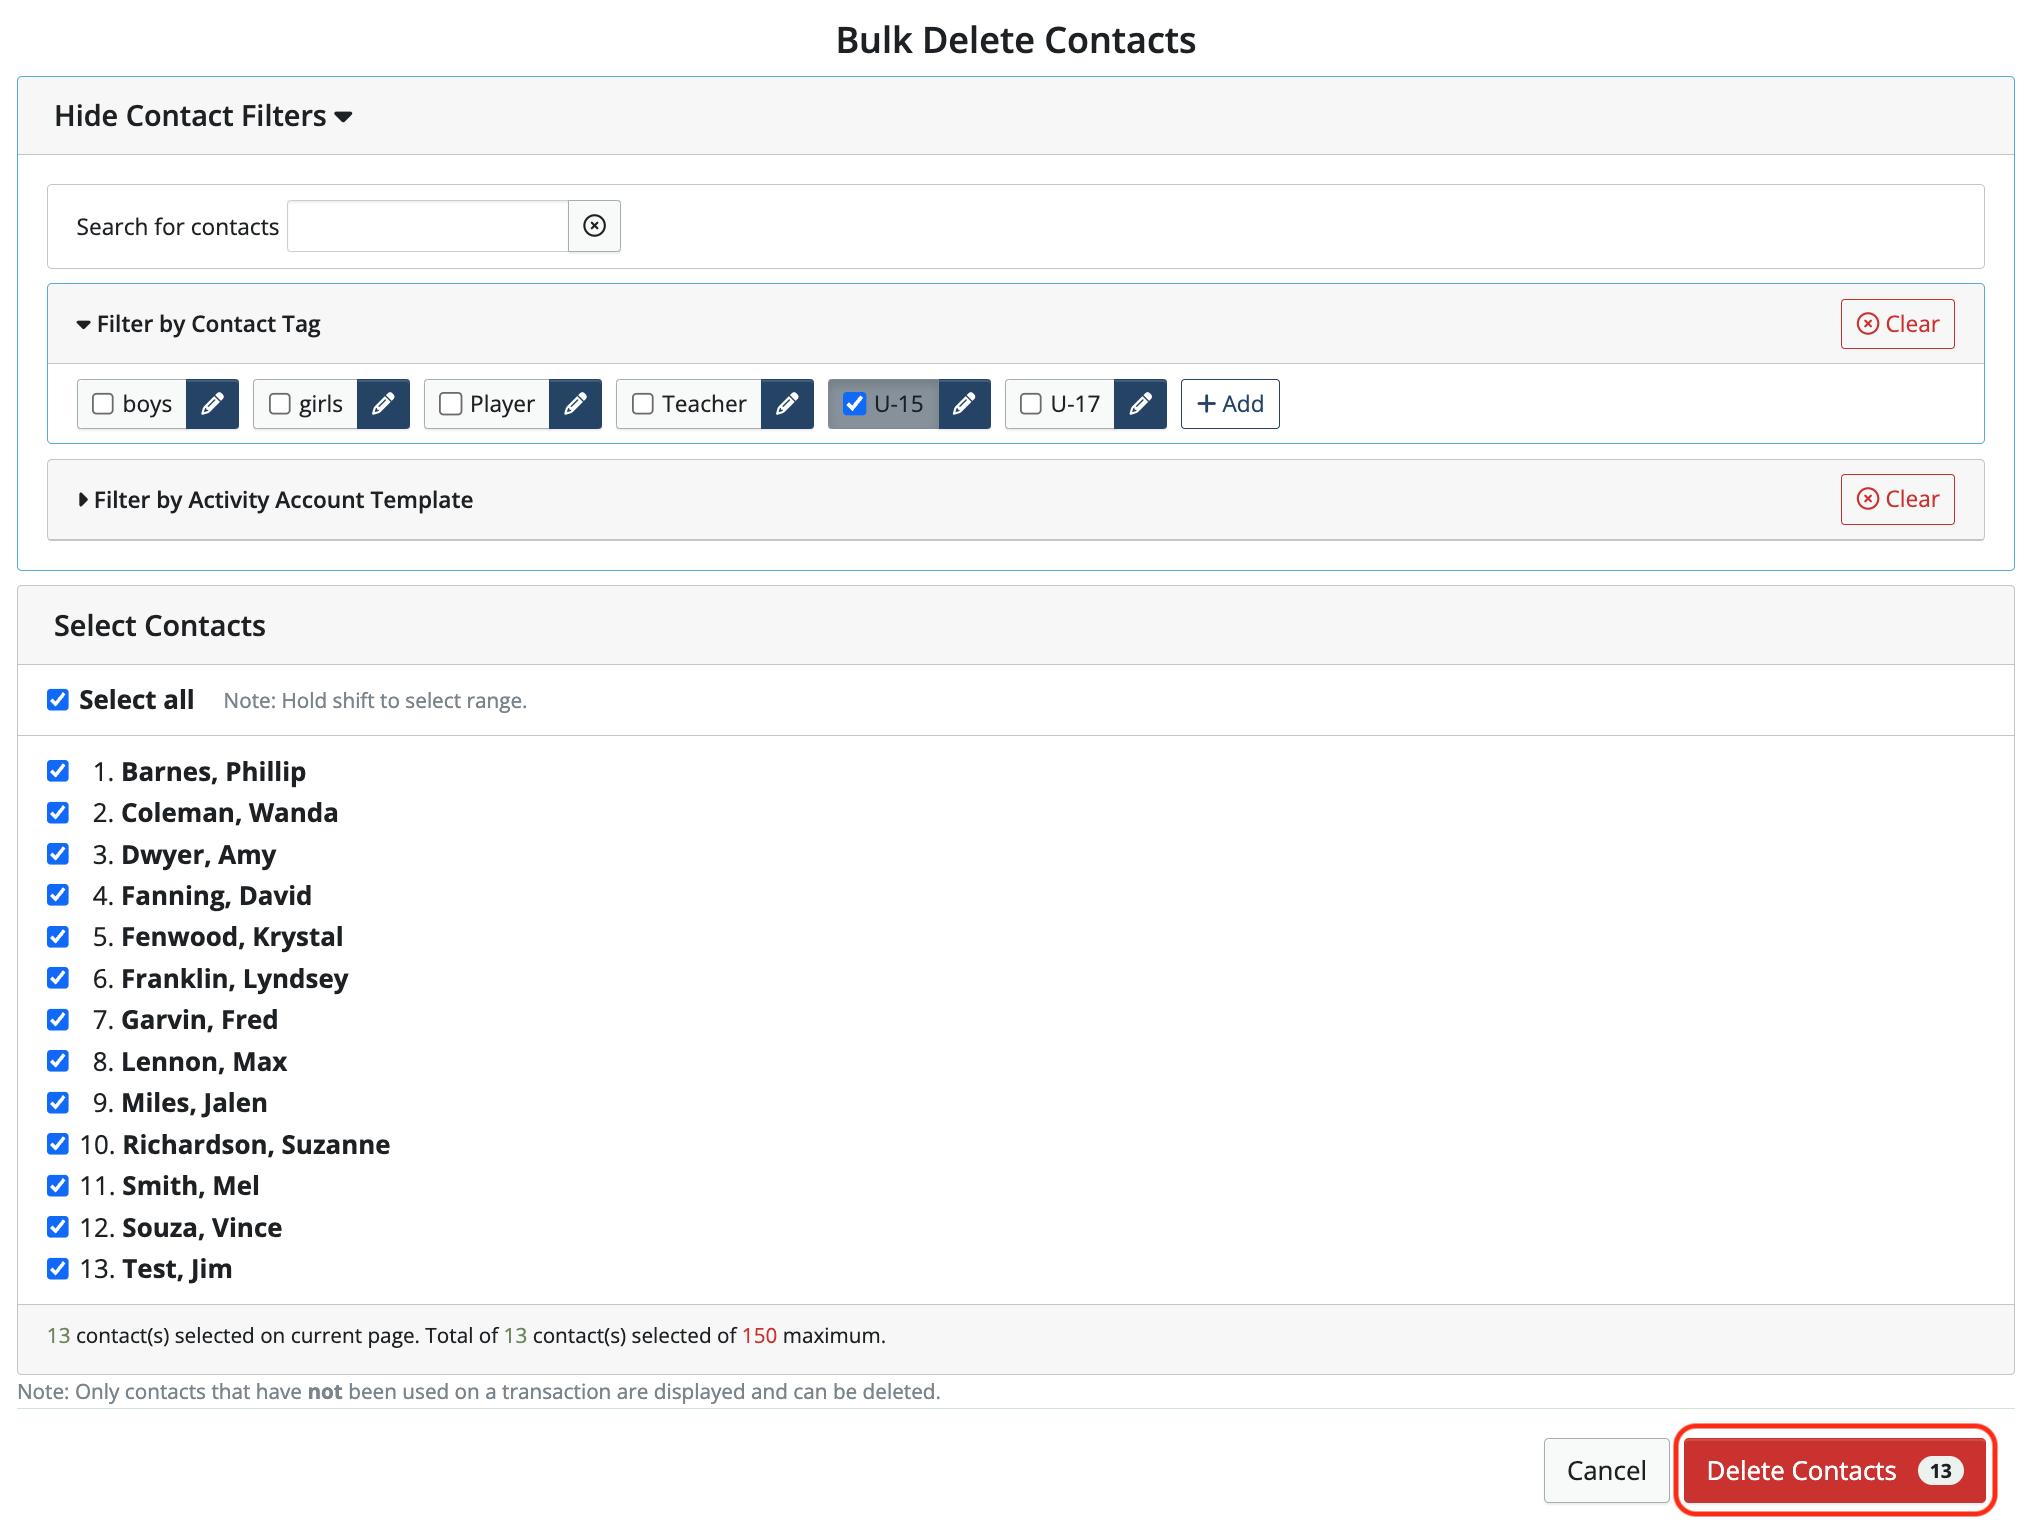
Click the Delete Contacts button. (The number that appears in the Delete Contacts button refers to the number of contacts that will be deleted.)
NOTE: A maximum of 150 contacts can be deleted at a time. Repeat the process continue deleting contacts.