How to Import Store transactions
Watch Video
- Import transactions individually
- Bulk import transactions to the same budget category
- How to record transfers from Cheddar Up
- Bulk Delete transactions from a bank register
- Disconnect Store collections no longer in use
Import transactions individually
Click Banking in the sidebar.
Click Actions to the right of either the Store Clearing Account or the bank account.

Choose Import Transactions from the dropdown.
![]()
Select the date range then click Fetch transactions to import.
![]()
Click the Import as button next to the items you’d like to import.

Withdrawals and deposits can be imported by choosing Transaction from the dropdown.
![]()
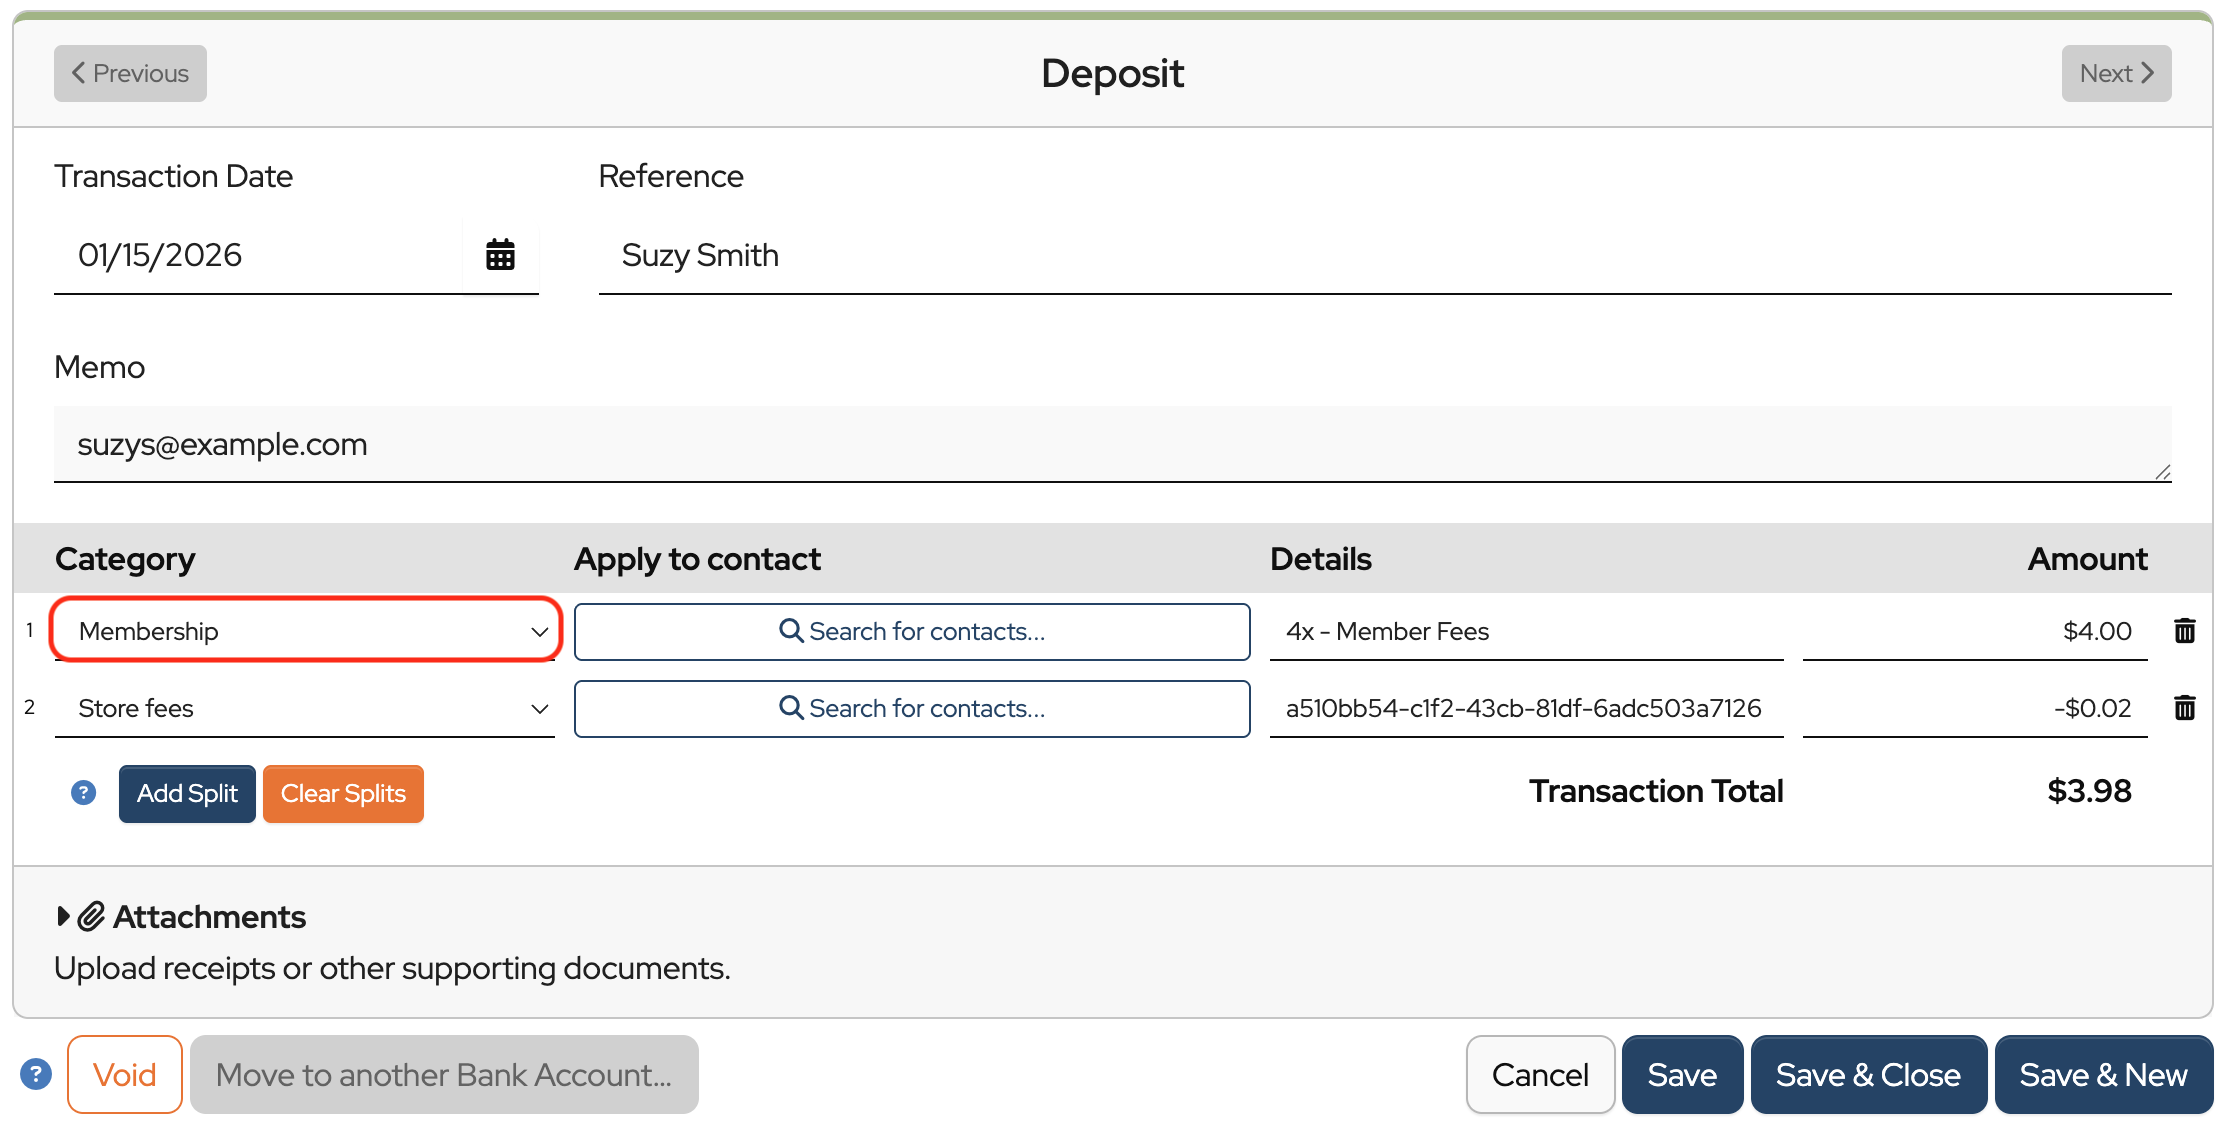
Check that all fields are filled correctly and assign a category. The store fees category will auto-populate as a split with a negative amount.
Click Save & Close. This will take you back to the Transactions Available to Import screen.
Note: Because Cheddar Up is used to receive payments, most of the imported transactions will be deposits. It is rare to import individual transactions as a transfer into a store account. Transfers from the Cheddar Up to your bank account will be imported when importing in your bank account or can be manually entered (See directions below).
To hide a transaction so that it doesn’t get imported, click the “eye” icon.
![]()
Bulk import transactions to the same budget category
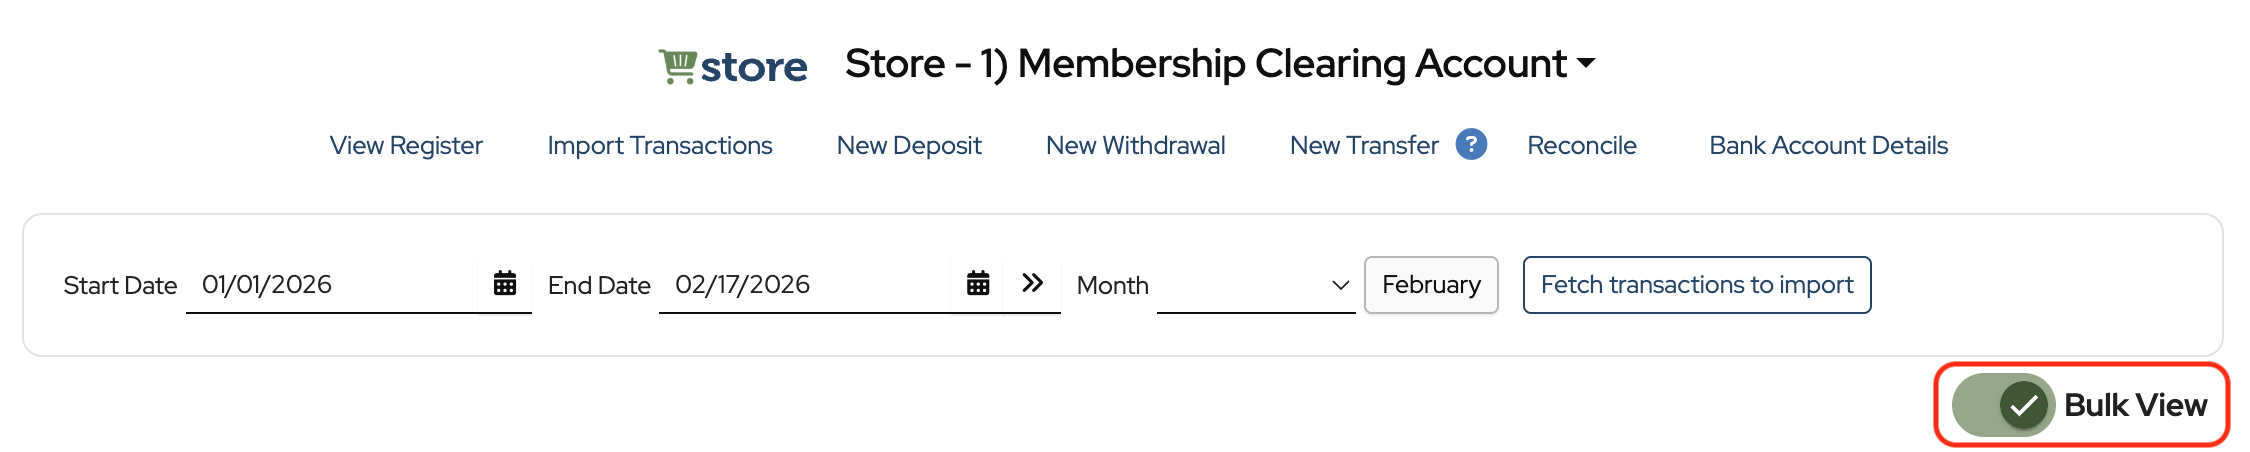
In the import screen after transactions have been fetched, toggle Bulk View on.
Select the transactions.
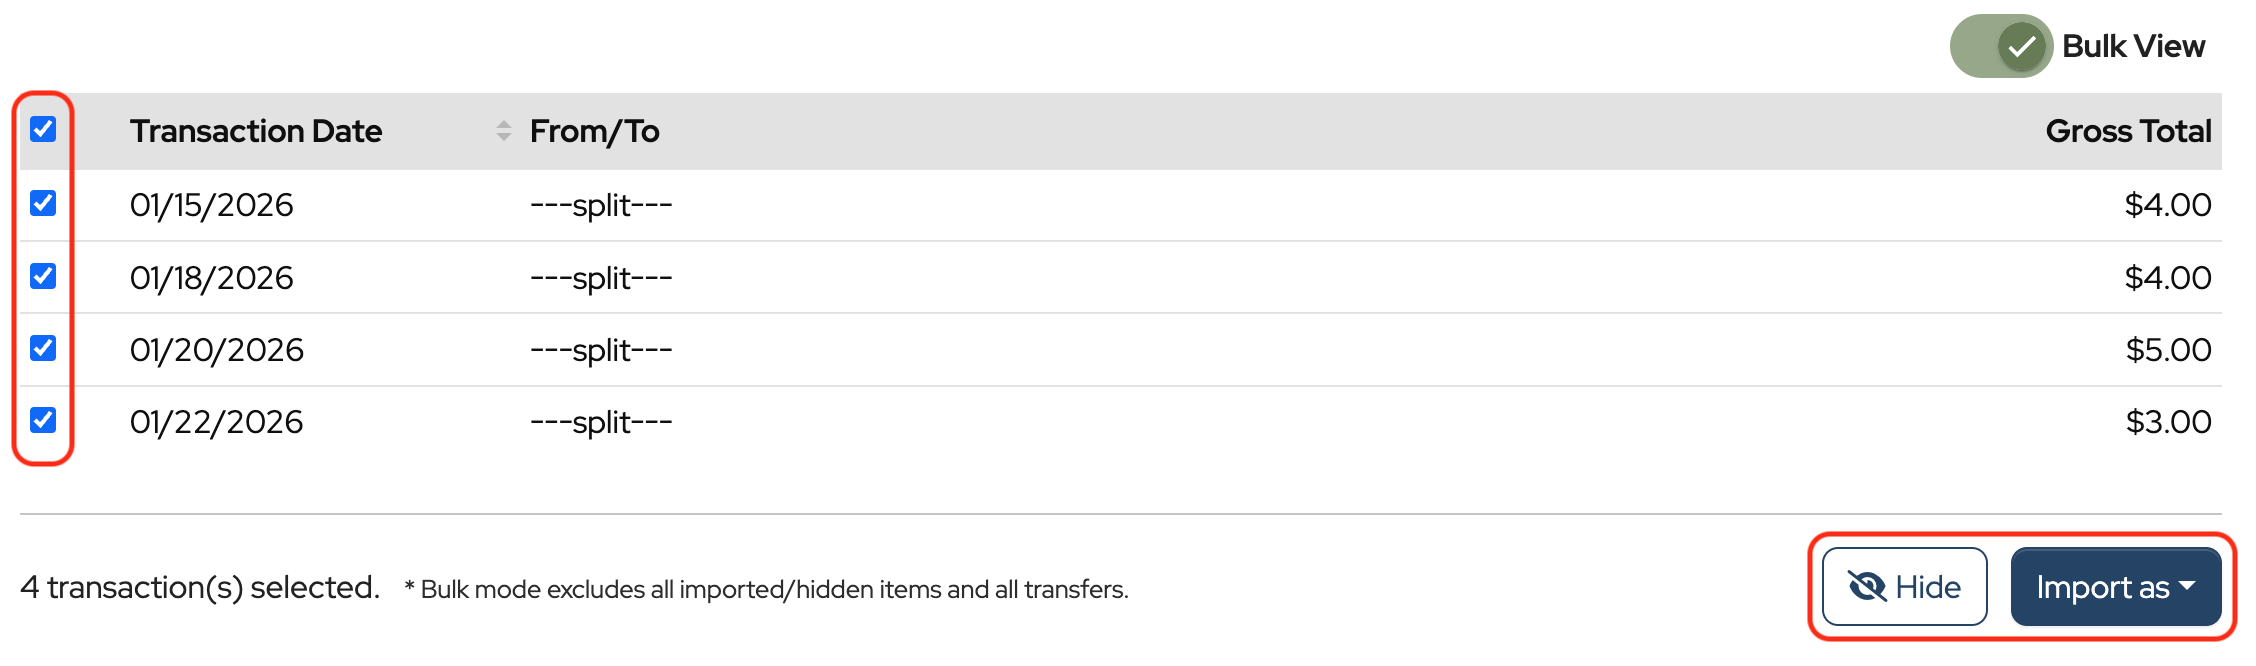
Click the Hide button to bulk hide transactions in the import screen.
Click Import as and select Transactions from the dropdown to import transactions into the Store Clearing Account register.
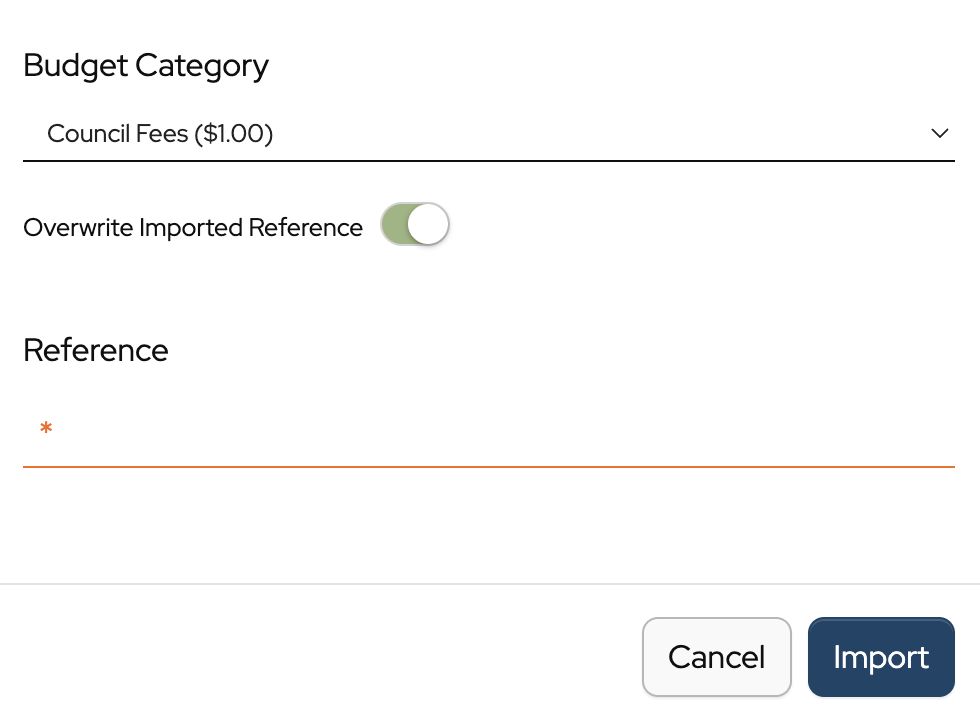
Choose a Budget Category from the dropdown.

Click Import. This will import all of the selected transactions at once.
To change the Reference information to something other than what was brought in from the Store, toggle it on and enter the information. Changing this field applies to all selected transactions.
How to record transfers from Cheddar Up
When funds are transferred from Cheddar Up to your bank account, this needs to be recorded as a transfer in MoneyMinder.
Note: If you have bank integration, deposits from Cheddar Up can be imported as transfers when importing into the bank account rather than being manually recorded.
To manually enter a transfer, click Banking in the sidebar.
Click Actions to the right of the Store Clearing account.
Choose New Transfer from the dropdown.
![]()
The From bank account should be the Store Clearing account. The To bank account should be the account the money was deposited into, i.e. checking account.
![]()
Fill in the details and click Save.
Bulk Delete transactions from a bank register
To bulk delete transactions, navigate to the bank register and toggle on Bulk Delete.
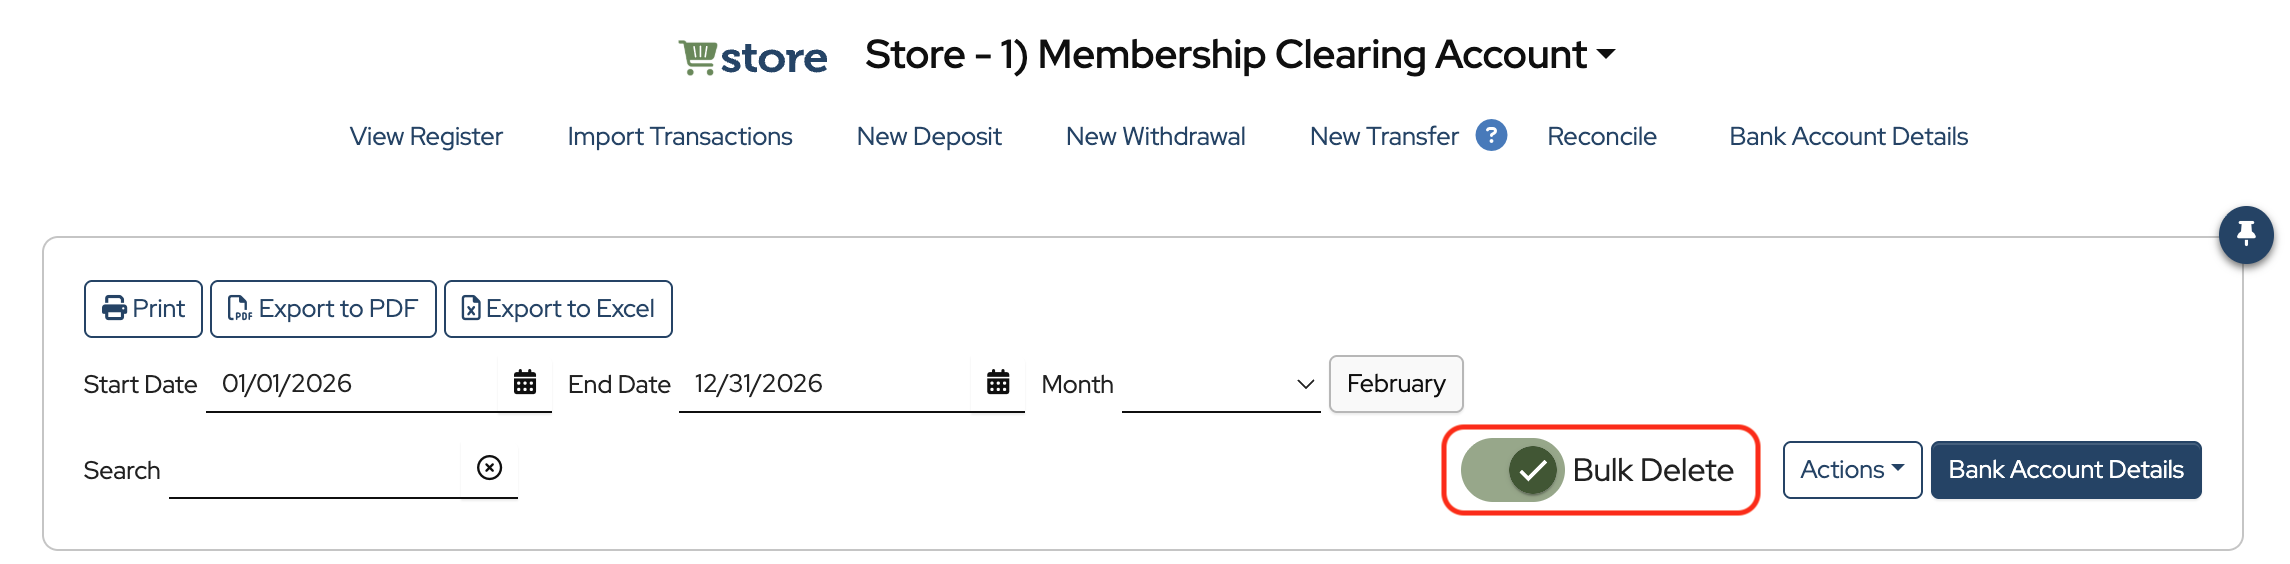
Select the transactions to be deleted. (Note: only transactions that are not reconciled can be deleted)
![]()
Click Delete selected transactions at the bottom of the page.
Note: After being deleted, imported transactions will reappear on the import page, where they can be reimported or hidden.
To disconnect Store collections that are no longer in use or that you don’t need on the banking page (i.e. forms, waivers, signups), click Store in the sidebar.
Click Disconnect to the right of the collection. This will move it into the Disconnected Collections section. It will also remove the Store clearing account from the banking page and remove the store fees category from the budget. Watch a quick video about this new feature.
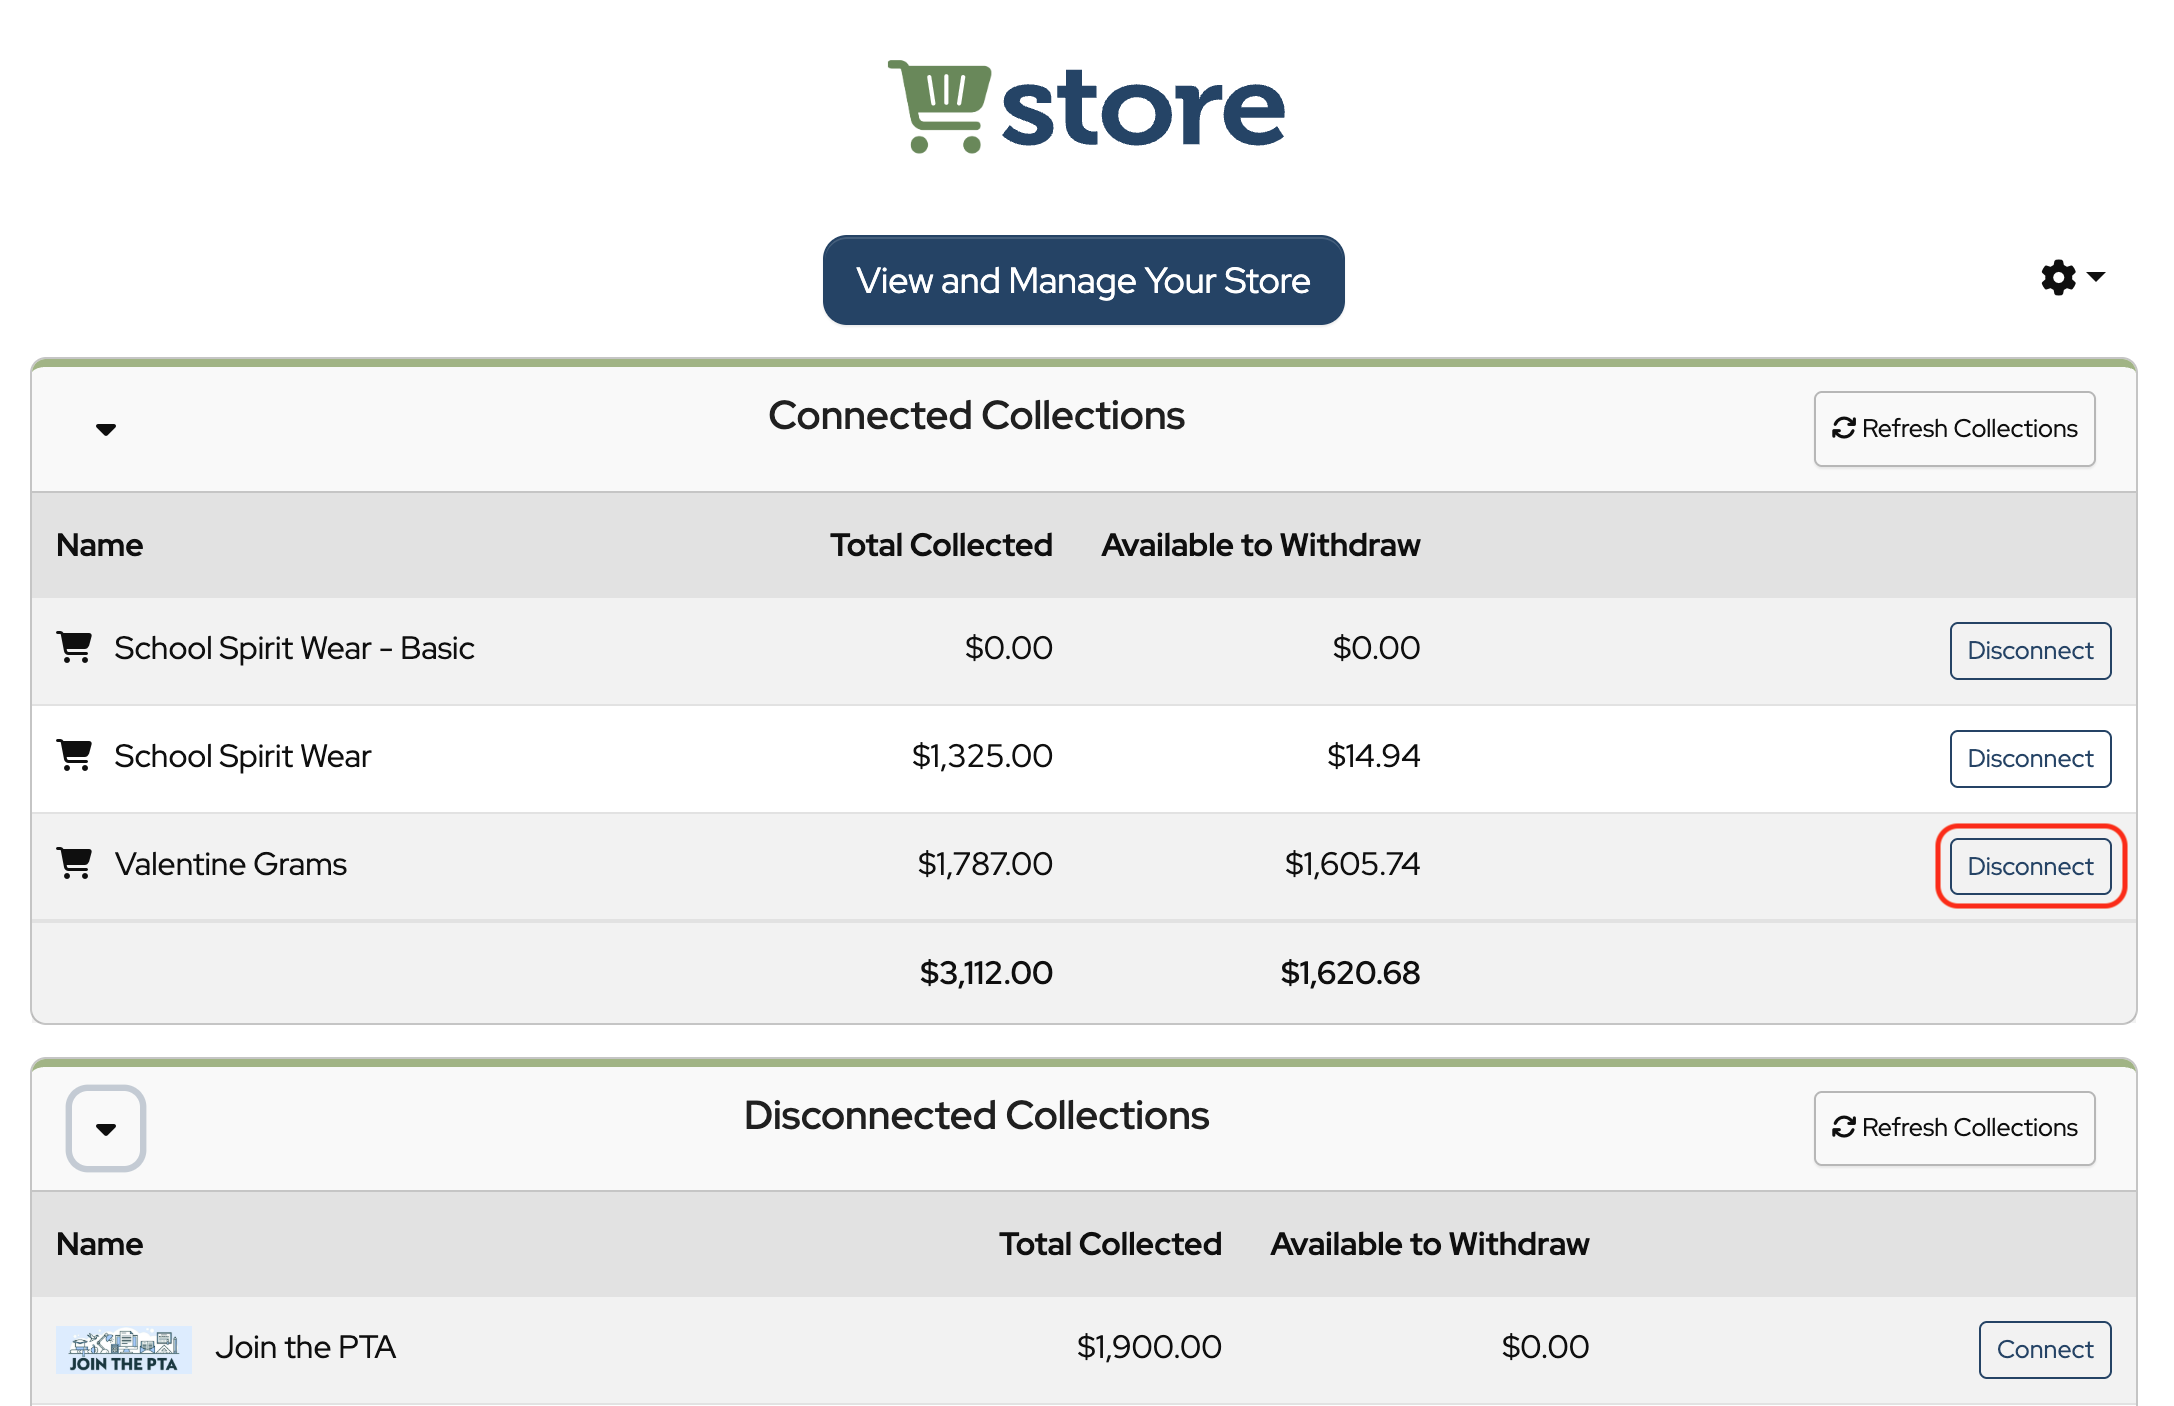
Click Connect if you want to open and import from the collection again.
If we take a cash payment in the cheddar up app, it imports but says “Transaction handled outside of Cheddar Up”. I can understand why I can’t import the cash transaction but is there a way to hide it or otherwise address it, so it doesn’t keep coming up as a transaction available to import?
Hi Sandra,
Yes, you can hide those transactions in the import screen by clicking the “eye” symbol to the left of the import button.
Is there a way to mass import transactions into one category? For instance we run a store for a fundraiser, and within that fundraiser the purchaser can purchase multiple items from different item types. When it is time to import the transactions we have to manually go through each sale and then manually assign the category for each item purchased. This is time consuming. Is there an easier, less time consuming way to do this?
Hi Jennifer,
There are a couple of things you could consider in this situation.
First, if you make your budget category names in MoneyMinder the same as the item names in your Cheddar Up store, the budget categories will auto-full when importing. You will still import each transaction individually, but the budget category will auto-fill which can save time.
The second thing you might consider is if you don’t need to track the details of each item, but only want to track the amount you make on the fundraiser, you can decide NOT to import each transaction from your Cheddar Up Store. Instead, you can just record the deposit in your bank account when you move the money from Cheddar Up and apply the whole deposit to the fundraiser category. This way it will all be applied to the fundraising category in one deposit instead of many individual transactions.
Which option you choose will depend on how much detail you would like to capture.
How do I import details into the contact field?
We are using this to collect membership fees and band fees, and I want to be able to track that reporting through MoneyMinder.
I don’t want to update each field individually, I want MoneyMinder to import the names into the contact field directly.
Hi Sean,
If you ask for members to enter a name when paying fees, then the name is usually brought in to the transaction when importing. If you need to apply the payment to a contact’s activity account for reporting, that has to be done manually in the transaction when importing.
Please feel free to chat with us during our business hours 8 am – 5 pm PT Monday – Friday if you have more questions.