Table of Contents
- Add a new financial year
- Copy your bank accounts from the prior year
- Set up your budget
- Enter Transactions & Attach Receipts
- View Some Reports
- Add Users
- Set Up Your Own Custom Store
- Upload Documents
1. Add a new financial year
If you haven’t already done so, add a new financial year by clicking on Financial Year and selecting Add new financial year.
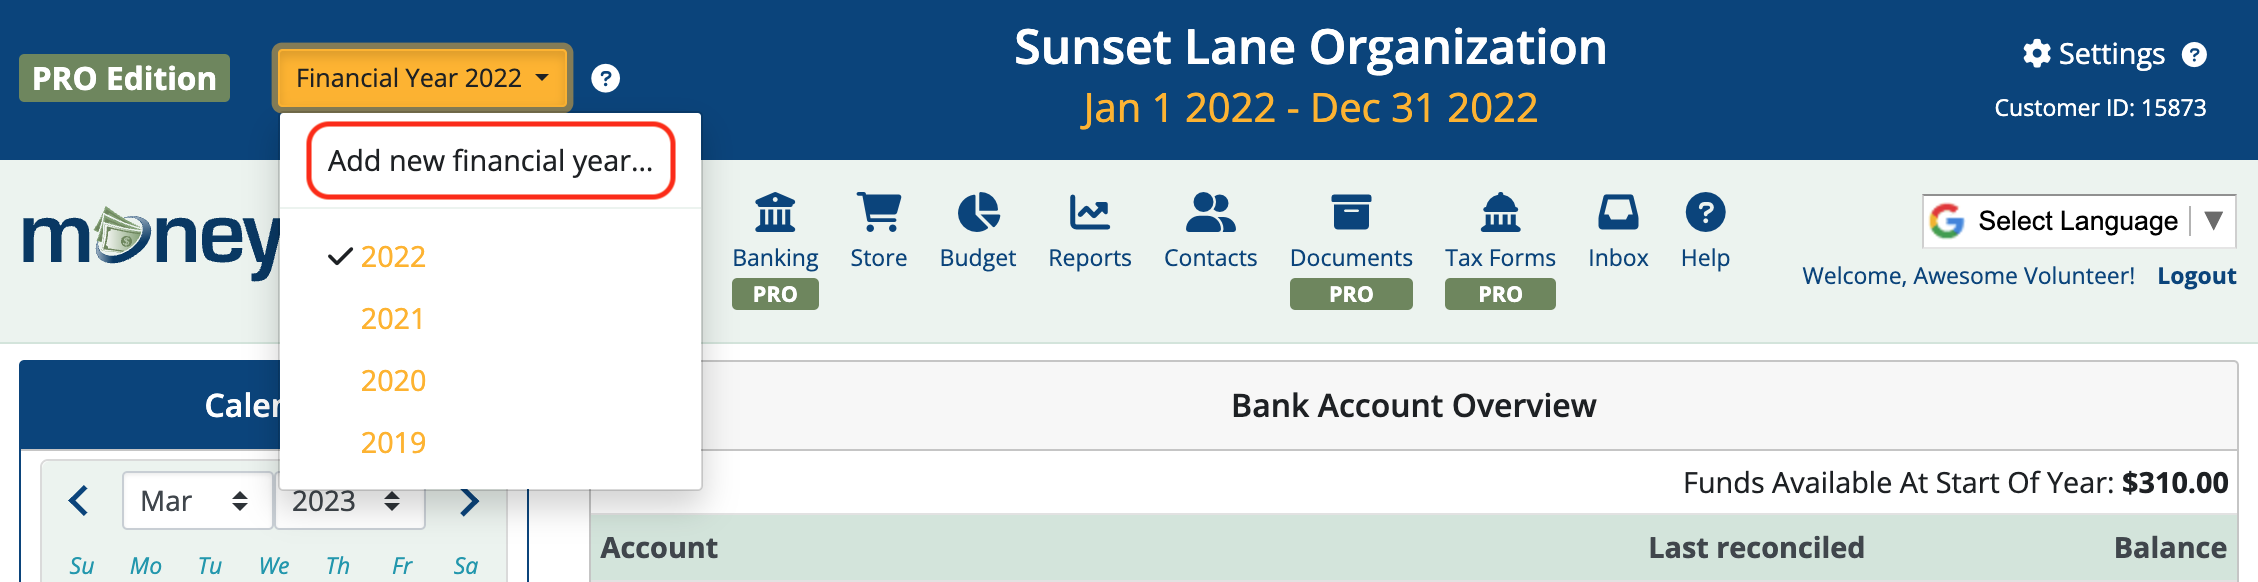
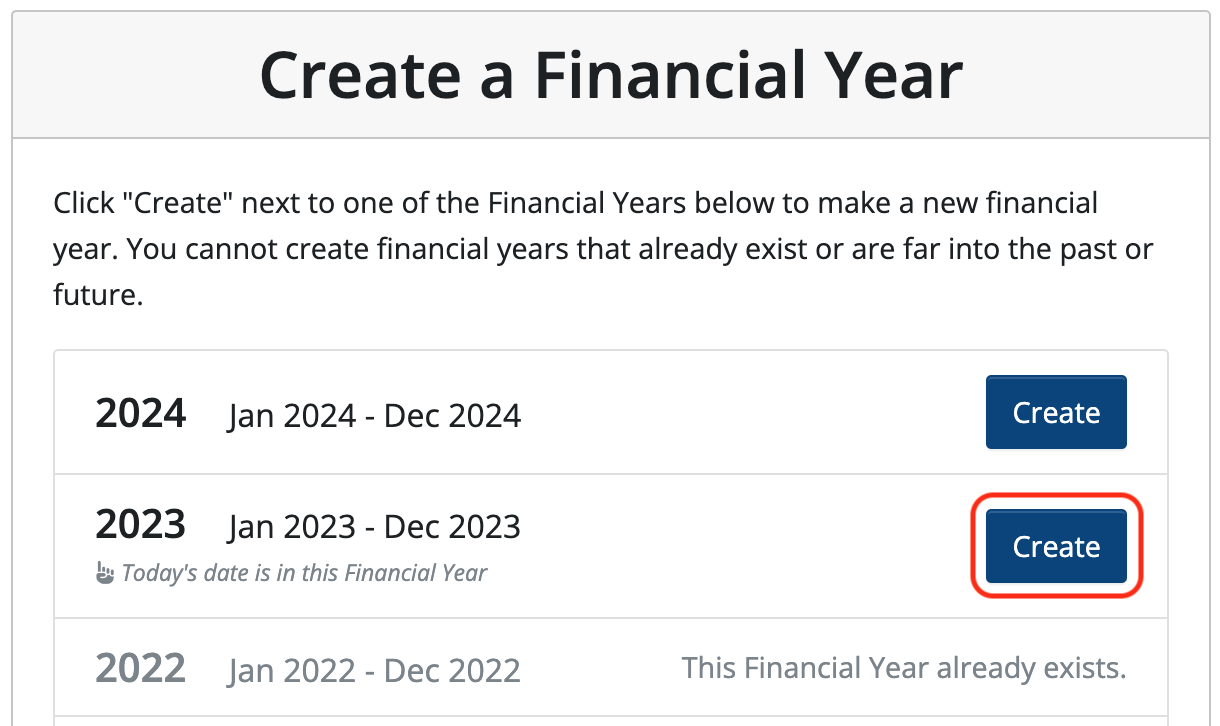
Identify the year you’d like to add and click Create and then click Done.
You should be able to see the financial year here along with the range that financial year covers:

2. Copy your bank accounts from the prior year
Click the Banking icon in the toolbar.
![]()
MoneyMinder allows you to select which bank accounts you would like to copy into your new financial year. If your accounts are reconciled thru the end of your previous financial year, all uncleared transactions and bank balances will copy forward.
Select all or select only certain bank accounts to be copied.

Click the Copy Bank Accounts button when you’ve made your selections.

To carry forward bank balances and uncleared checks, click the Details button to the right of the bank account.
Note: If you see the green words “Carry forward from prior year is possible” and double arrows above the Details button, that means you are reconciled through the end of the last financial year and can carry forward the banking into the new financial year.

Click the Carry Forward Last Year’s Account Information button.

Click Save.
Set up new bank accounts:
Click on the Banking icon in the toolbar.
![]()
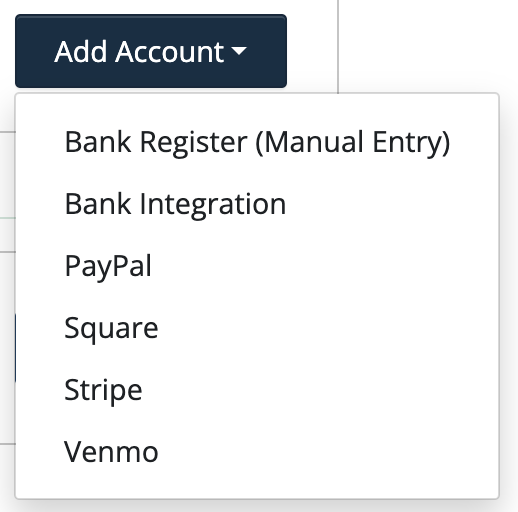
Click the Add Account dropdown.

Choose which type of account you would like to add from the dropdown list.
Enter the bank account name and starting balance at the beginning of your financial year. This should be taken directly from your bank statement.

Click Add Uncleared Deposit or Add Uncleared Withdrawal to enter outstanding checks or deposits that were written in the prior financial year but did not clear the bank until after the start of the new financial year.
![]()
Note that entries you make in this section do not affect your current year numbers at all. They are here as placeholders for the bank reconciliations. This is a security measure. It is most transparent to enter the bank statement opening balance, which is easily verifiable, and then enter any known outstanding items to arrive at a true starting balance for the year.
For uncleared deposits: Enter the date, who the money was received from, the amount, and a reference number if any. Continue to do this for every deposit that you show as being made in your previous year that did not show on the bank statement.
![]()
For uncleared withdrawals: Enter the date, who the money was paid to, the amount, and a check or reference number if any.
![]()
When you’re finished adding uncleared transactions, click Save.
3. Set up your budget
From the home page, click the Budget icon.
![]()
You can create your budget using one of the following:
- Copy one of your existing budgets.
- Select one of MoneyMinder’s templates.
- Add a budget from scratch.
Note: Once you save your selection you will not be able to start over.
Definitions:
Headings give structure to your budget. These are used to organize broad activities. Budgets typically include headers such as: Fundraising, Administration, Programs.
Subheadings further group similar activities within that broader heading. For example, you might have a heading for Fundraising with a subheading for a particular fundraiser you want to track in more detail (eg walk-a-thon, purple pinkie project, bingo).
Categories are the detailed areas of the activity you want to track (eg ticket sales, awards).
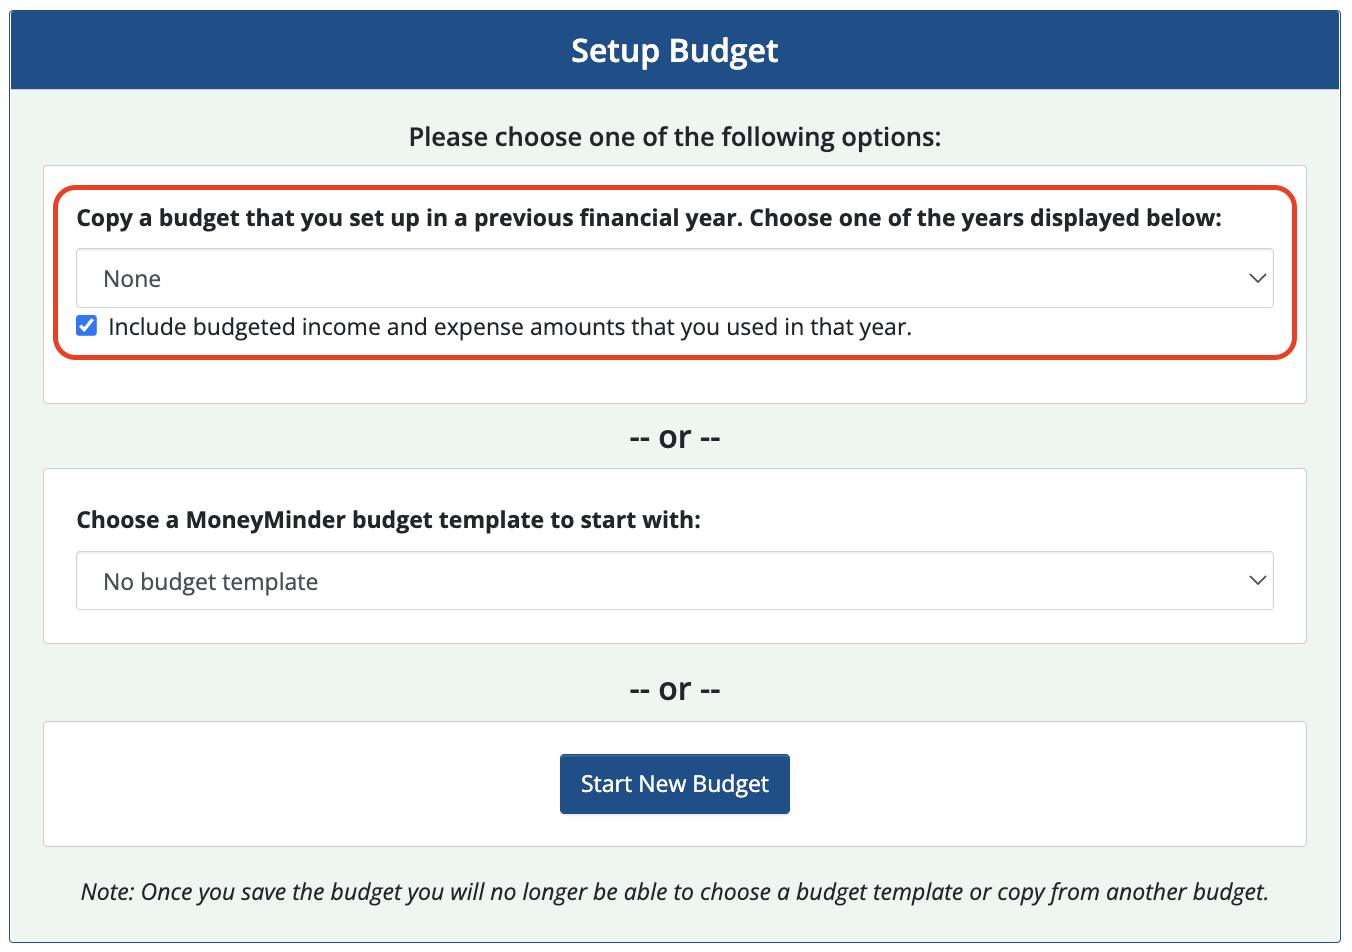
Copying an existing budget:
Select the budget you want to copy from the dropdown menu that says Copy a budget that you set up in a previous financial year. Choose one of the years displayed below:
This will allow your group to copy a budget from a prior year.
Modify this budget to reflect any changes and click Save.
Making changes to a budget that’s been copied from a prior year will NOT affect the financial year the budget was copied from.
Note: Unchecking “Include budgeted income & expense amounts that you used in that year” before selecting the budget you want to copy will copy only the heading, subheading, and category names.
Selecting a budget template:
Select a budget template from the “Choose a MoneyMinder budget template to start with” drop-down menu:
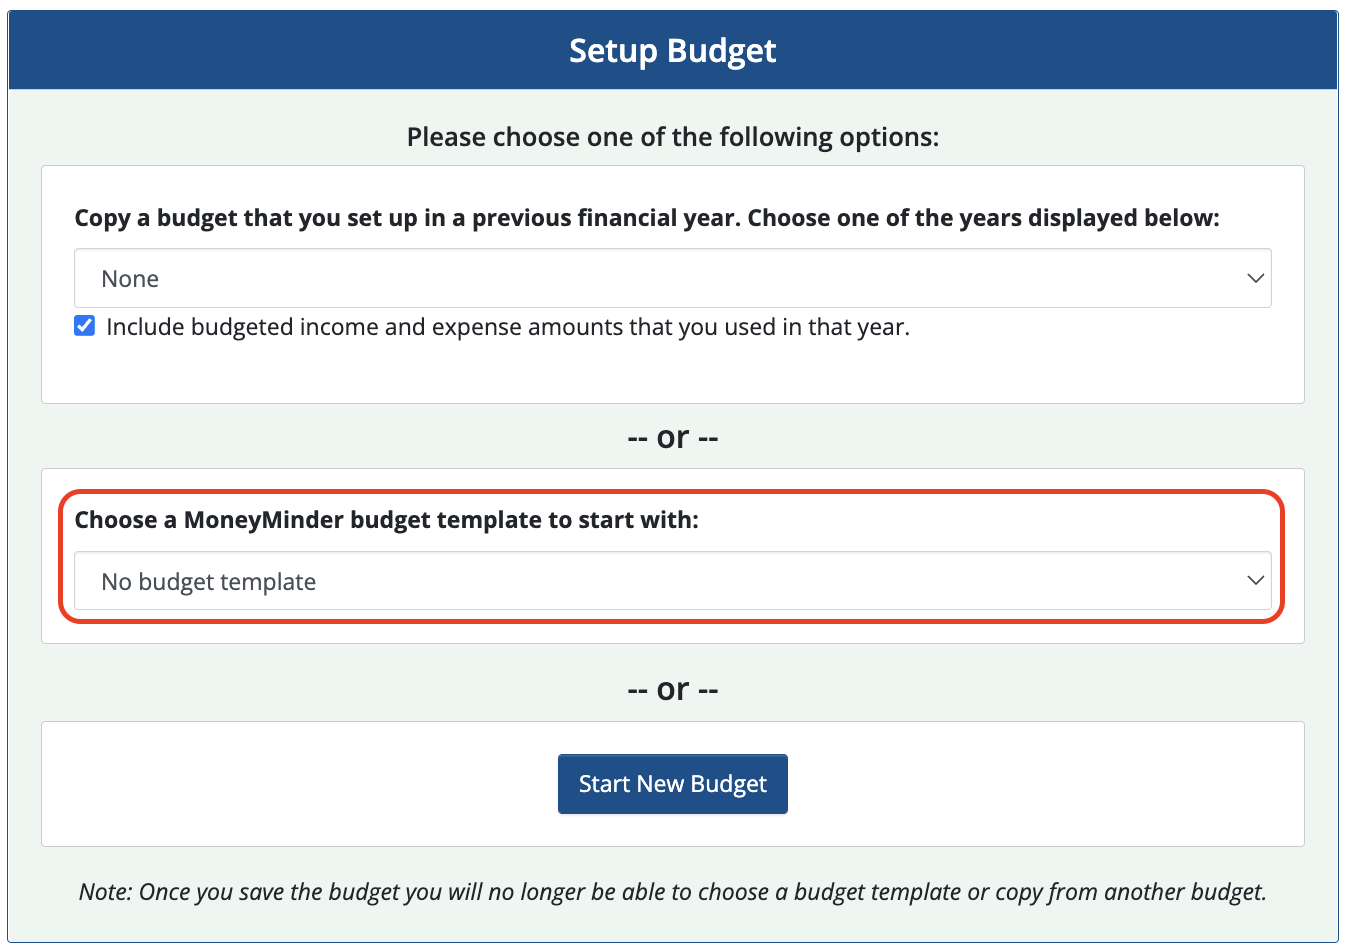
Modify this template to suit your needs by deleting items that are not relevant to your group and adding items that are.
Click Save when done.
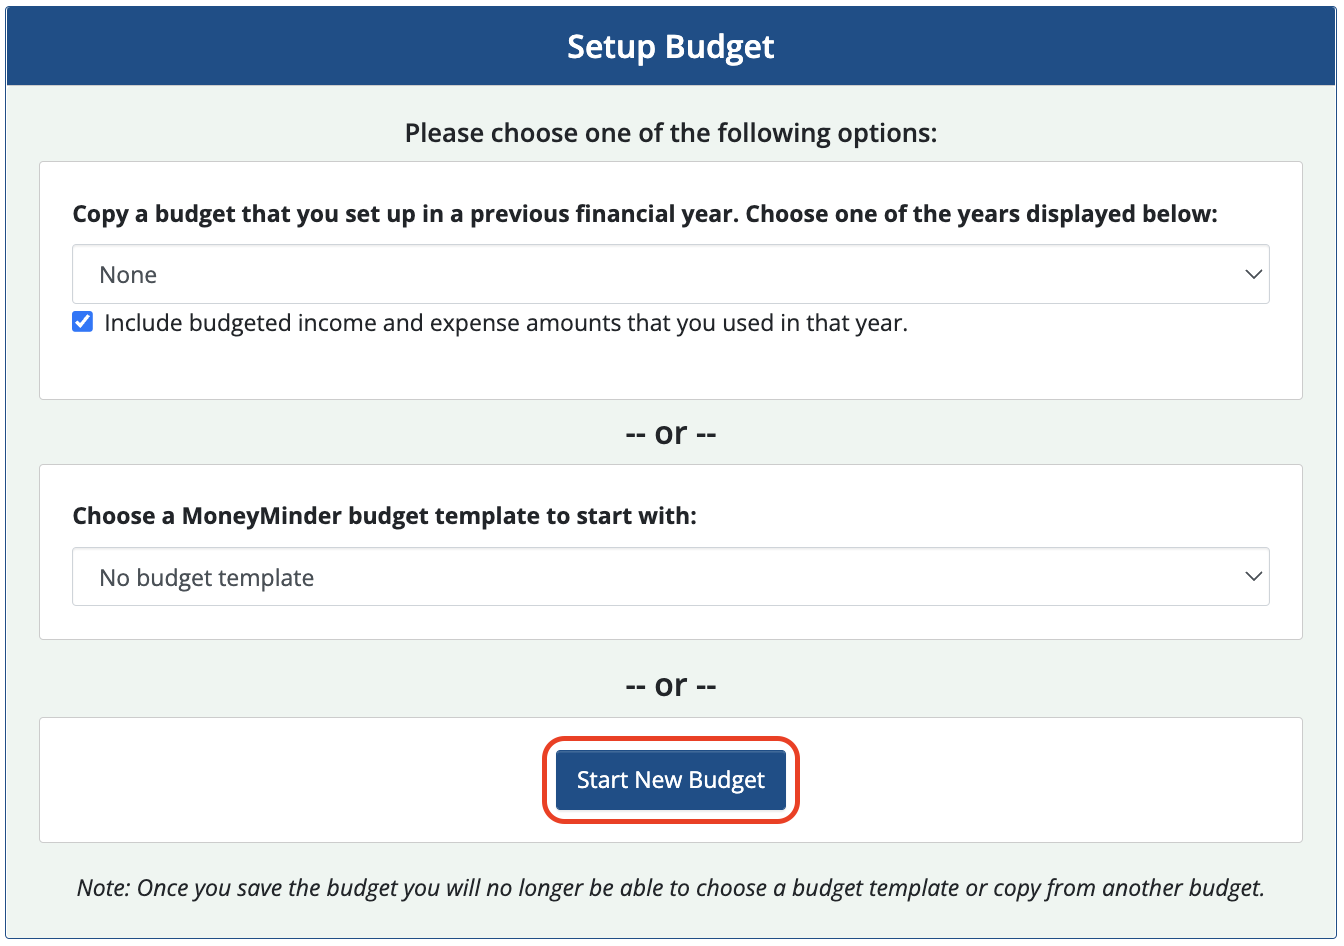
Adding a budget from scratch:
Click Start New Budget to begin creating your new budget.
Type the name of your first heading (eg Fundraising).
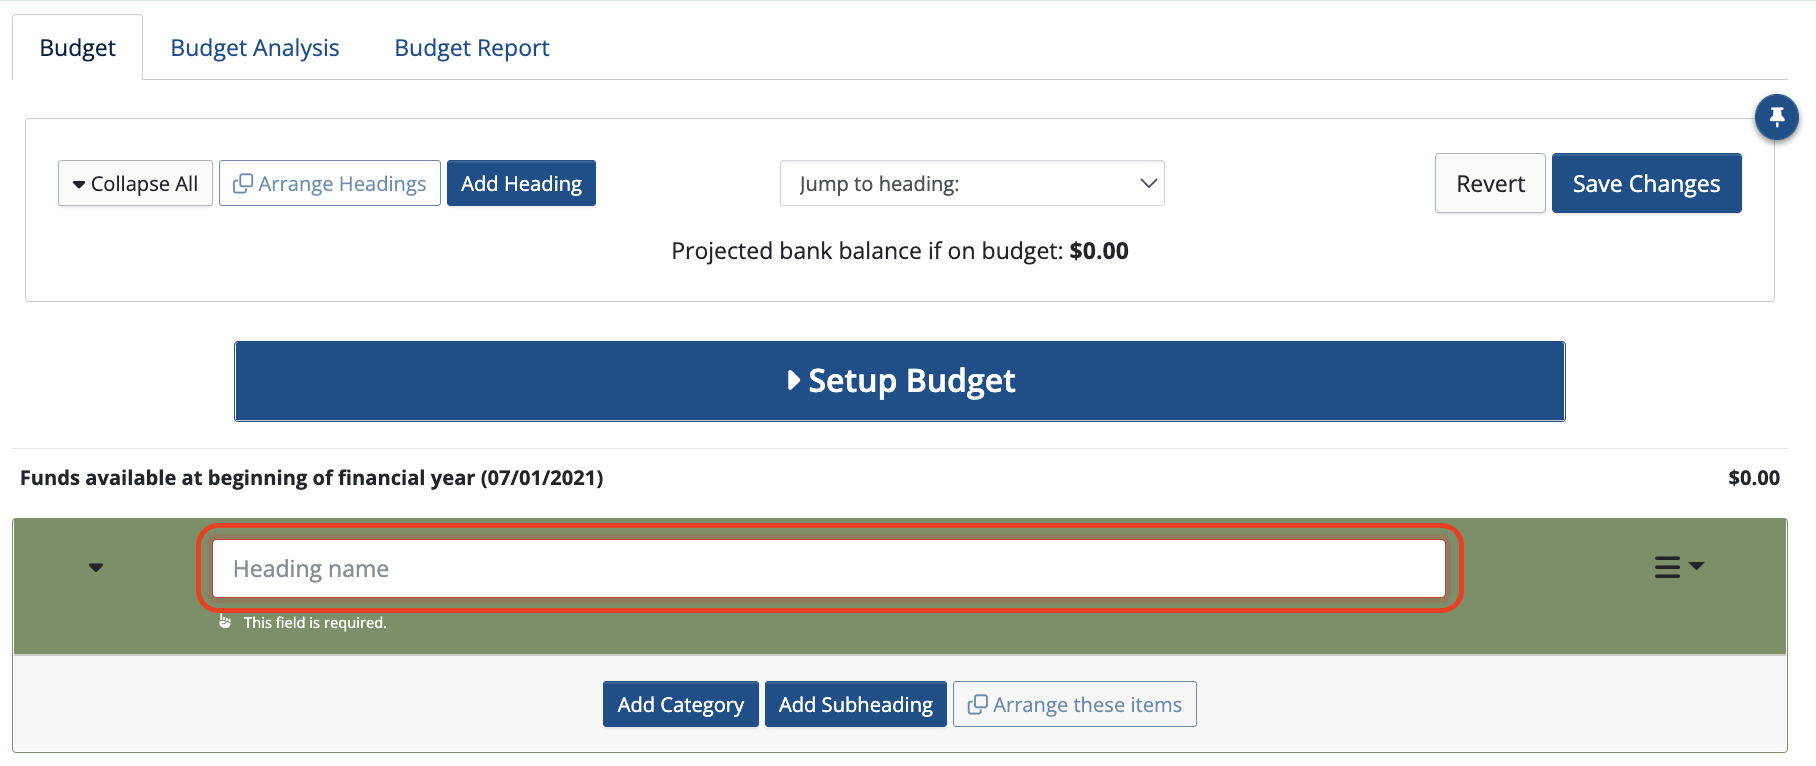
Continue creating your budget by adding additional headers, subheaders, and/or categories.
To delete a category:
- Click the More> button to the right of the Budget Net column.
- Then click the Delete button.
- Click Save Changes.

To delete a heading:
- Click the Delete button to the right of the heading name. Note, that you can only delete a heading if there are no categories or subcategories listed beneath it.
- Then click Save Changes.

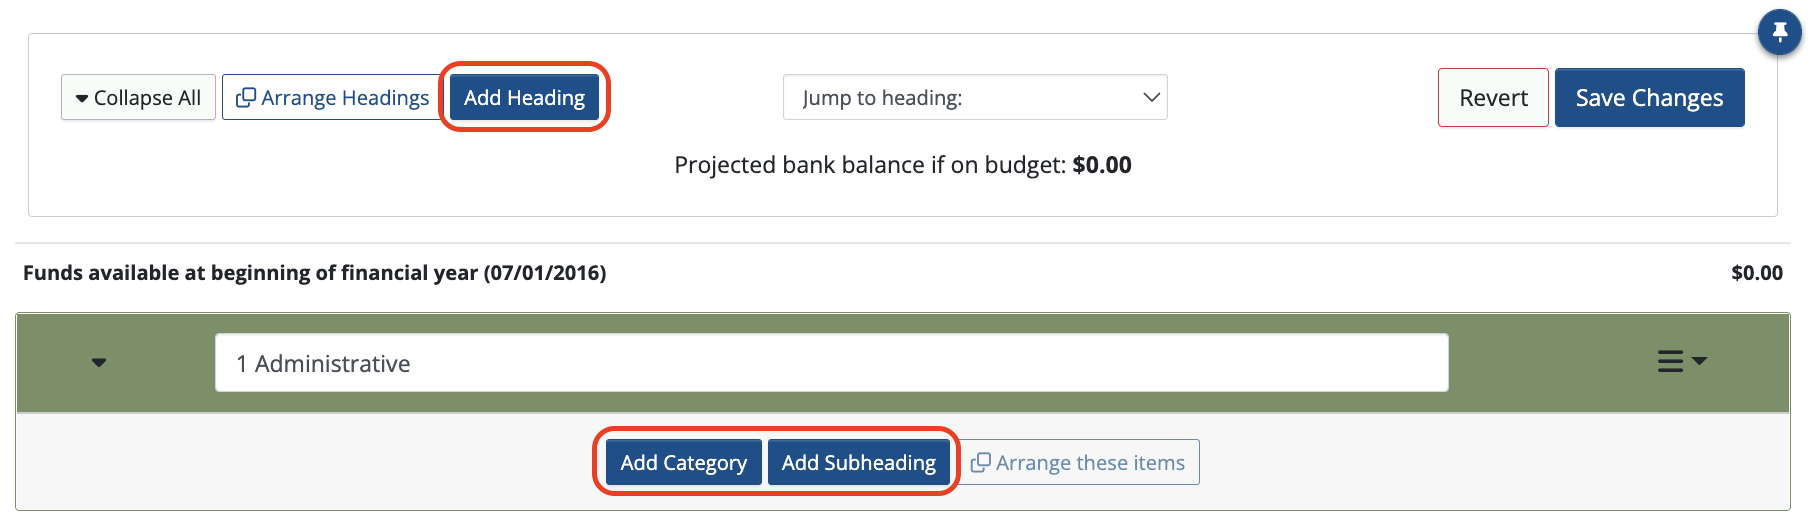
To add a heading, subheading, or category:
- Click on the corresponding button.
- Click Save Changes.
To move a heading:
- Click Arrange Headings in the static toolbar at the top of the screen or click and drag the item to the position you prefer.
- Click Save Changes.

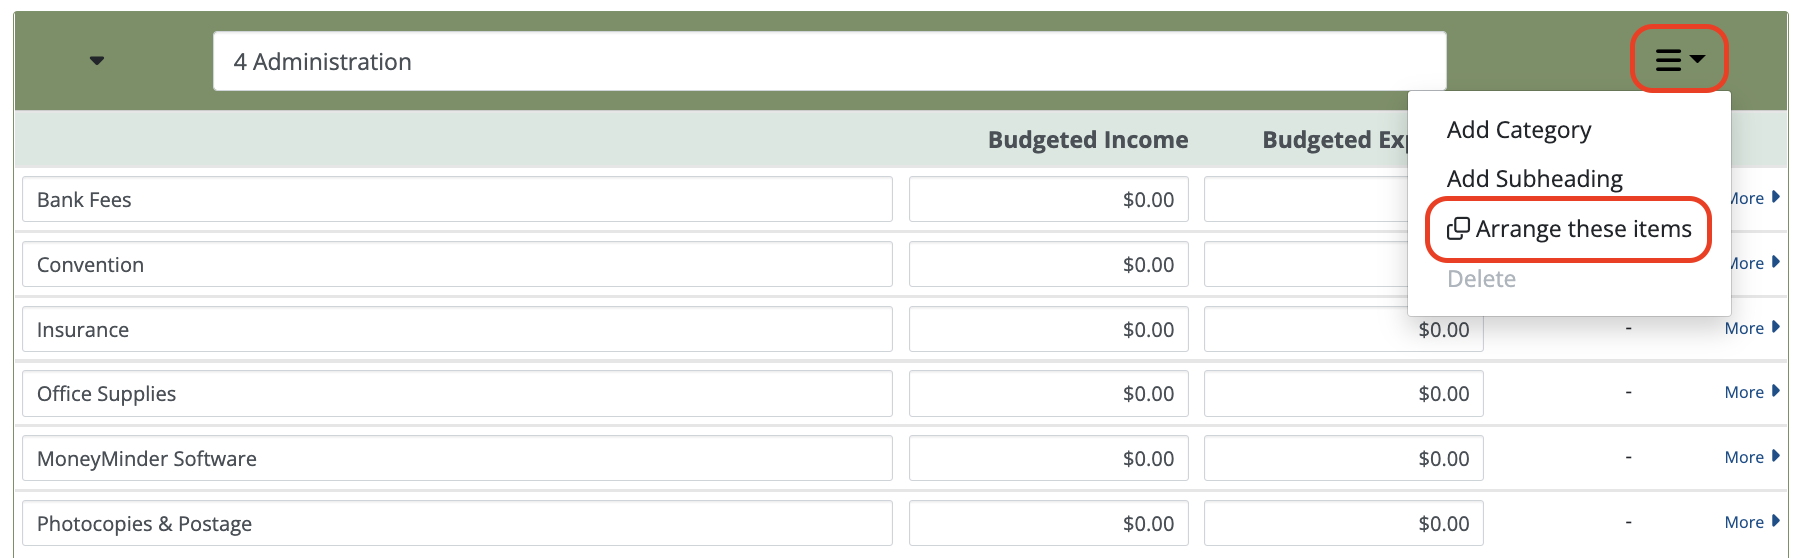
To move a category:
- Click Arrange these items to the right of the Header that it’s located within and use the Alphabetize button or the up/down arrows to re-order these or click and drag the item to the position you prefer.
- Click Save Changes.
4. Enter a few transactions & attach receipts
To enter a DEPOSIT
Click the Banking icon in the toolbar.
![]()
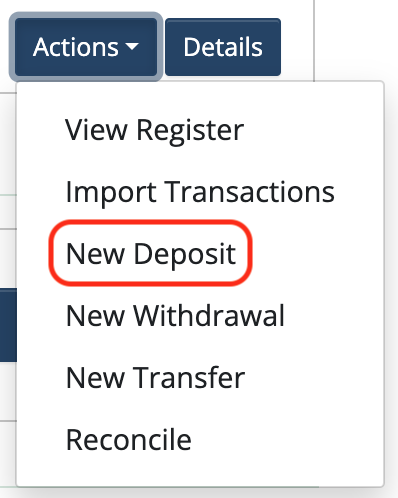
Select the bank account you’d like to apply the deposit to, then click the Actions dropdown menu to the right of the bank account.

Choose New Deposit from the dropdown.
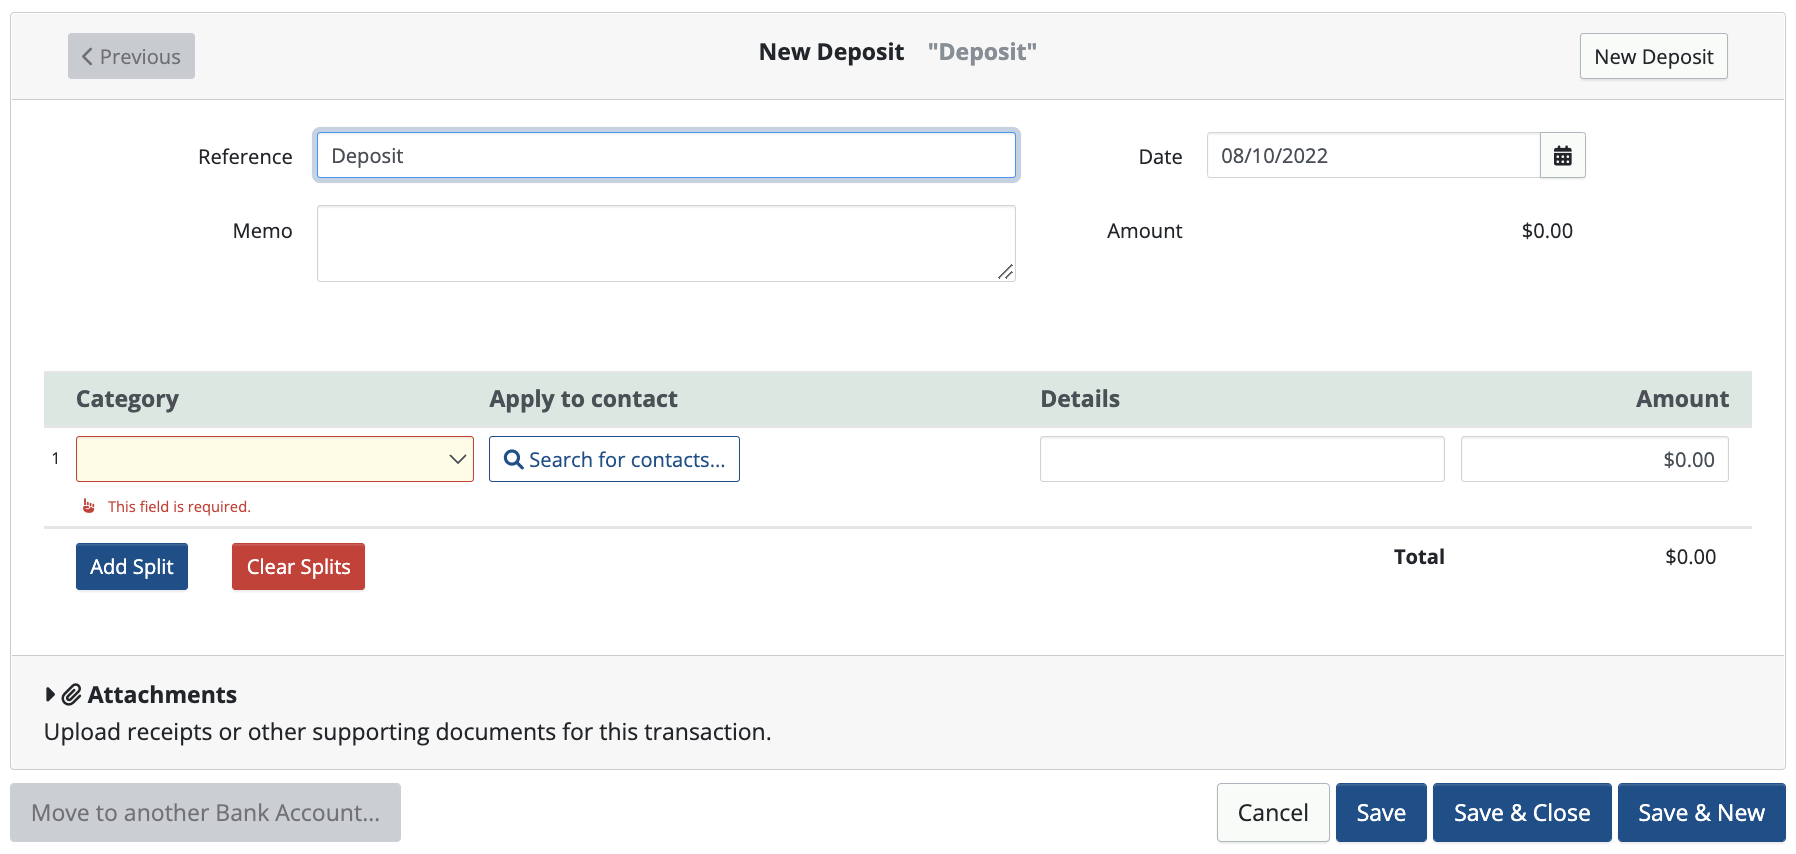
Fill in the required fields:
- Reference: Type in the identifying reference number you’d like to assign. Defaults to “Deposit” unless you overwrite it or use the type-ahead feature for your commonly used reference names.
- Date: Date deposit is created.
- Memo (optional): Use up to 512 characters to create a reminder about this deposit. The memo will show in the register.
- Amount: Total amount of deposit.
- Category: Select a category from the drop down list or add a new one. These are the budget items you entered in the Budget screen.
- Apply to Contact (optional): Select a name from the drop down list to apply the deposit to an individual’s account.
- Details (optional): Use up to 255 characters to create details about this deposit.
- Amount: Enter the amount for this portion of the deposit.
Click Add Split to add more lines to allocate various parts of a deposit to different categories. These split amounts must equal the total in the Amount field.
Click Clear Splits to delete information entered in all split lines for this transaction.
To attach a receipt to a deposit click on Attachments.
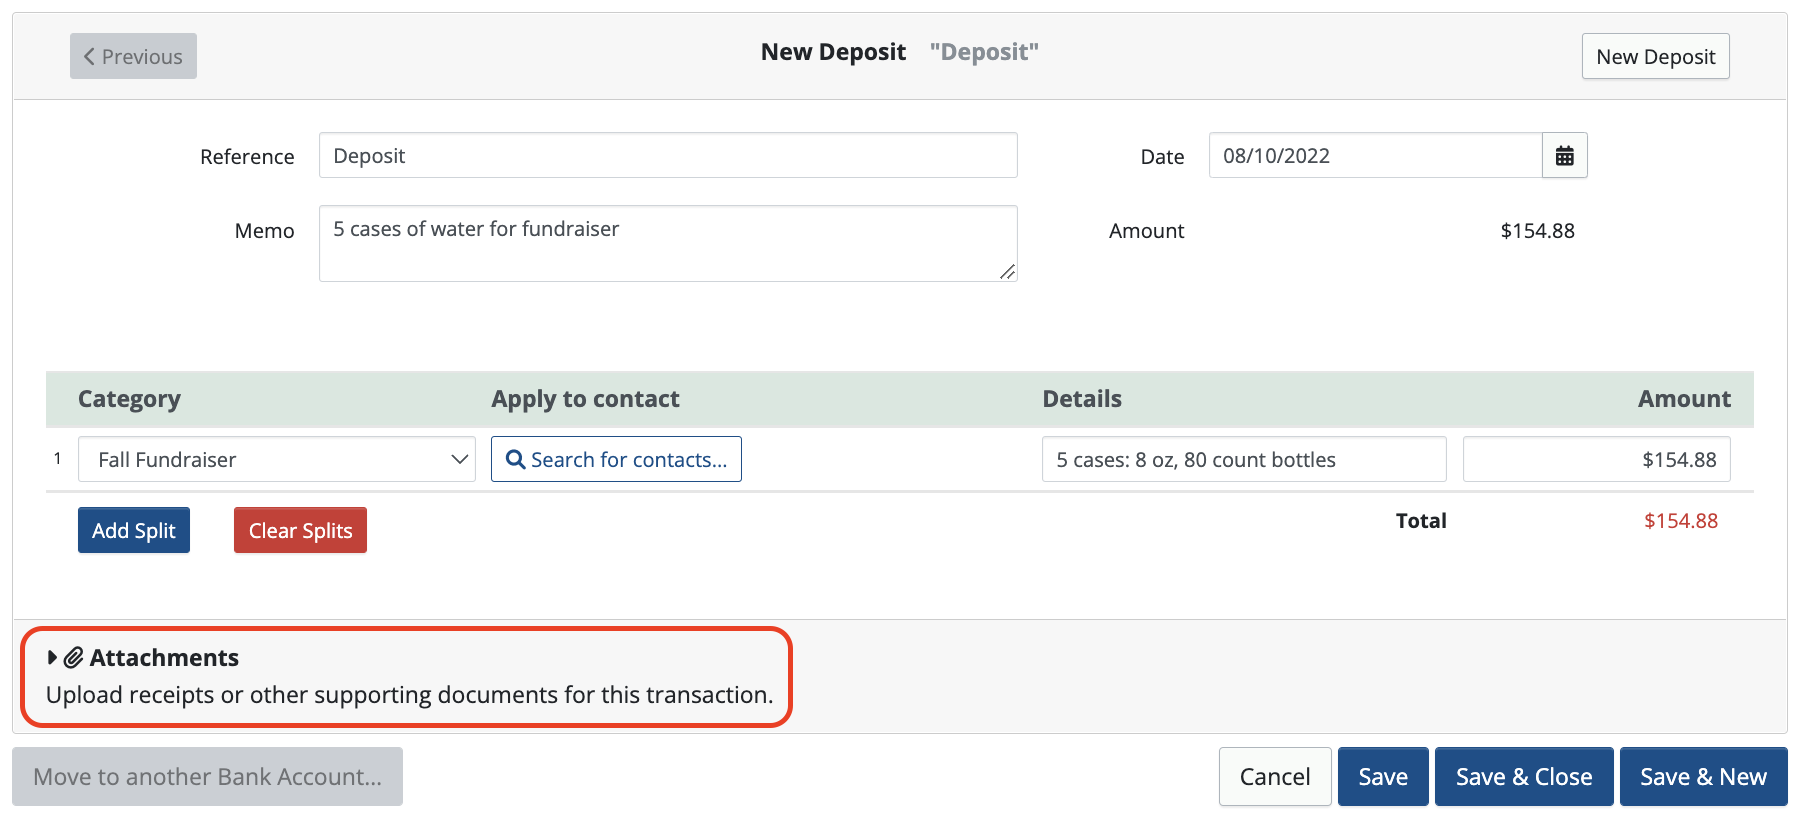
Either drag & drop a file inside the dotted line OR click Choose Files to search for one.
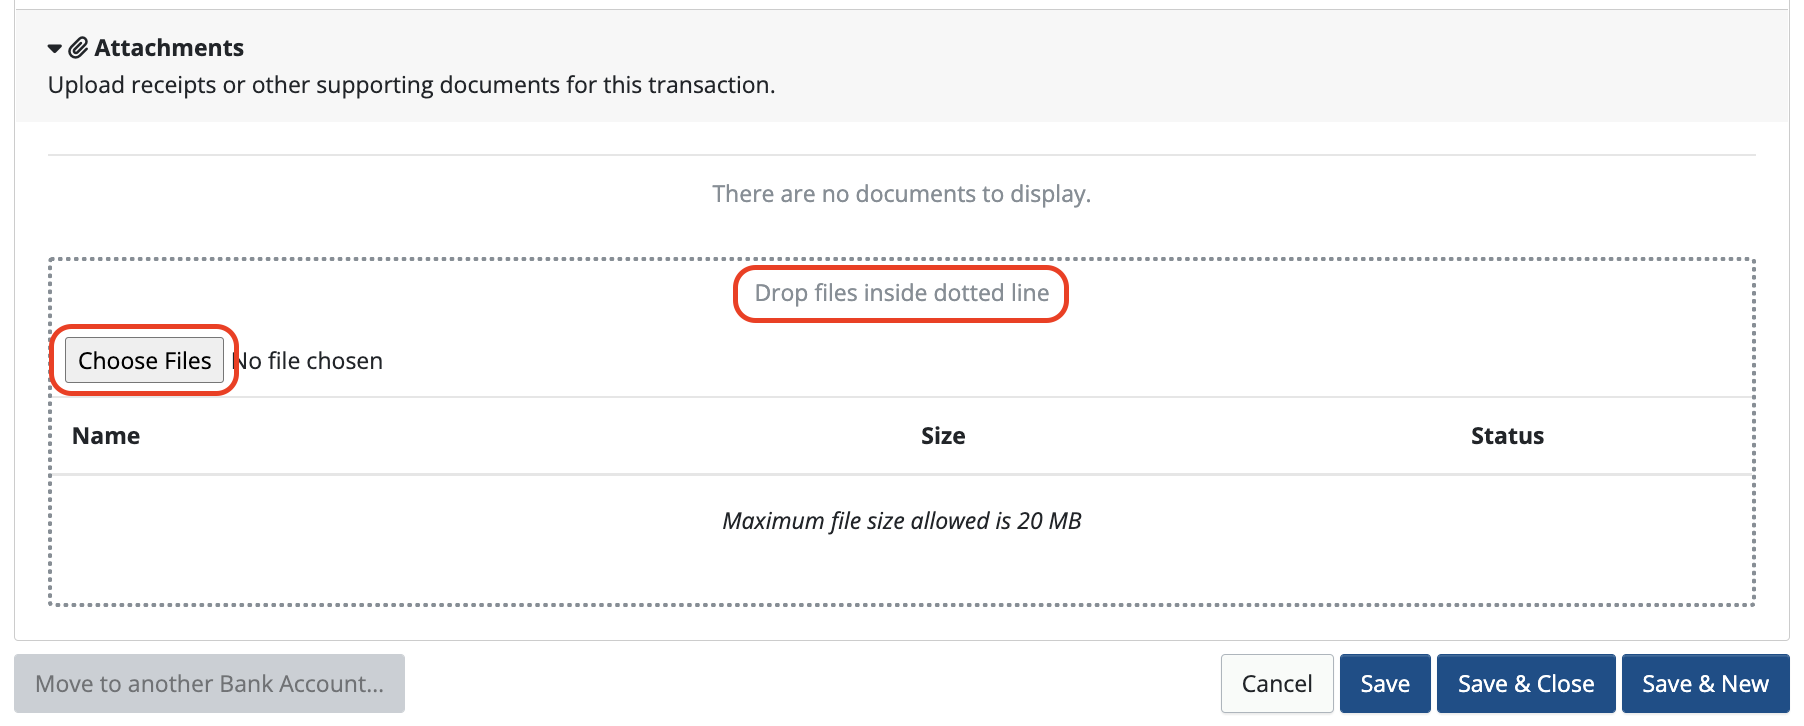
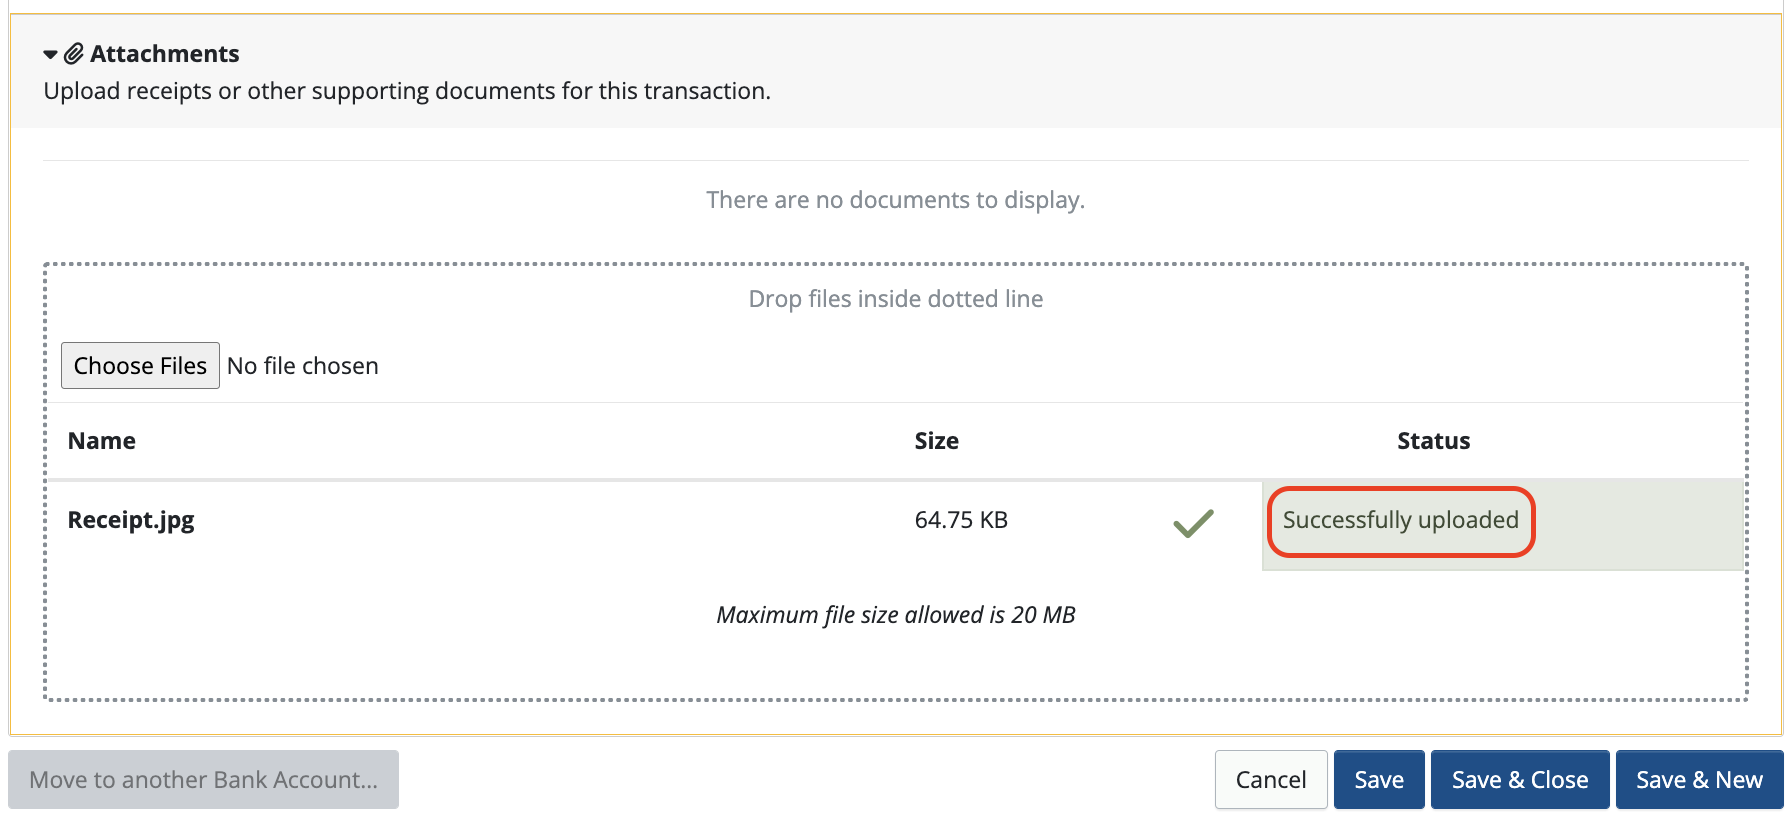
Confirm that it’s been successfully uploaded.
When finished click one of the following:
- Cancel to cancel the deposit in progress and return to the Banking page.
- Save to save an in-progress transaction.
- Save & Close saves the transaction and closes the window taking you back to the Banking tab.
- Save & New saves the transaction and opens a new window to enter another deposit.
To enter a WITHDRAWAL
Click the Banking icon in the toolbar.
![]()
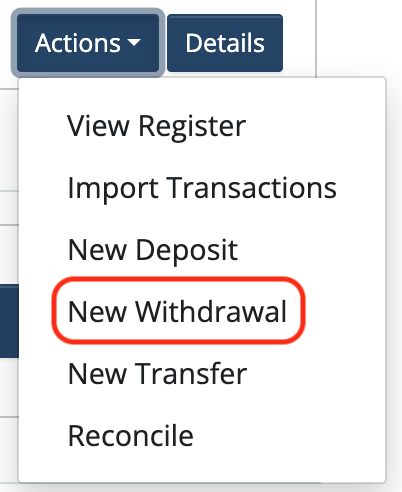
Select the bank account you’d like to apply the withdrawal to, then click the Actions dropdown menu to the right of the bank account.
Choose New Withdrawal from the dropdown.
Fill in the required fields:
- Check #/Reference: Check number from your check or identifying reference number you’d like to assign.
- Date: Date check is written or withdrawal is made.
- Paid to: Either select a name from the drop down menu or enter the name of the person/organization/description the withdrawal is payable to.
- Amount: Total amount of withdrawal.
- Memo (optional): Use up to 512 characters to create a reminder about this withdrawal. The memo will show in the register.
- Category: Select a category from the drop down list or add a new one. These are the budget items you entered in the Budget screen.
- Details (optional): Use up to 255 characters to create details about this withdrawal.
- Amount: Enter the amount for this portion of the check.
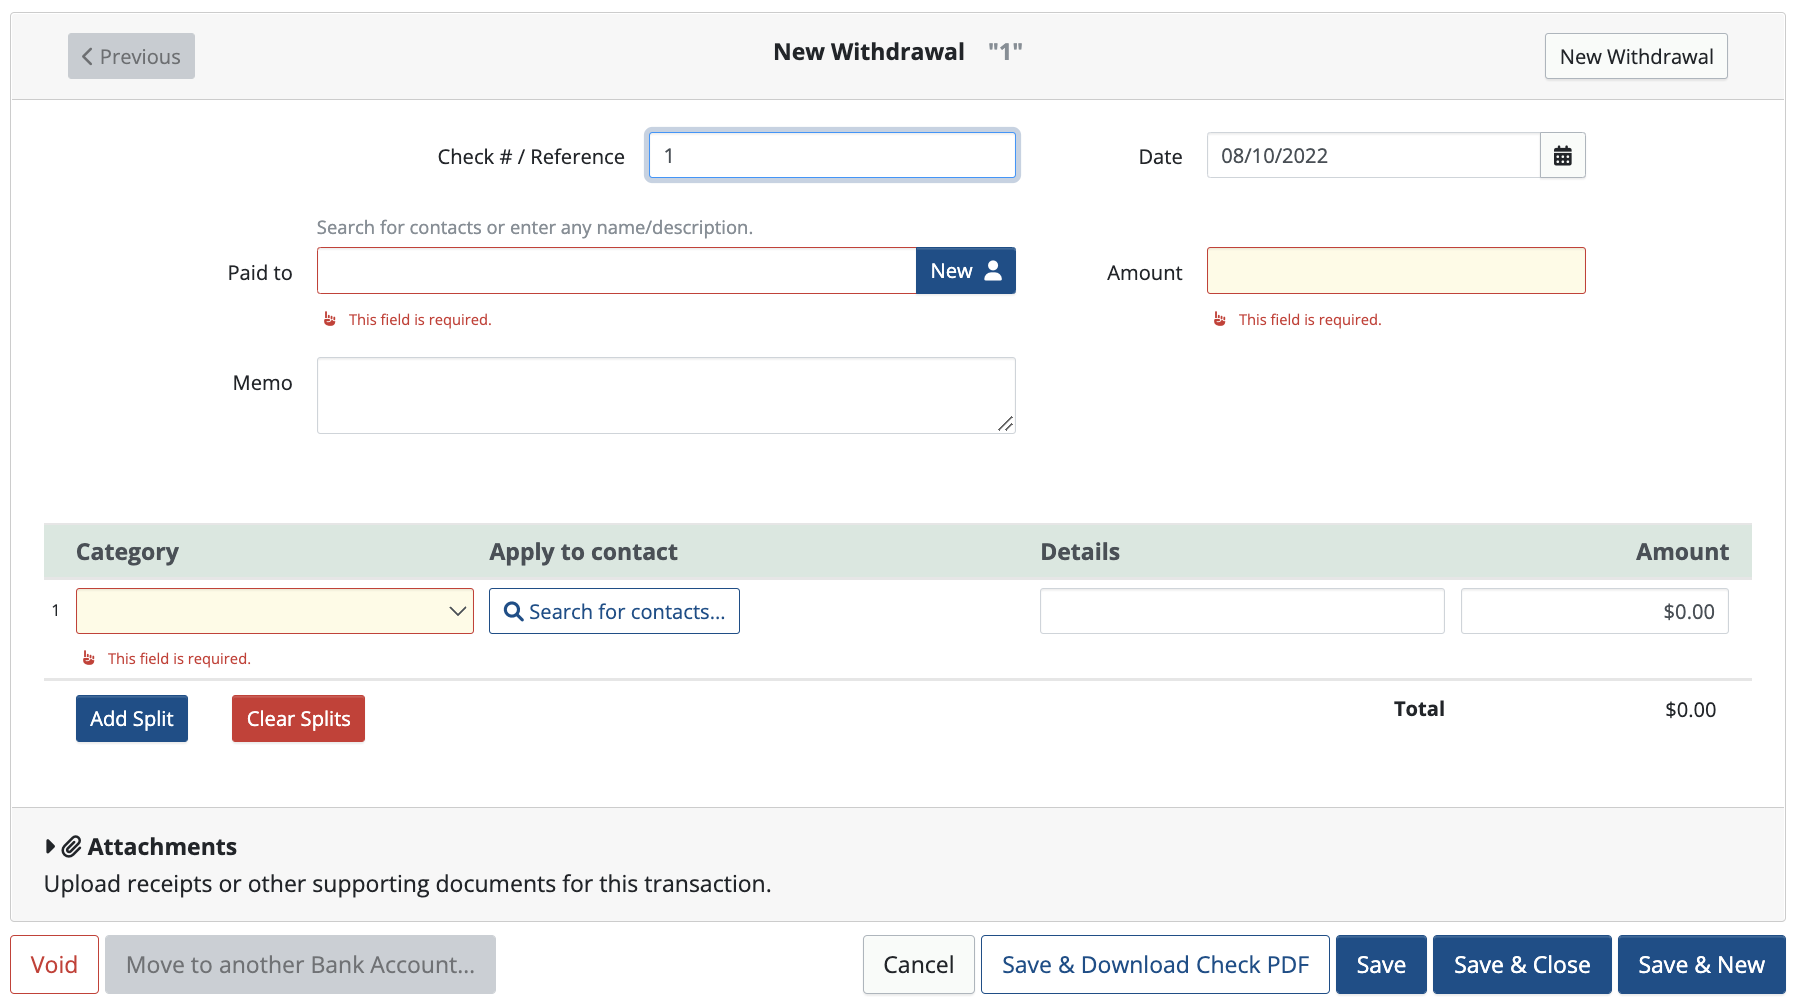
Click Add Split to add more lines to allocate various parts of an expense to different categories. These split amounts must equal the total in the Amount field.
Click Clear Splits to delete information entered in all split lines for this transaction.
Click Void to save a check that is not disbursed, maintaining your check sequencing. This also keeps record of the check since it will not clear your bank.
To attach a receipt to a withdrawal click on Attachments.
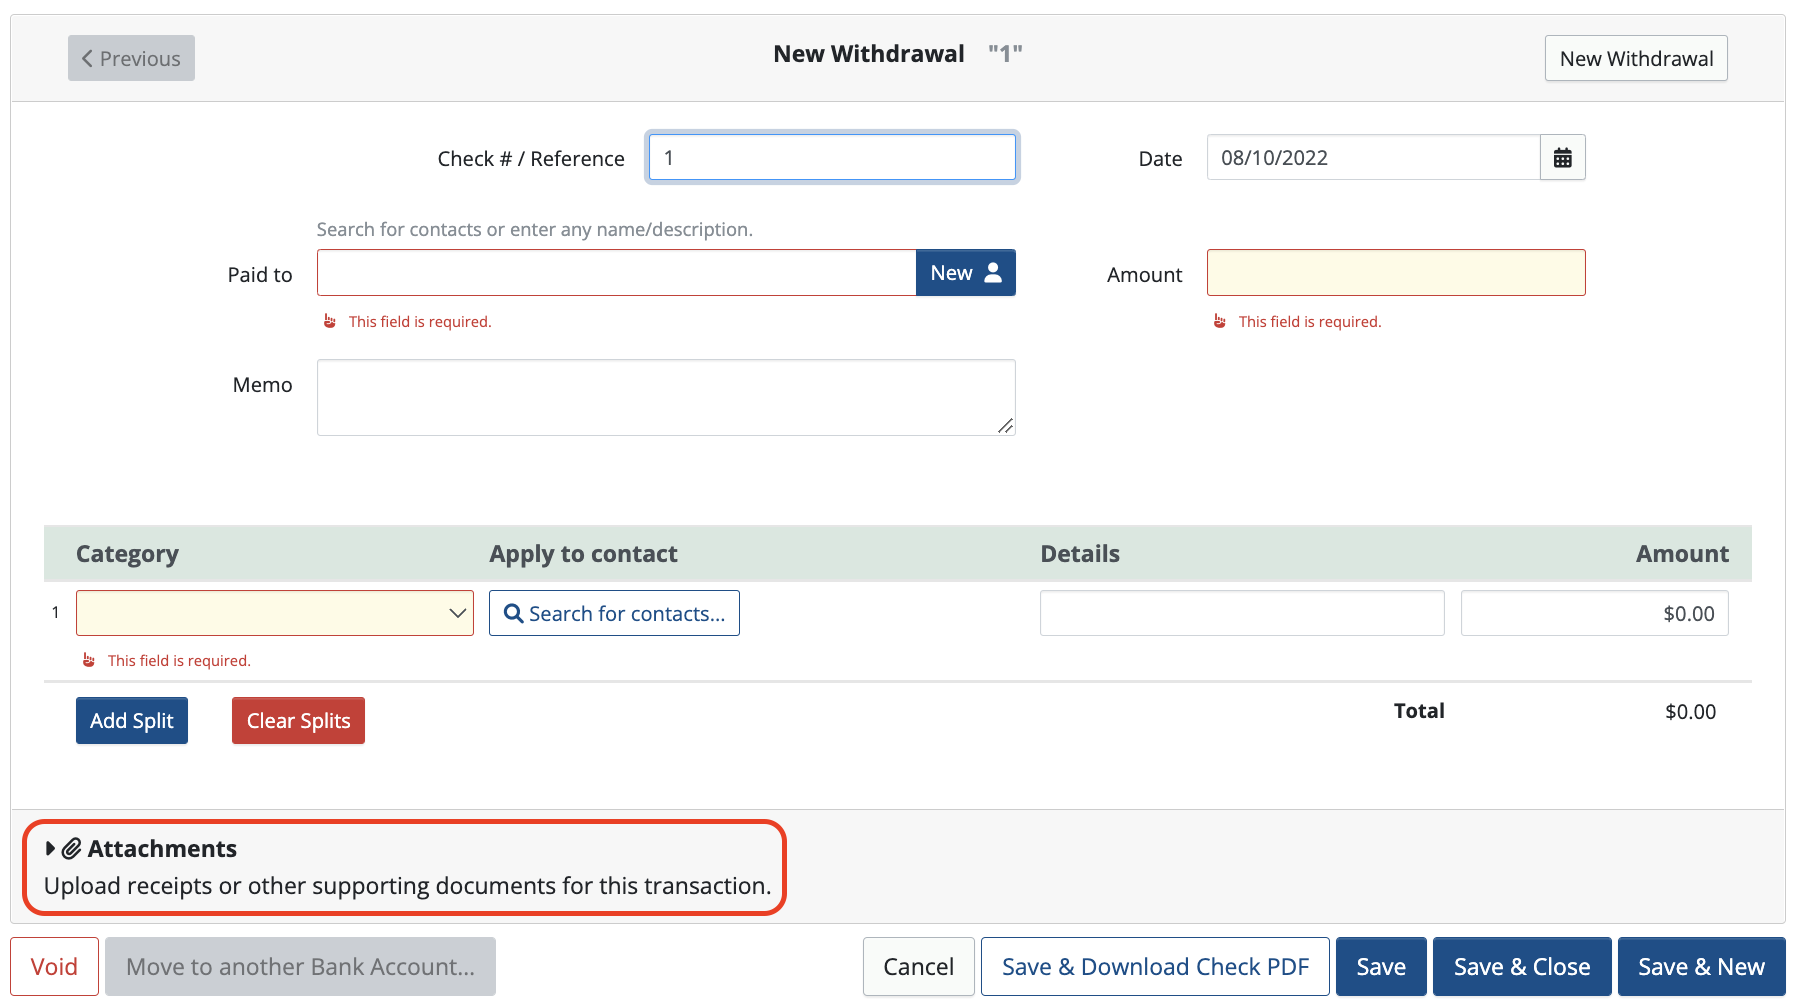
Eiher drag & drop a file inside the dotted line OR click on Choose Files to search for one.
Confirm that it’s been successfully uploaded.
When finished click one of the following:
- Cancel to cancel the withdrawal in progress.
- Save & Download Check PDF saves the entry in MoneyMinder and simultaneously downloads a PDF to your hard drive for printing purposes.
- Save & Close saves the transaction and closes the window taking you back to the bank register.
- Save & New saves the transaction and opens a new window to enter another withdrawal.
5. View Some Reports
MoneyMinder includes several dozen click-of-the-mouse reports. You’ll find them by clicking on the Reports icon in the toolbar.
![]()
Then click on the one you’d like to view either from the sidebar or in the main list.
Notice that once you run the report you have the option to Print, Export to PDF, or Export to Excel:

Here are some of our most popular reports:
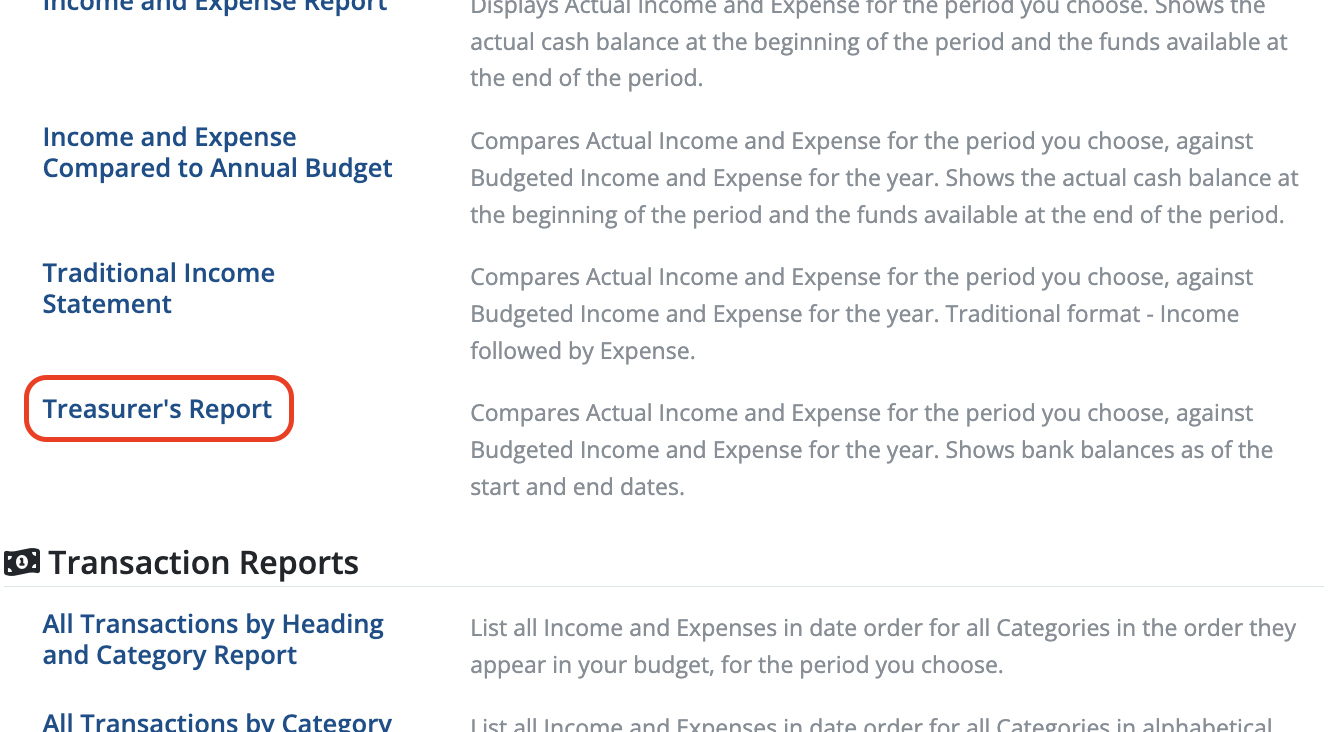
The Treasurer’s Report
Many Treasurers take this report to their monthly meeting as it provides total income & expenses against budget for the time period you choose. It also shows bank balances as of the start & end dates.
The Budget Report
Displays the Budget for the year. Shows the actual balance carried forward from last year and the projected budgeted carry forward to next year.
Reconciliations Report
Displays detailed information for each bank reconciliation for the Bank Account you choose.
All Transactions by Category Report
List all Income and Expenses in date order for all Categories in alphabetical order, for the period you choose. You can also choose to show only selected categories.
The Audit Report
Summary report comparing Bank Statement balances to your MoneyMinder balances to ensure that they match.
Check out these reports and others to see what’s available to you.
6. Add Users
You may give as many users as you’d like access to your MoneyMinder account. The level of access is determined by a person’s Role that you select.
Click on the Settings button in the upper right-hand corner.

Scroll down to the Users section of the page to add, edit or delete a user. As well as to assign their role in MoneyMinder.
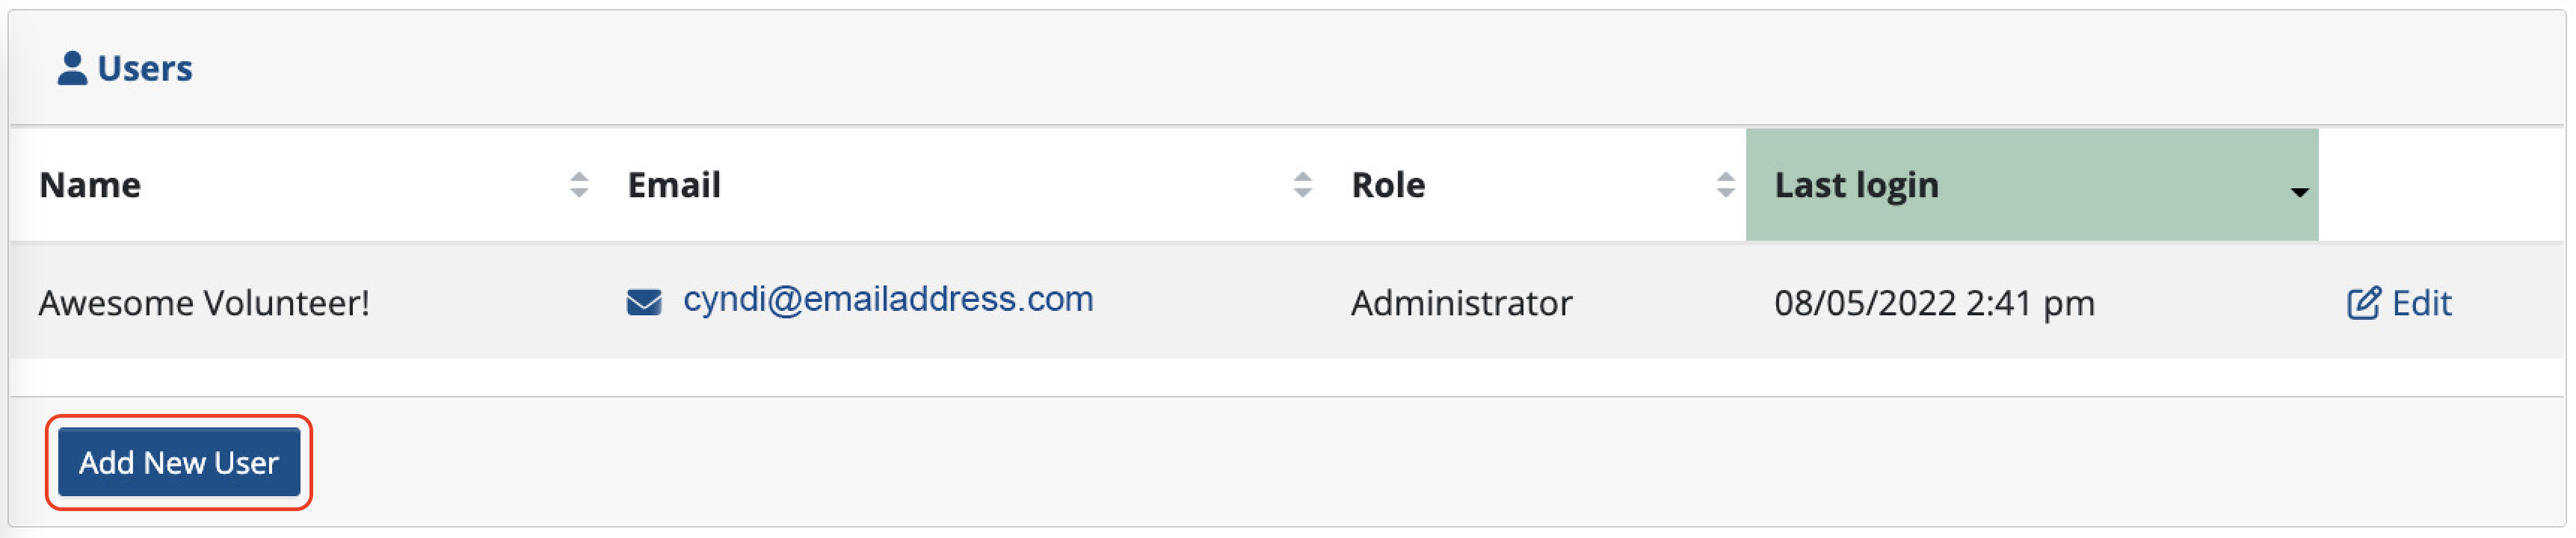
To add a new user:
Click Add New User:
Enter their name and email address in the appropriate fields and select a role:
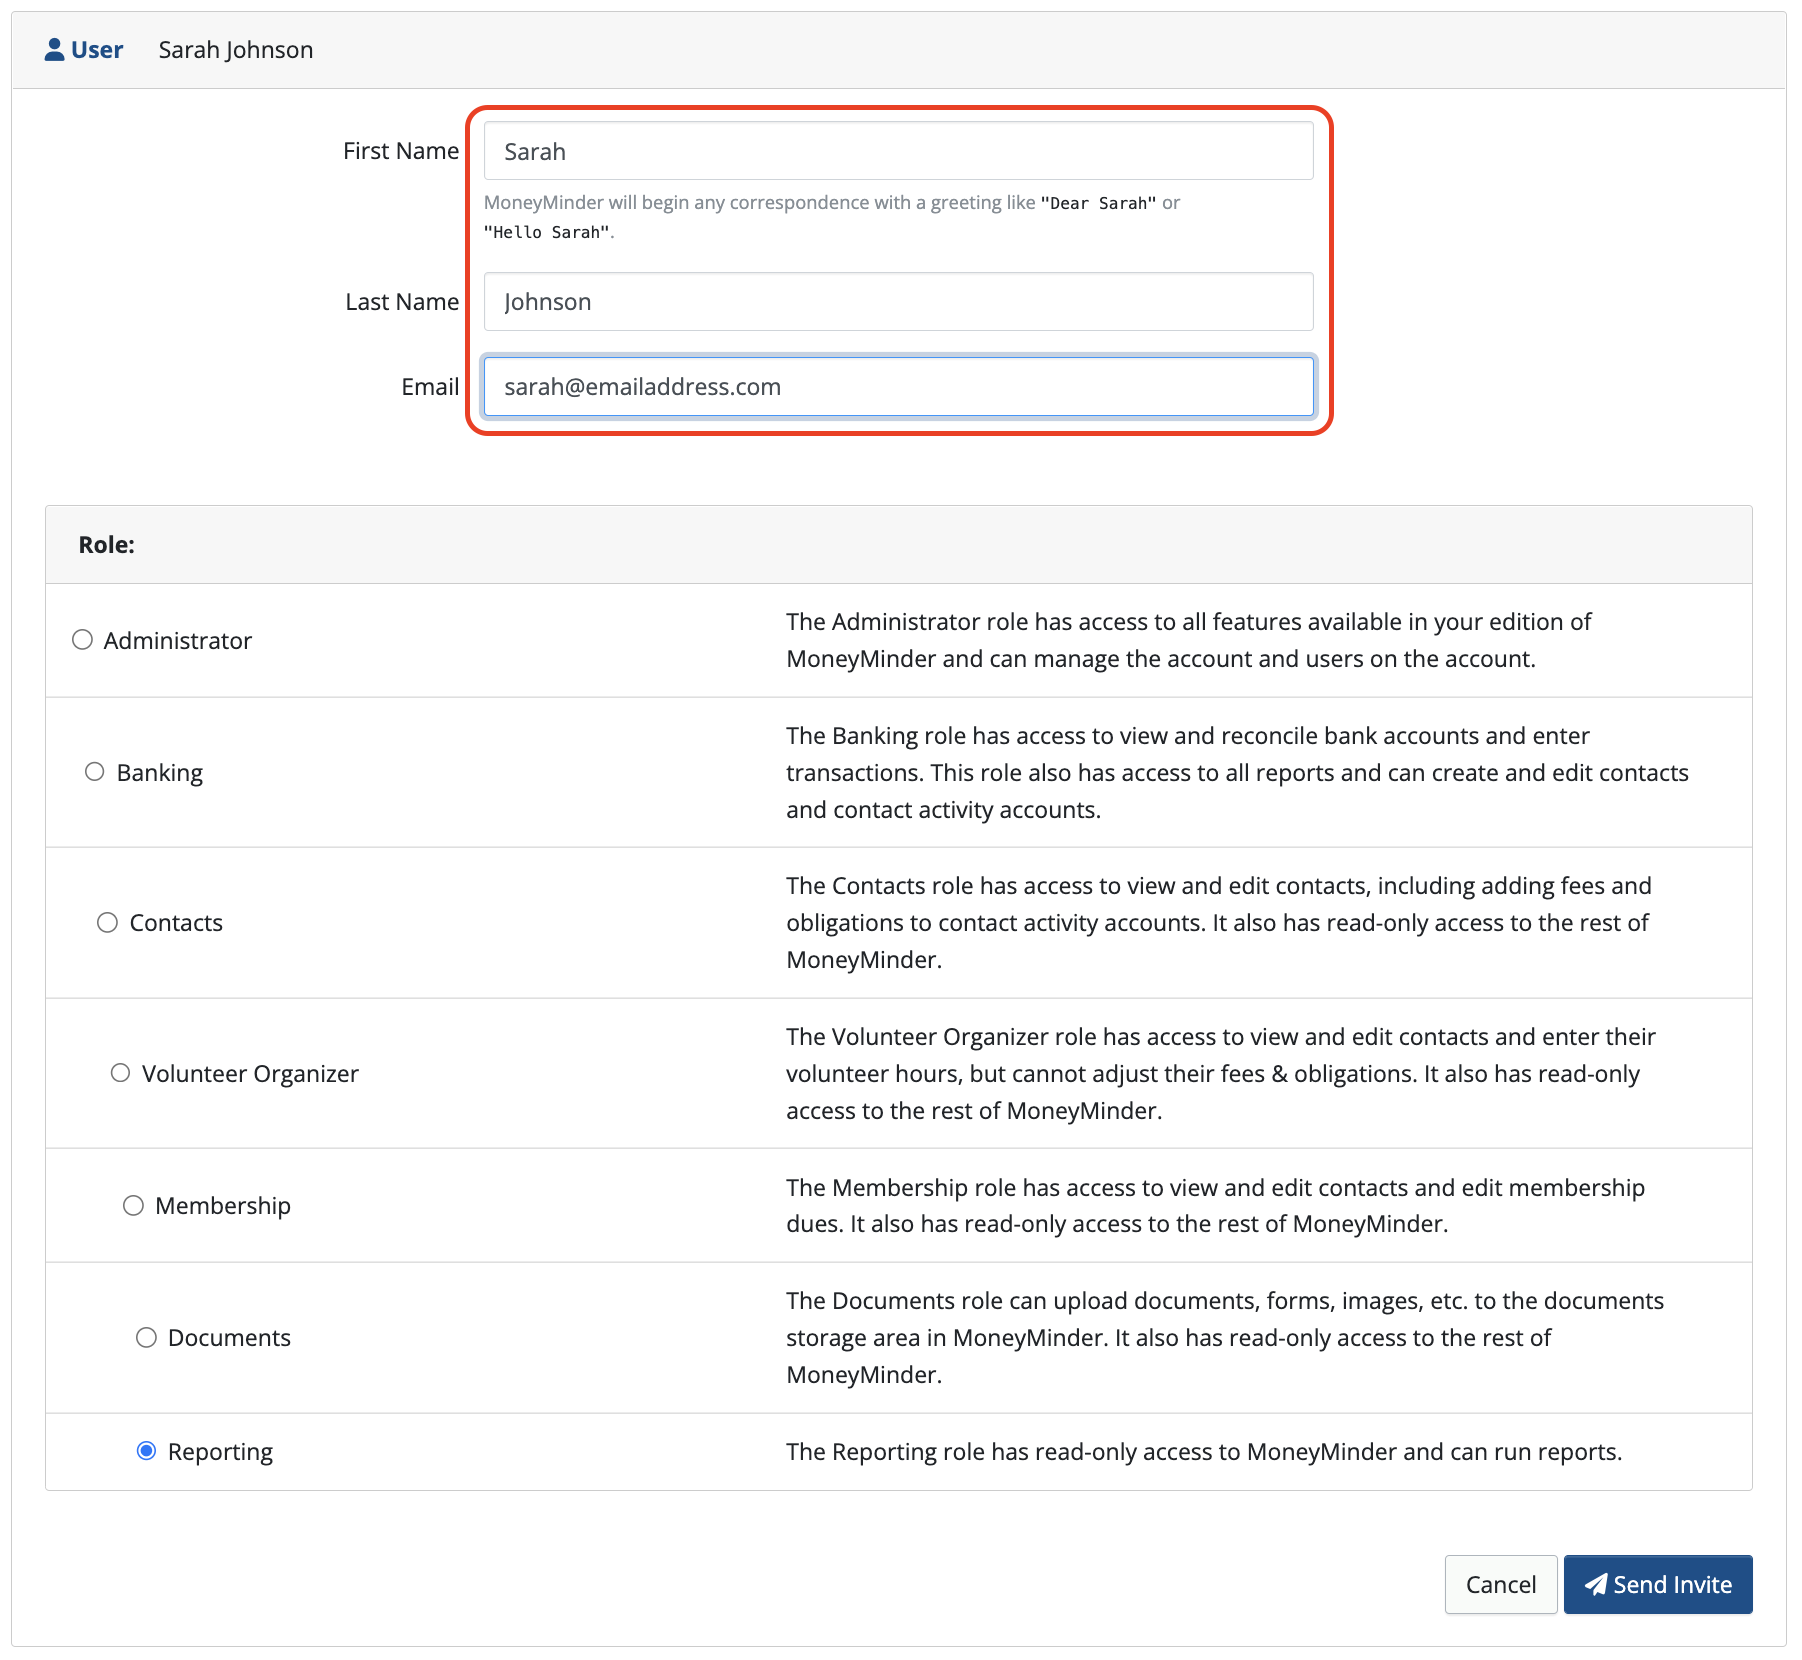
Select a Role:
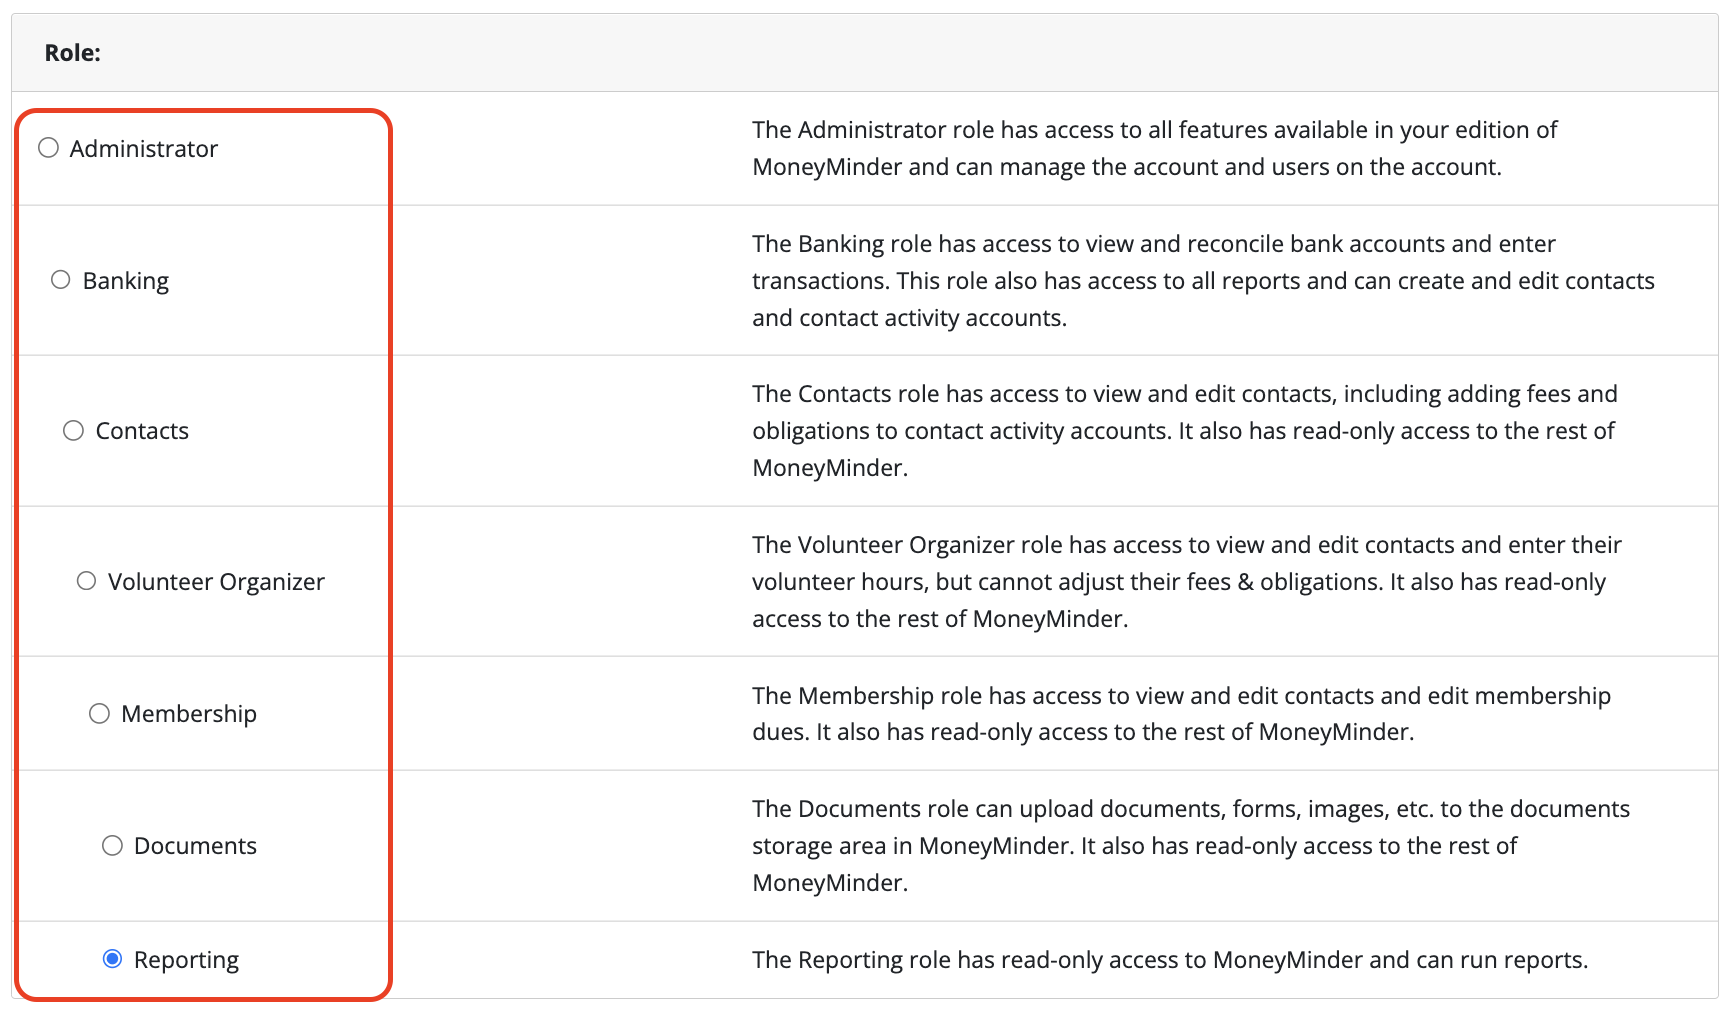
Click Send Invite:
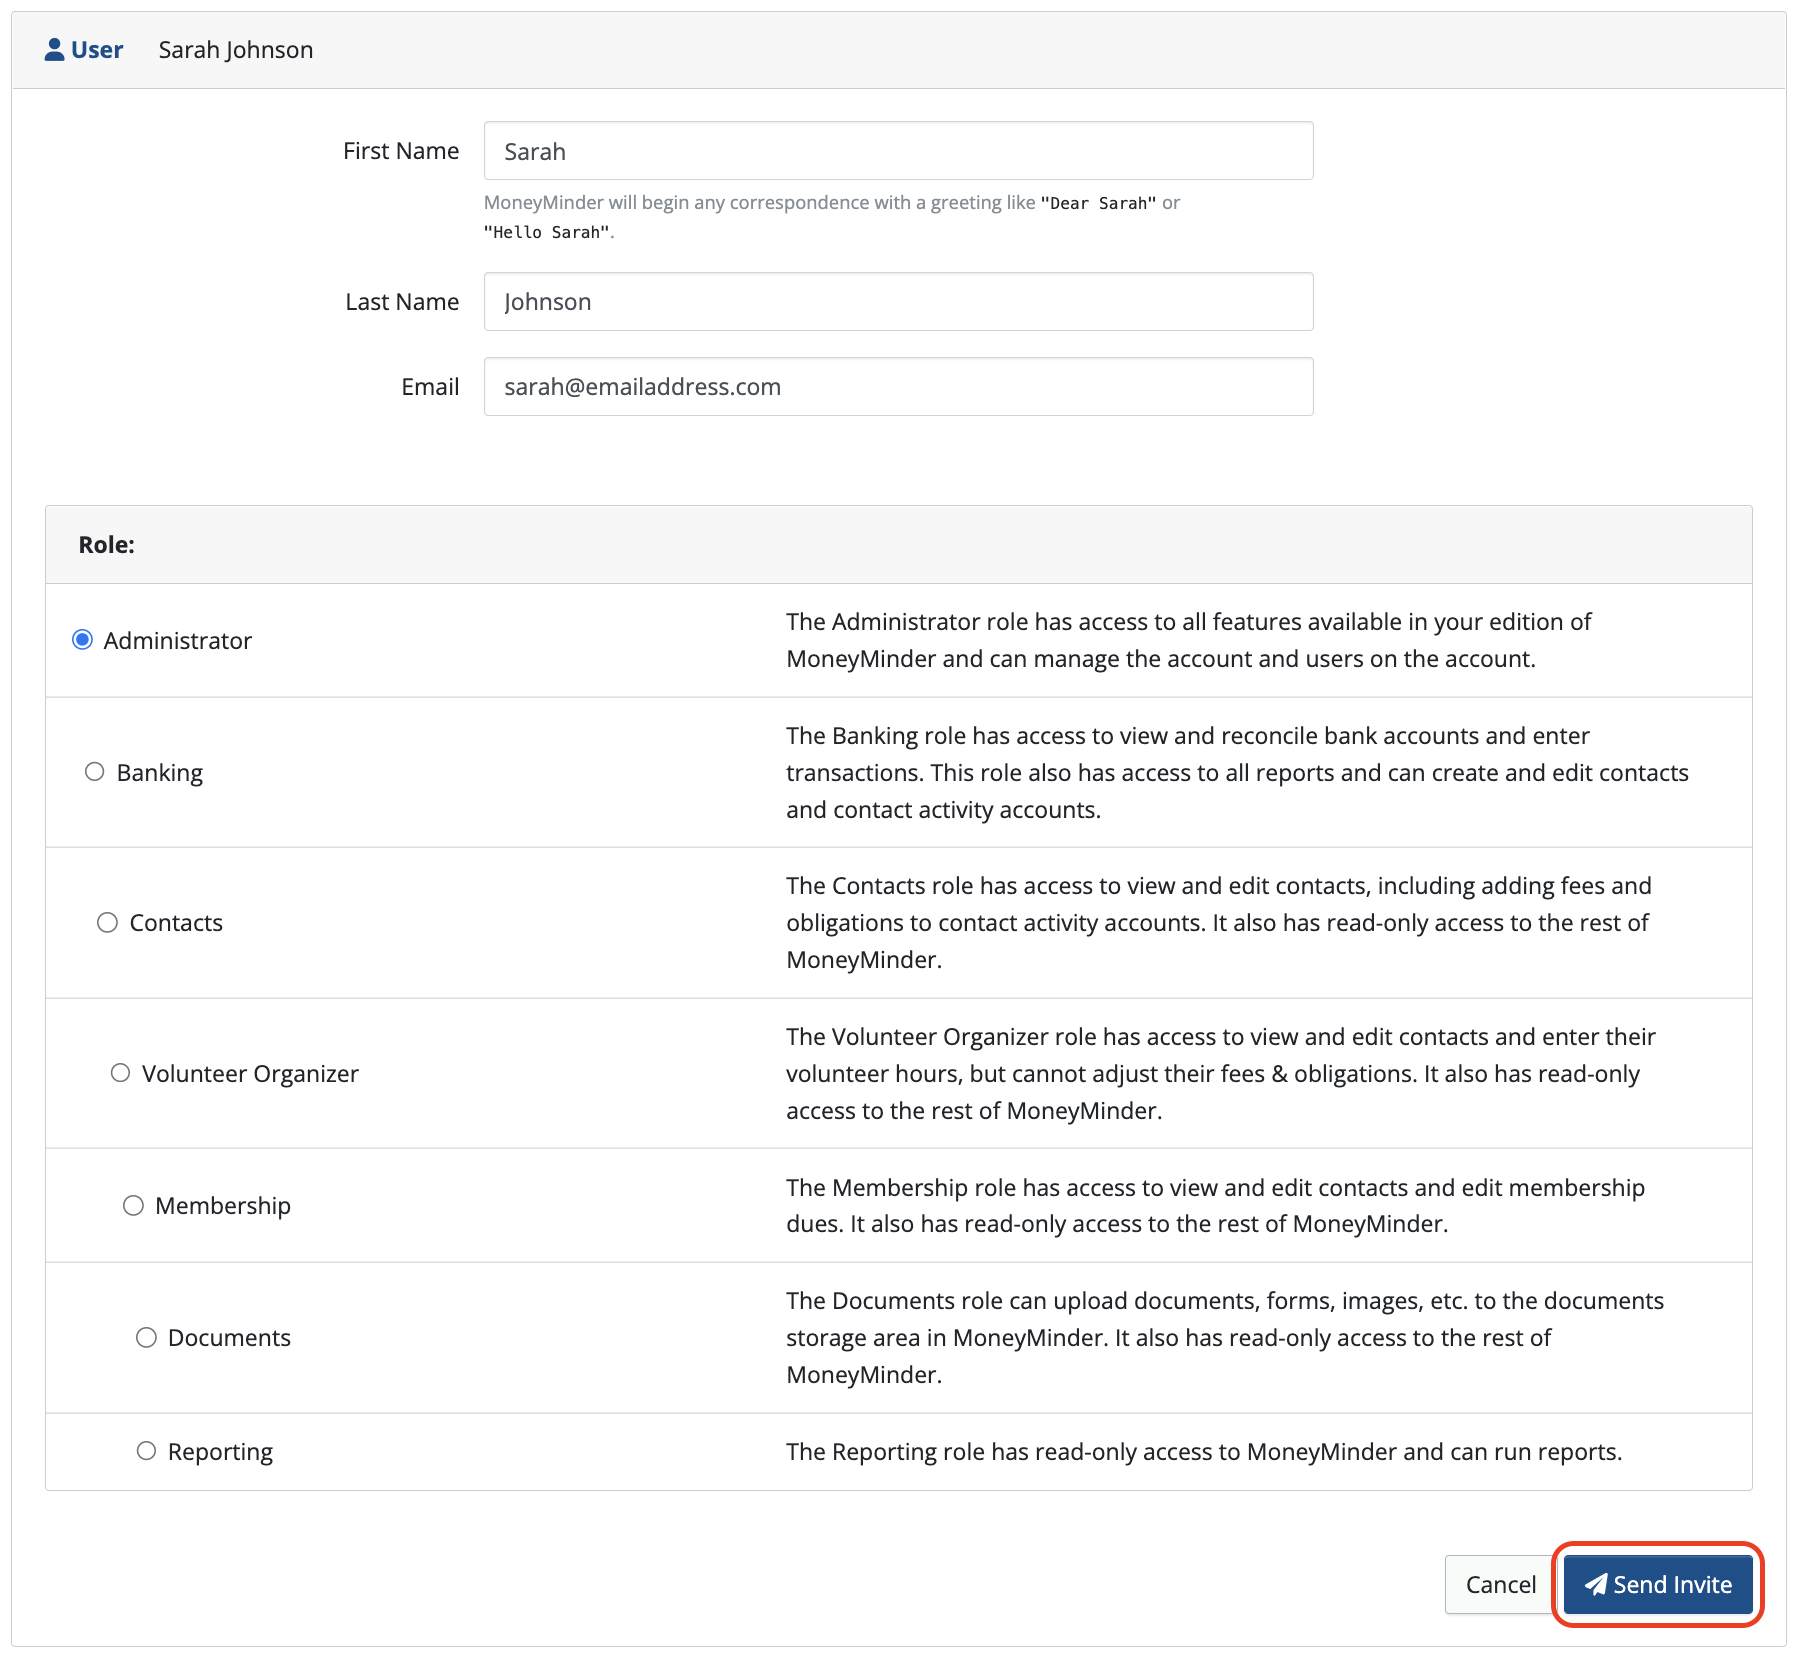
This will send an invitation to the email address you provided, assign them a password to use for logging in, and provide them a link to access your MoneyMinder account.
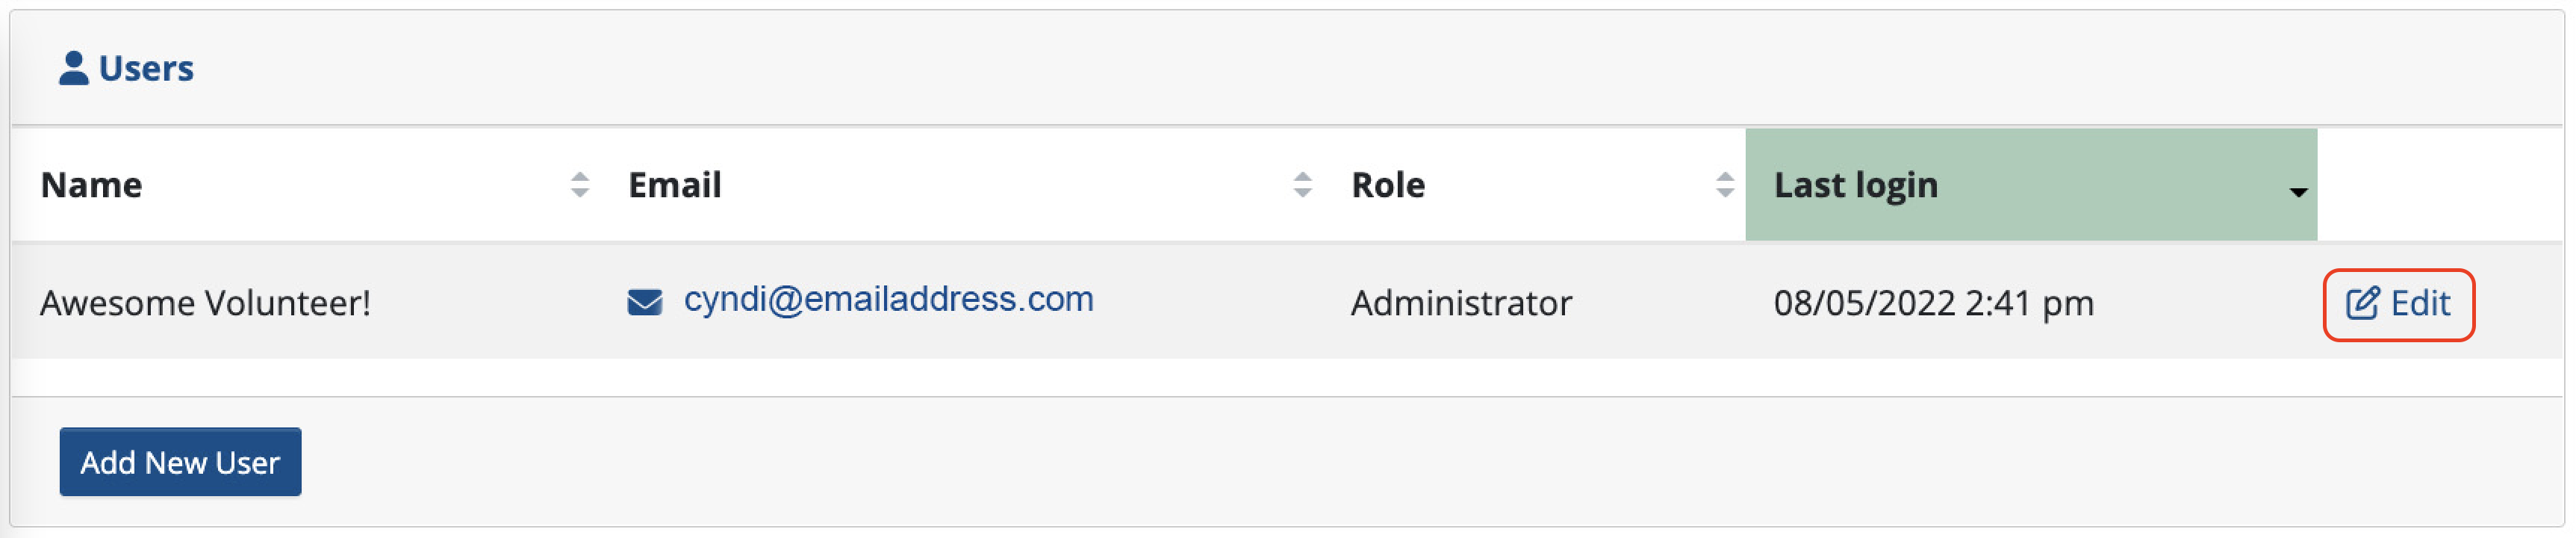
To edit or delete a user:
Click the Edit button associated with their name:
Make the appropriate changes. When finished, click one of the following:
- Cancel to leave this page without making changes and return to the main list of users with MoneyMinder account access.
- Delete to remove this user from having MoneyMinder account access.
- Save to save the changes you made and return to the main list of users with MoneyMinder account access.
NOTE: MoneyMinder does not allow you to change an email address. If you’d like to log in using a different email address than what’s been set up for you, add yourself as a user with that email address, log out & back in using that email address to ensure it works. Then delete the email address you do not wish to have associated with your account.
7. Set Up Your Own Custom Store
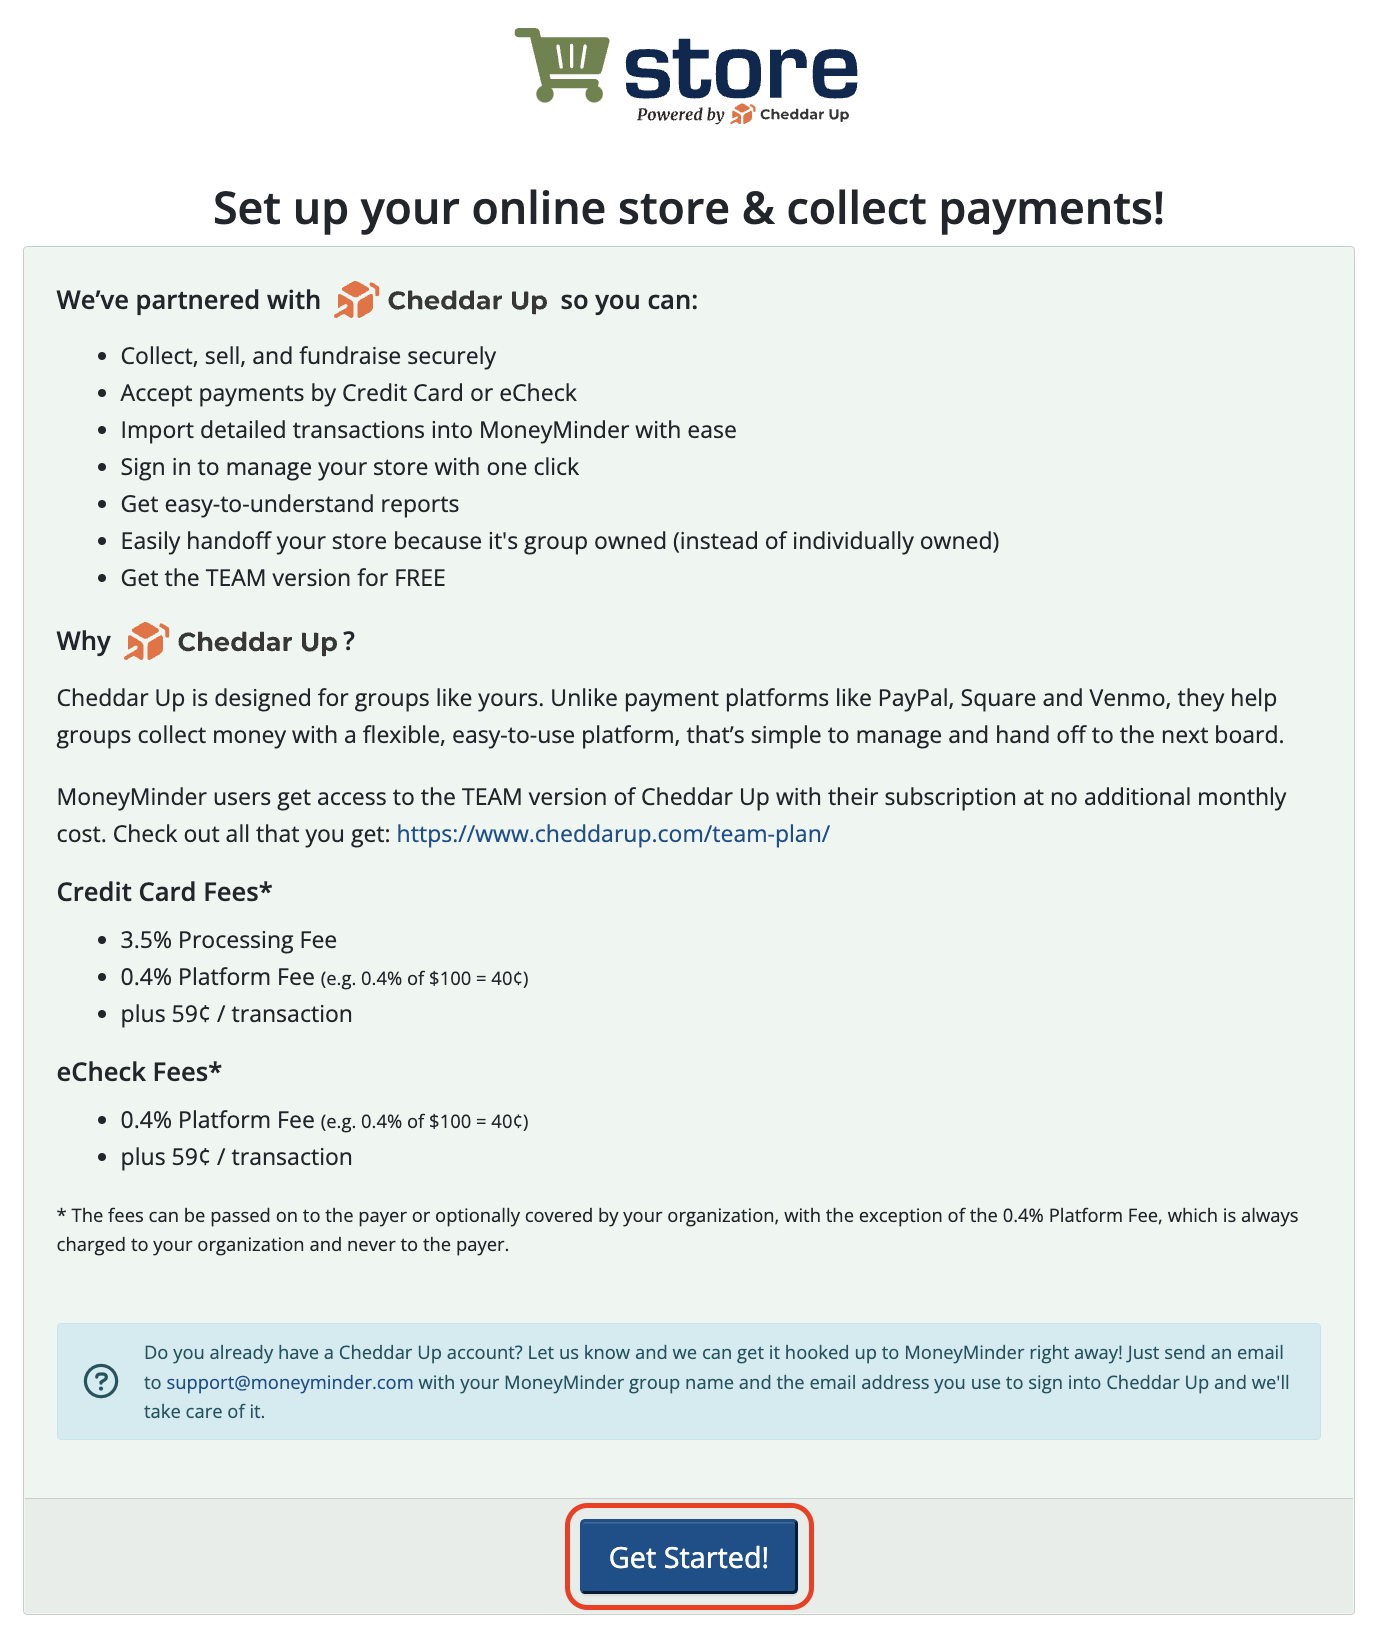
Click on the Store icon in the toolbar:
![]()
Click Get Started!
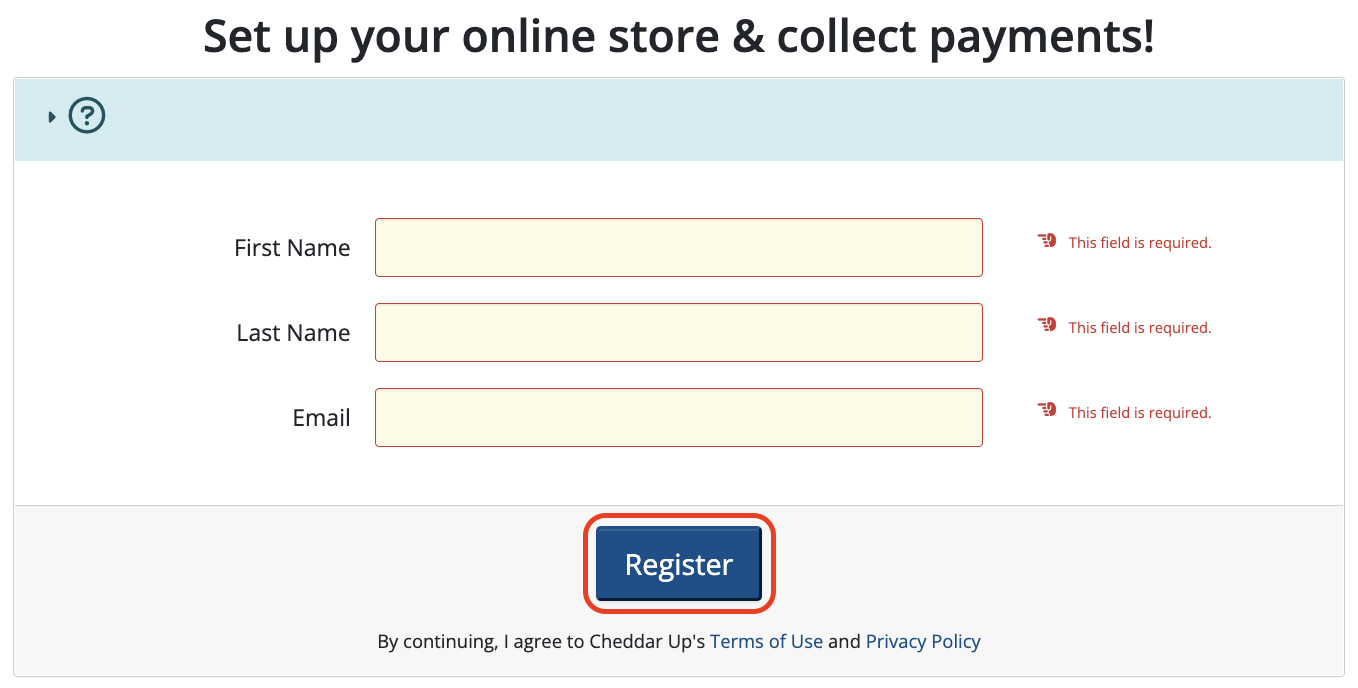
Enter your First and Last Name, along with your email address to register your store.
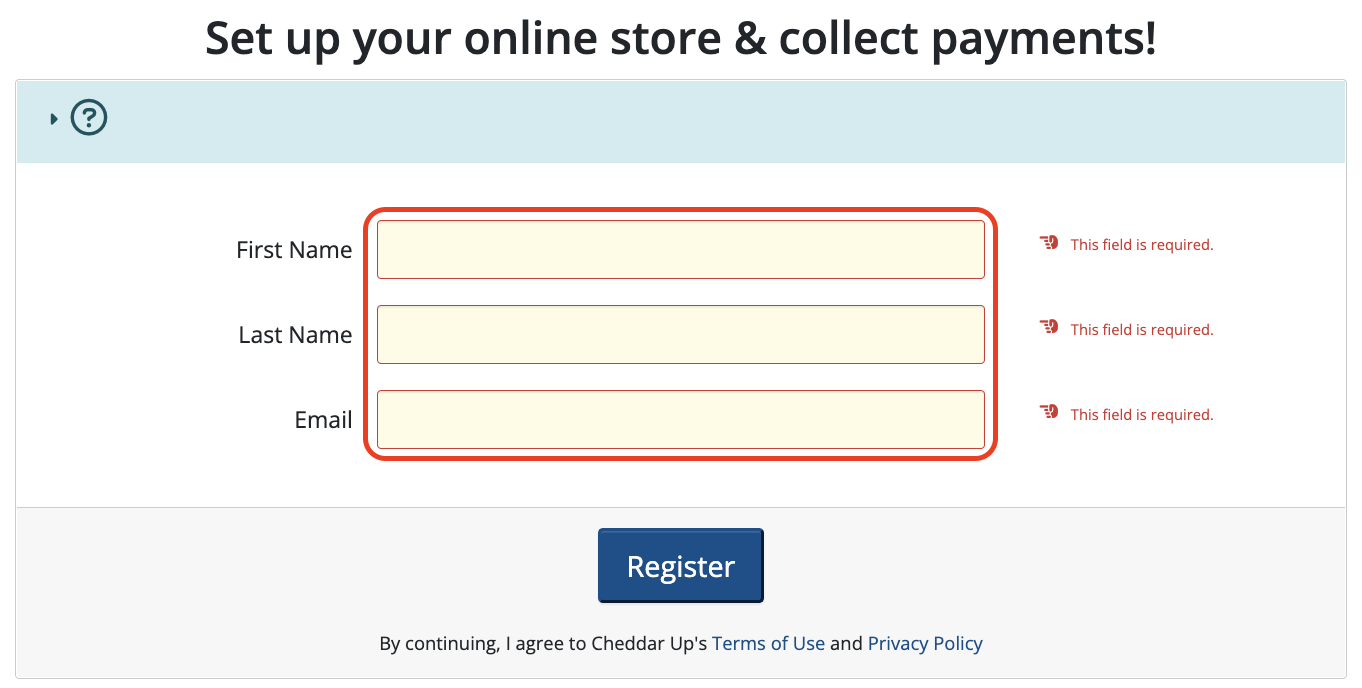
TIP: We recommend using your group’s email address when you set up your store so future treasurers can use the same login.
Then click Register.
Already have a CheddarUp store? Email us to see if we can connect it to your MoneyMinder Account: [email protected]
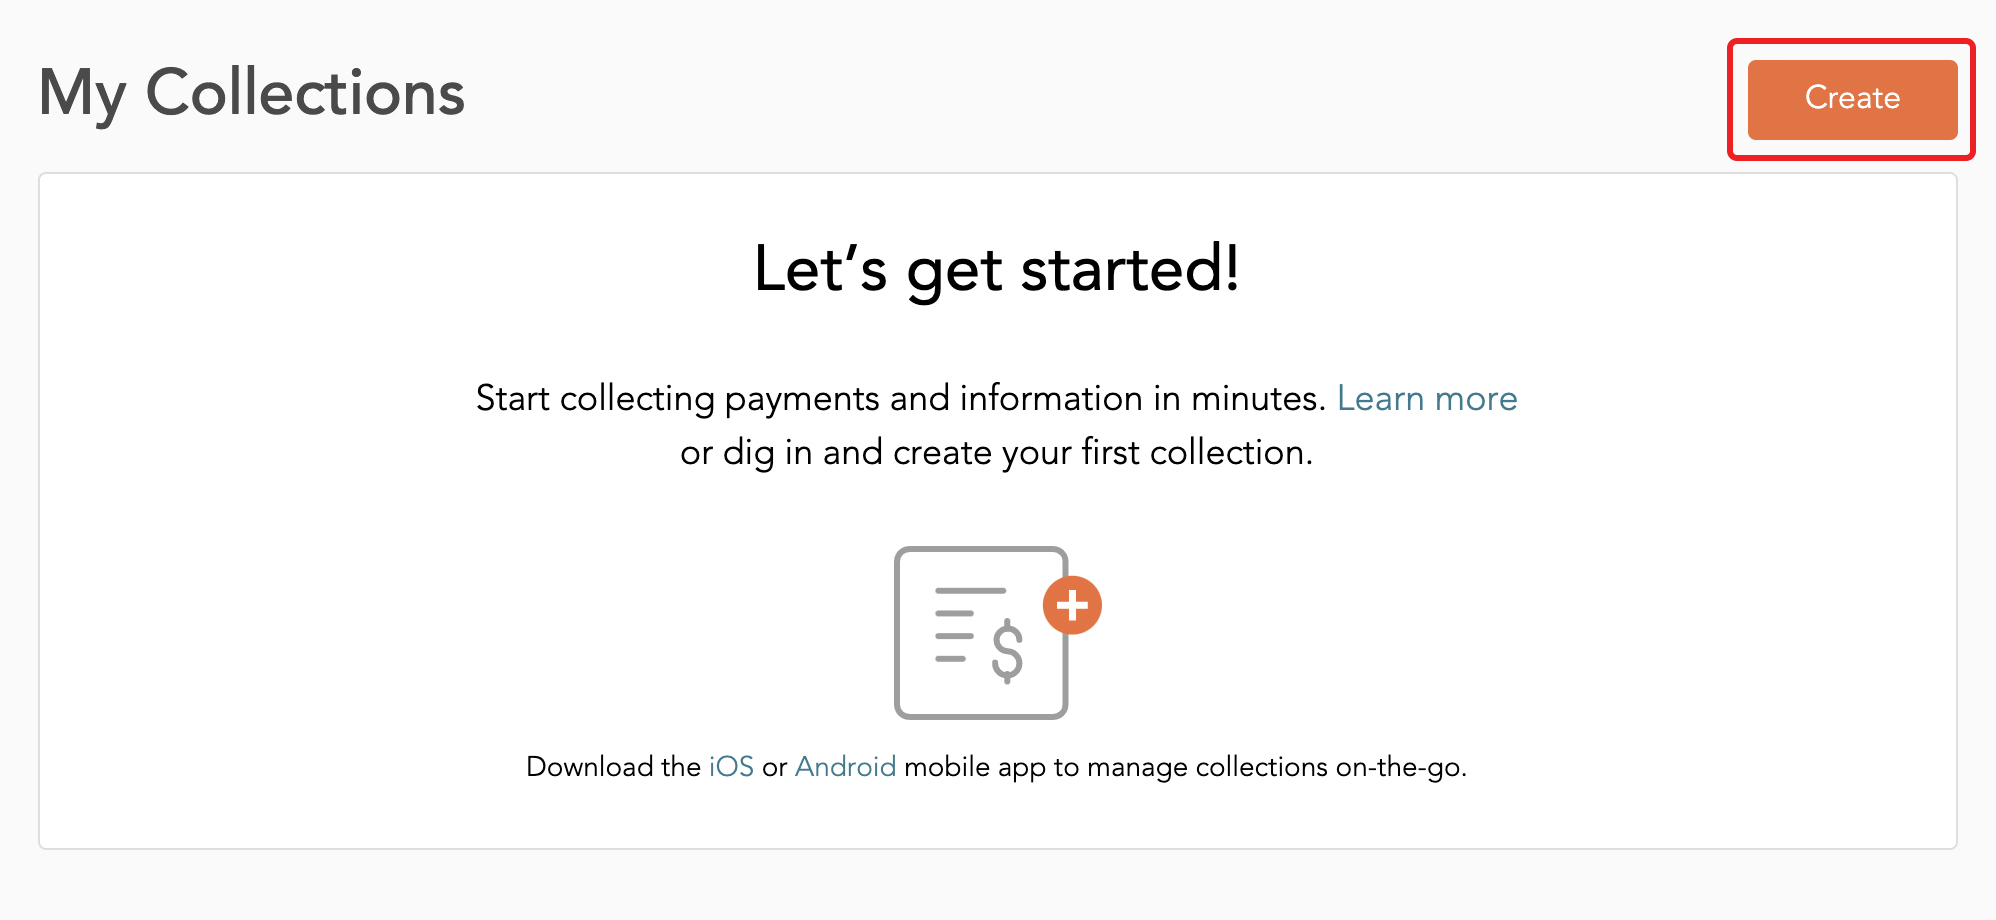
Click View and Manage Your Store to connect to CheddarUp.

Click Create to begin setting up the items in your store.
8. Upload Documents
The Documents feature allows you to upload & store forms and records for your group.
Some common items that groups upload are Meeting Minutes, Bylaws, 990(EZ) forms, Meeting Agendas, Check Request Forms, Audit Findings, NSF Check Letters, Flyers, other IRS documentation, etc.
The maximum file size allowed for upload is 20MB per file.
Click on the Documents icon in the toolbar.
![]()
To upload files, click Upload Files:
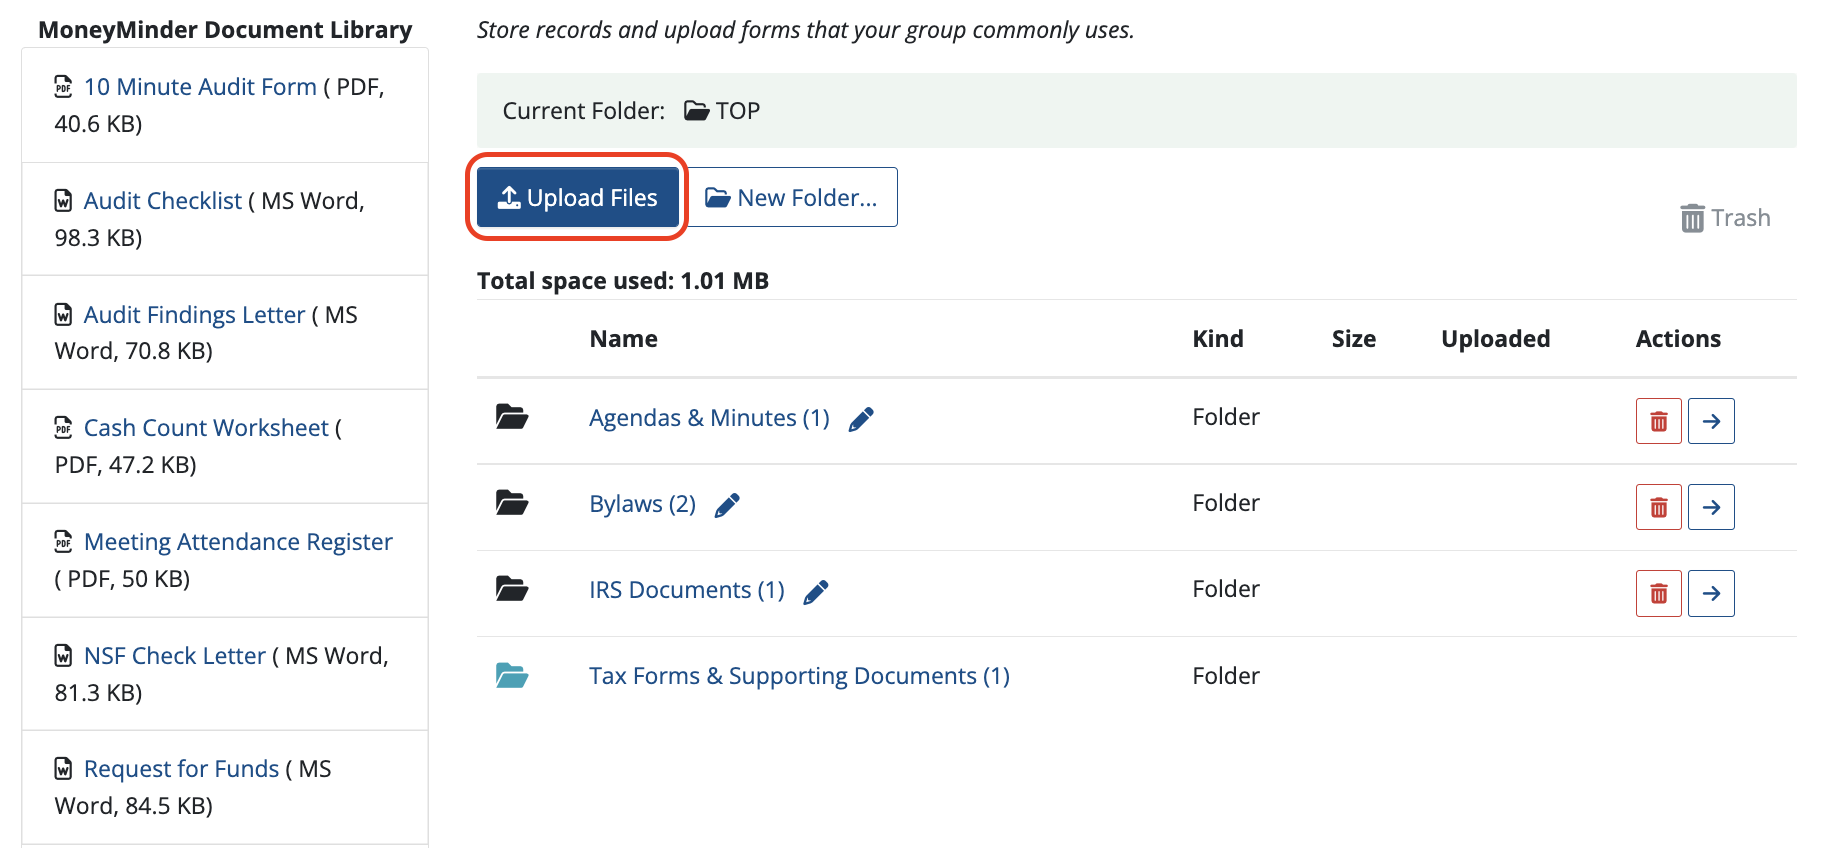
Next either “drag & drop” a file or choose a file from your file browser window.
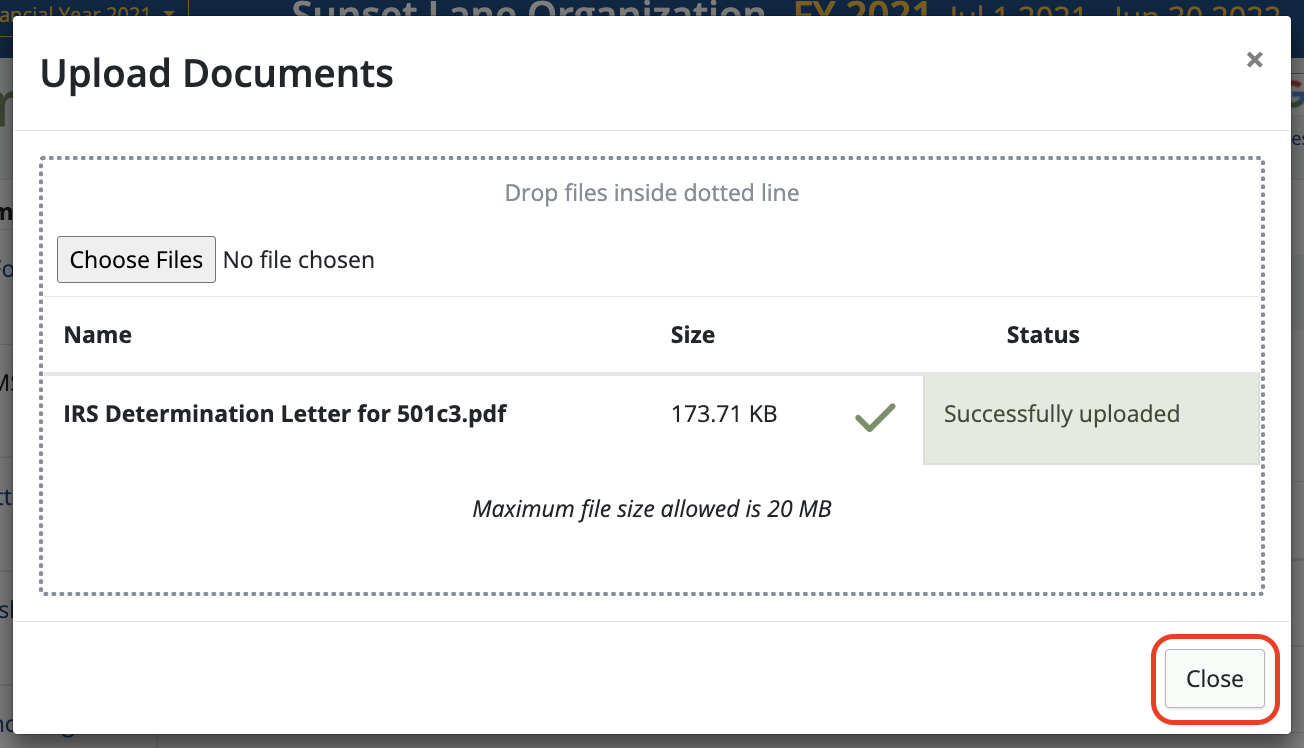
Once you’ve selected a file, the Status will show Successfully Uploaded.
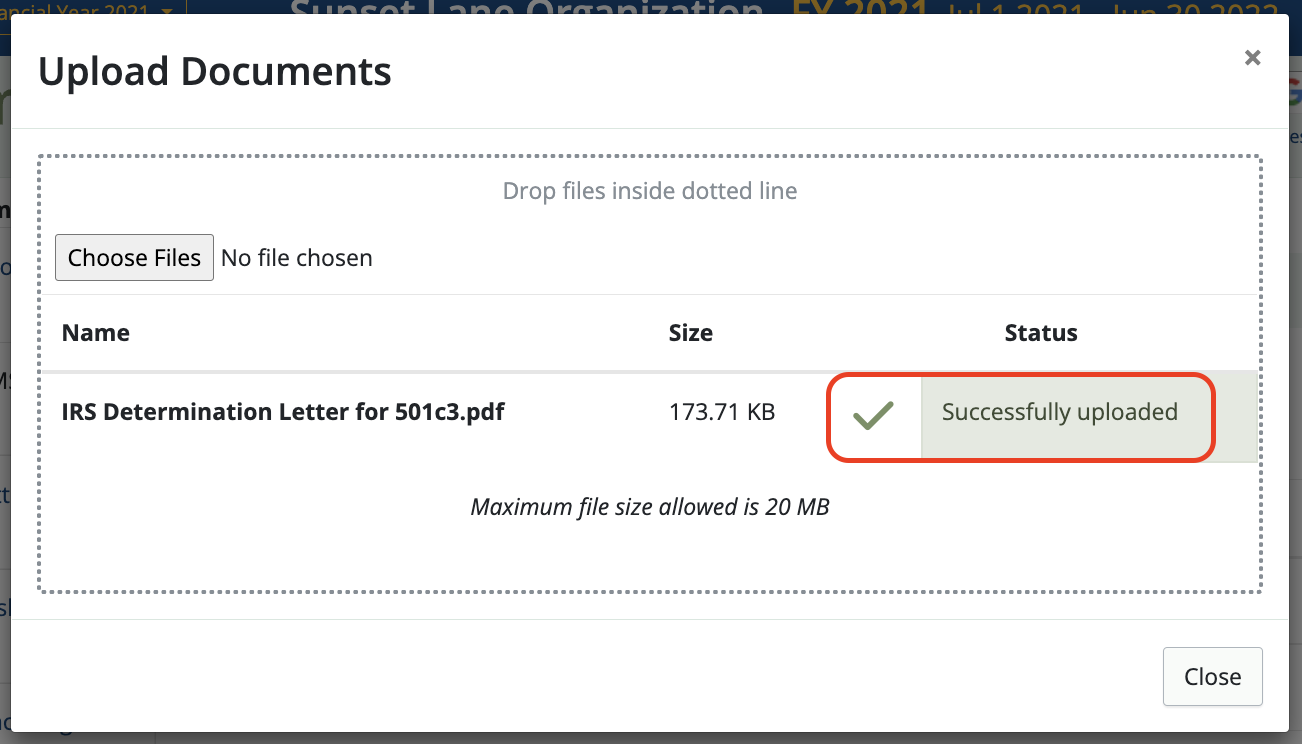
Click Close.
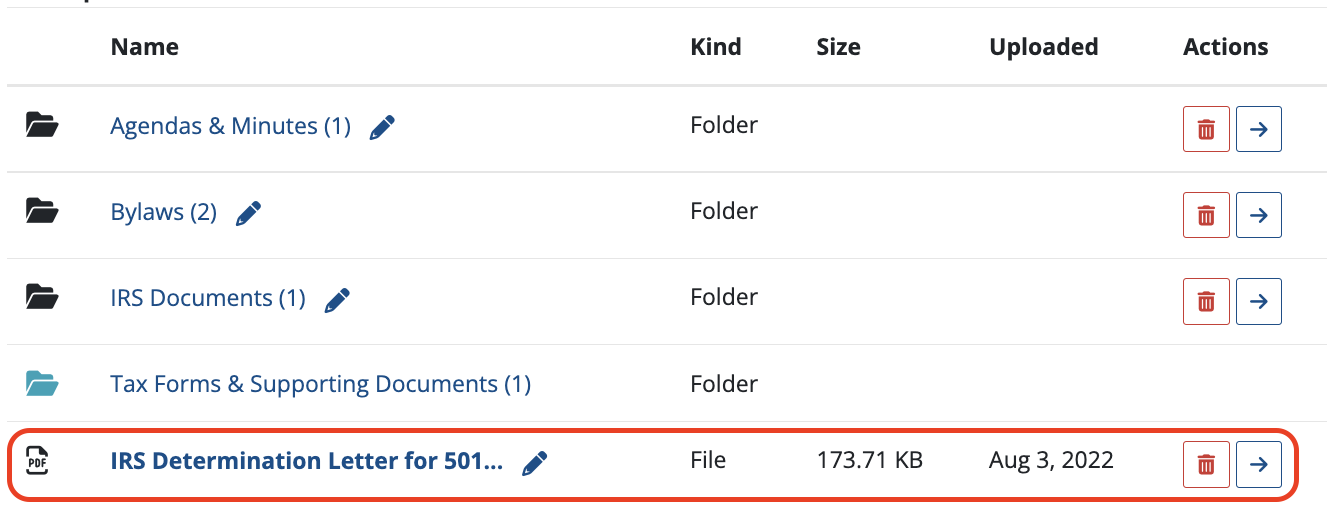
You should then see that file listed in the directory.
Organizing your documents
Click TOP to go to the main folder list.
Double click on any Folder name to open the folder.
Click on an item name to automatically download the file to your desktop.
Click on the blue arrow icon under Actions to re-organize or move items or folders into other folders.
![]()
Removing documents
To delete a document, identify the document and click the trash can icon to the right of the document name.
![]()
Permanently deleting documents
When a document is deleted, it is moved to the Trash can.
To permanently delete an item, click Trash to see a list of items in the Trash can.
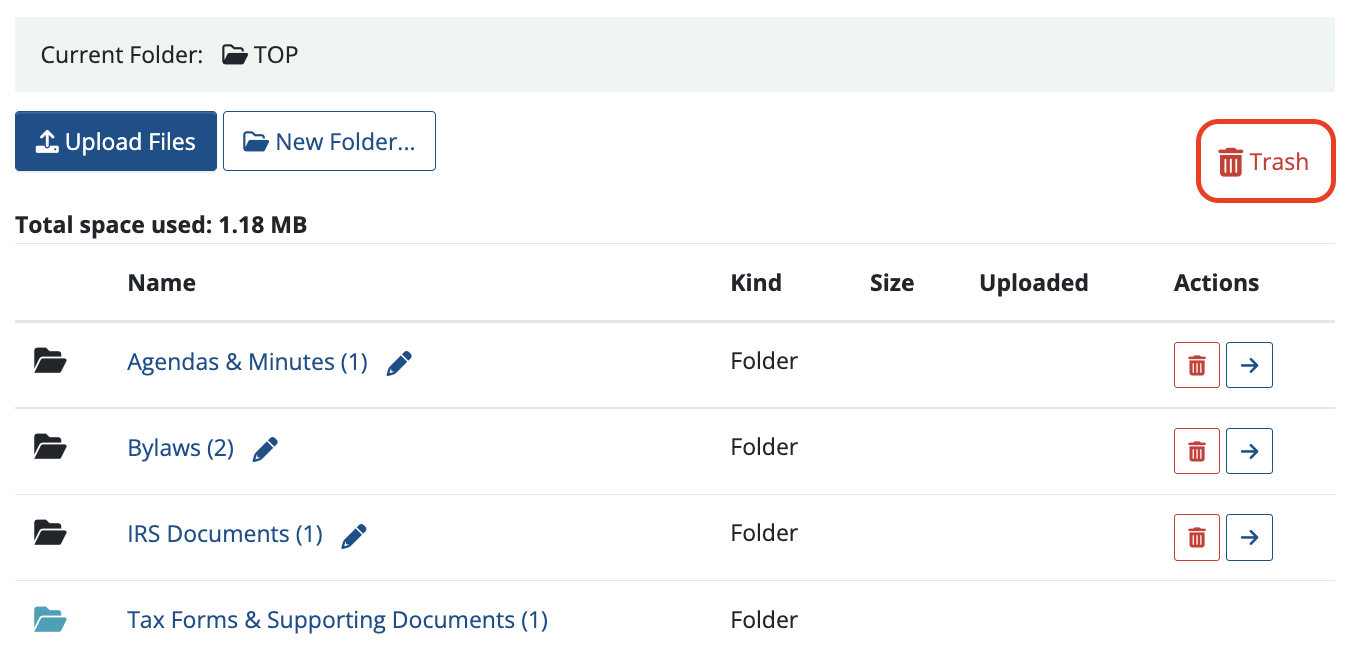
Click Empty trash… to permanently delete it.
![]()
 Connect your Venmo account to MoneyMinder PRO to directly download transactions, saving you time and effort. You just review the transactions to ensure they are properly categorized and fill out any required fields.
 Connect your Bank, Square and PayPal accounts to MoneyMinder PRO to directly download transactions, saving you time and effort. You just review the transactions to ensure they are properly categorized and fill out any required fields.
 Connect your Bank, Paypal and Square accounts to MoneyMinder PRO to directly download transactions, saving you time and effort. You just review the transactions to ensure they are properly categorized and fill out any required fields.
 Connect your Bank, Paypal and Square accounts to MoneyMinder PRO to directly download transactions, saving you time and effort. You just review the transactions to ensure they are properly categorized and fill out any required fields.
 Join It is a membership management service that helps businesses and nonprofits effectively sell, track, and grow their membership.